Creating and managing S3 buckets

Server Academy Members Only
Sorry, this lesson is only available to Server Academy members. Create a free account now to get instant access to this and more free courses. Click the Sign Up Free button below to get access to our free courses now, or sign in if you have an account.
Instructions
Q&A (0)
Notes (0)
Resources (0)

Saving Progress...
Resources
There are no resources for this lesson.
Notes can be saved and accessed anywhere in the course. They also double as bookmarks so you can quickly review important lesson material.
An S3 bucket is a logical container for your data in the cloud. It's similar to a folder in a traditional file system, and you can use it to store and manage any type of data, such as text, images, audio files, videos, and more. In this lesson, we are going to create an AWS S3 bucket.
Create an S3 Bucket
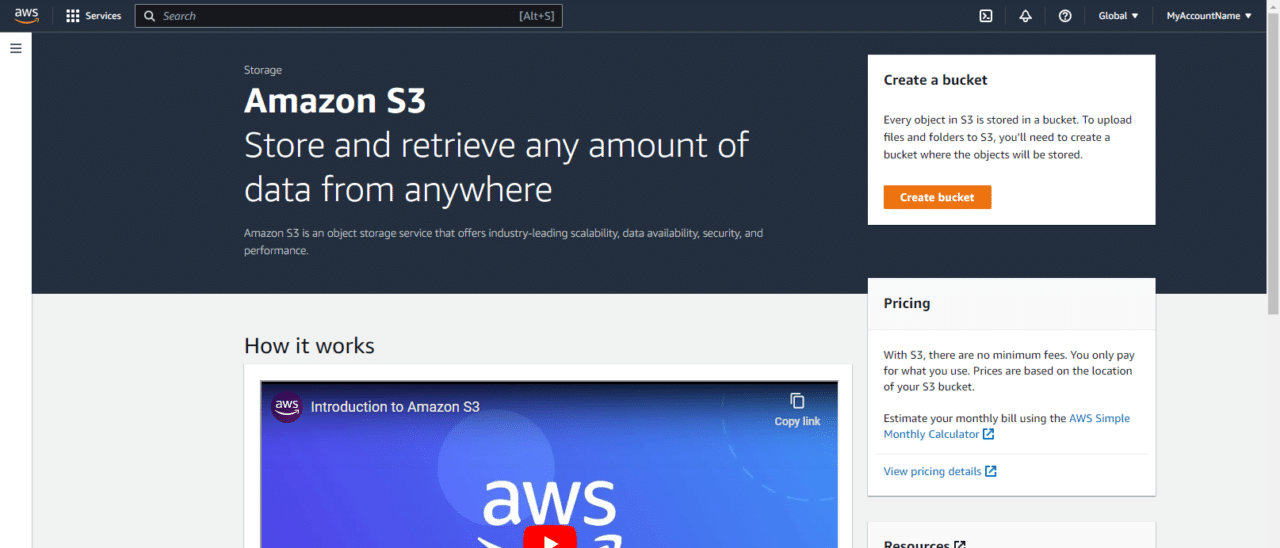
First, log into your AWS account and open the AWS S3 dashboard. Once there, click the Create bucket button:

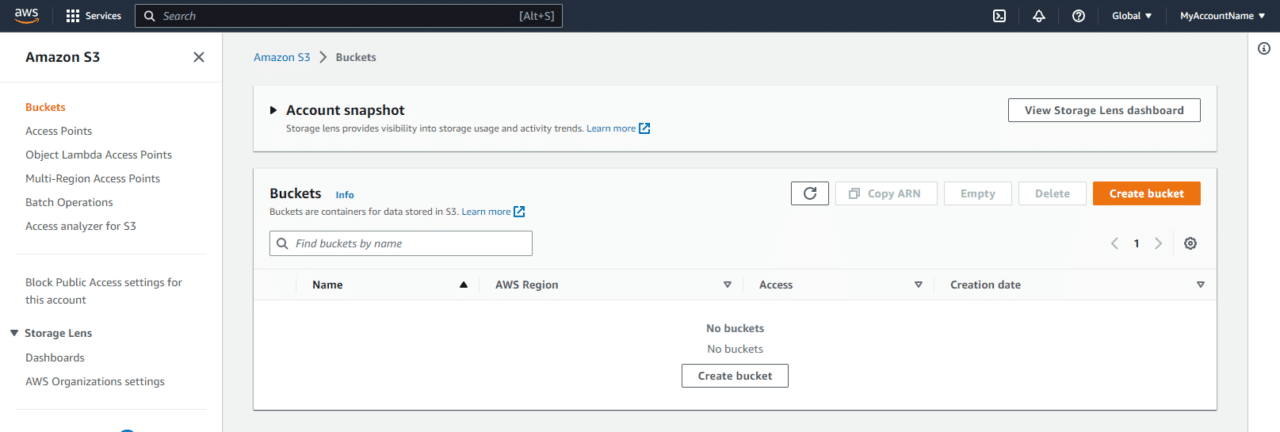
Alternatively, you can create an AWS S3 bucket from the buckets page:

Next, I am going to enter myfirstbucket129 as the name.
The bucket name needs to be GLOBALLY unique. So you cant use a name like myfirstbucket because this has been taken by another user.
NOTE
I am going to chose us-east-1 as my AWS Region.

I am going to leave S3 ACLs disabled. Here is a little more information on S3 ACLs:
Amazon S3 Access Control Lists (ACLs) are used to grant read and write permissions to authorized users for individual buckets and objects. Each bucket and object has an ACL attached to it as a subresource, and the ACL defines which AWS accounts or groups are granted access and the type of access.
By default, when another AWS account uploads an object to your S3 bucket, that account (the object writer) owns the object and has access to it and can grant other users access to it through ACLs. However, you can use the Object Ownership feature to change this default behavior so that ACLs are disabled and you, as the bucket owner, automatically own every object in your bucket.
This means that access control for your data is based on policies, such as IAM policies, S3 bucket policies, virtual private cloud (VPC) endpoint policies, and AWS Organizations service control policies (SCPs). It is generally recommended to disable ACLs, except in unusual circumstances where you need to control access for each object individually.
More info on S3 ACLs
The next option you might care about is the Block Public Access settings for this bucket. This obviously depends on your use case, and for my example, I will leave this enabled. If you were creating an S3 bucket where you want to share files with the public, you would obviously want to disable this option.
The Default encryption section allows you to enable or disable (default) Server-side encryption. If enabled, this means that S3 will encrypt an object before saving it to disk and will decrypt that data when you download the object. If you need to encrypt data at rest, then this would be a very important option to enable. For this lesson, I am going to leave it disabled.
Click the Create bucket button:

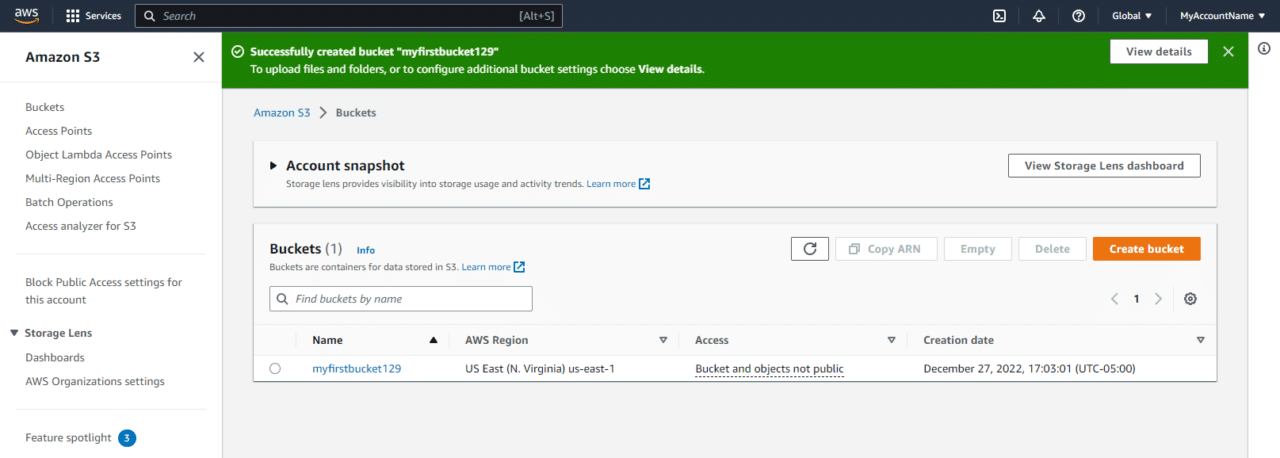
Now under the buckets page, I can see my new myfirstbucket129 bucket listed:

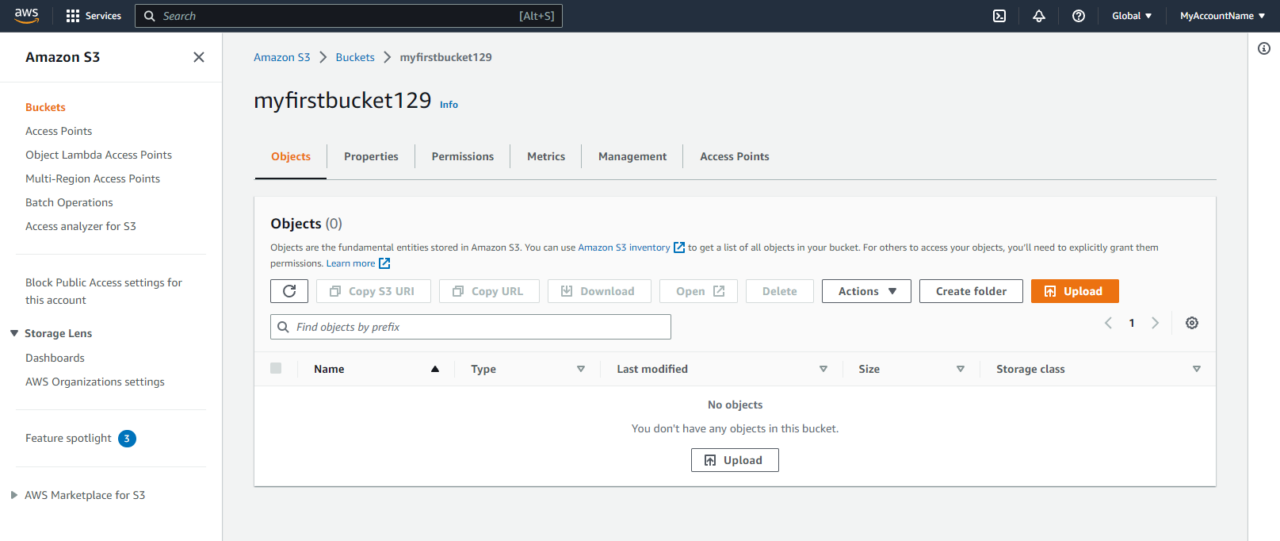
We can click on the bucket to view the bucket details to include the objects, properties, permissions, metrics and more:

That's all we have to cover in this lesson. Great job!

Server Academy Members Only
Want to access this lesson? Just sign up for a free Server Academy account and you'll be on your way. Already have an account? Click the Sign Up Free button to get started..


