Creating the System Management Container
Instructions
Q&A (0)
Notes (0)
Resources (0)

Saving Progress...
Resources
There are no resources for this lesson.
Notes can be saved and accessed anywhere in the course. They also double as bookmarks so you can quickly review important lesson material.
We are going to create the System Management Container that System Center Configuration Manager is going to use to store information important to SCCM like:
- Client computer installation and site assignment
- Port configuration for client-to-server communication
- Network Access Protection
- Content deployment scenarios
You may refer to this article for more information about the System Management Container.
Create the System Management Container
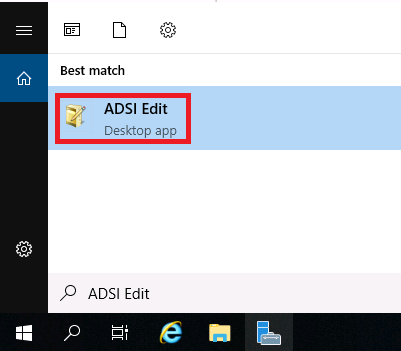
Log in to your Domain Controller and click the Windows button then search for and launch ADSI Edit.
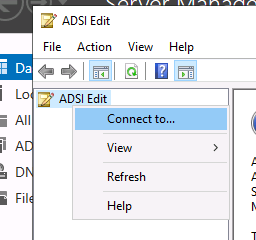
In the ADSI Edit console, right-click ADSI Edit at the top and select Connect to then click OK to connect to your domain. Usually the default settings are correct, but if you need to specify an alternate server you can before clicking OK.
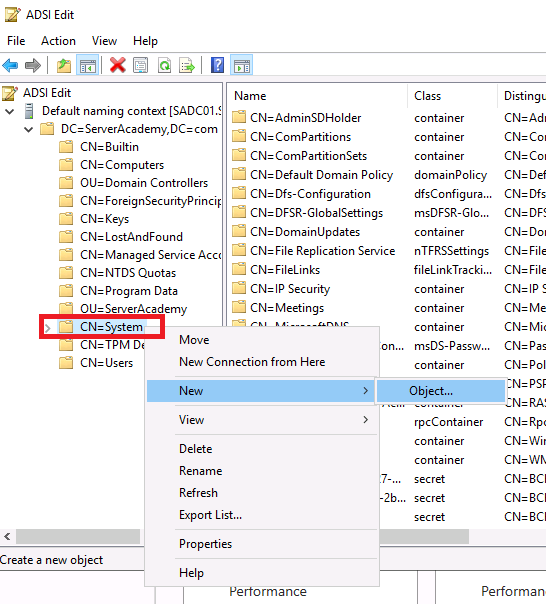
Within the left pane, left-click the “Default naming context”, then expand your domain name (in my case, serveracademy.com), right-click CN=System and select New > Object.
Select the container class and click Next. Under the Value textbox, enter the name “System Management”.
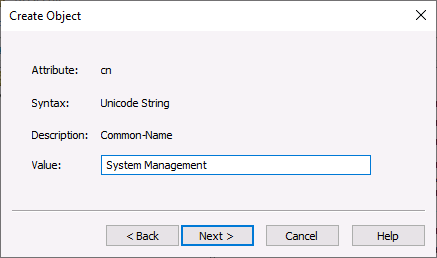
Click Next, then click Finish.
Alternatively, we can create the container with the Windows PowerShell commands below when we run the PowerShell console as an administrator:
Import-Module ActiveDirectory # Import AD module
$Container=”CN=System,"$((Get-ADDomain).DistinguishedName)” # Get container DN
New-ADObject -Name "System Management" -Type Container -Path $Container # Create Container
Grant Full Container Permissions to SCCM Server
Now we need to grant full control permissions of the System Management container to the SCCM computer account.
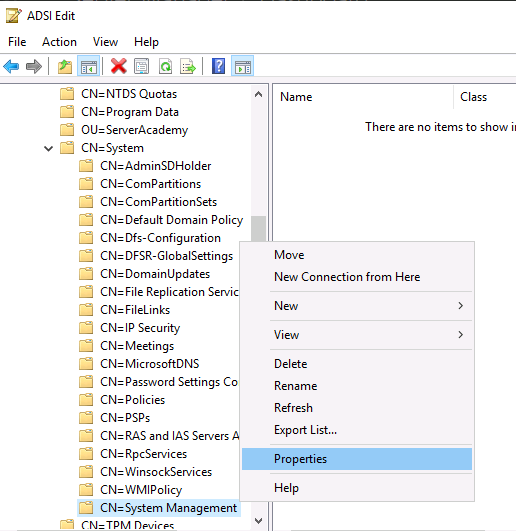
To do this we need to right-click our System Management folder and click Properties
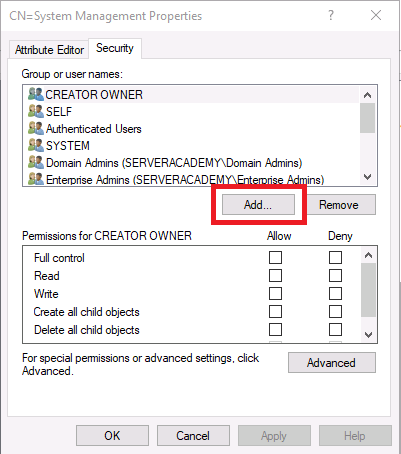
Go to the Security tab and click Add
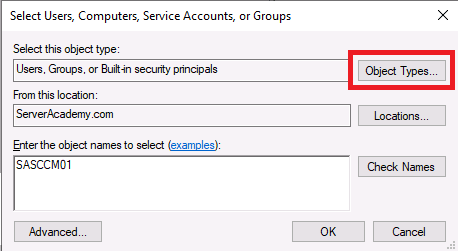
We need to include computer accounts in our search so we can find the SCCM computer. Click Object Types:
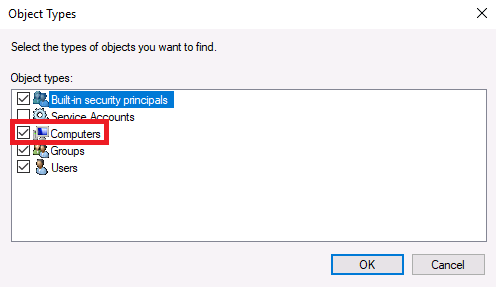
Select the checkbox next to Computers:
Now search for SASCCM01 and click Check Names, and then click OK:
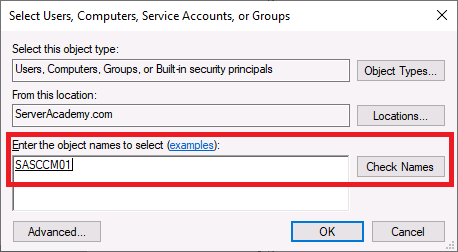
Click the Full control checkbox, then click OK.
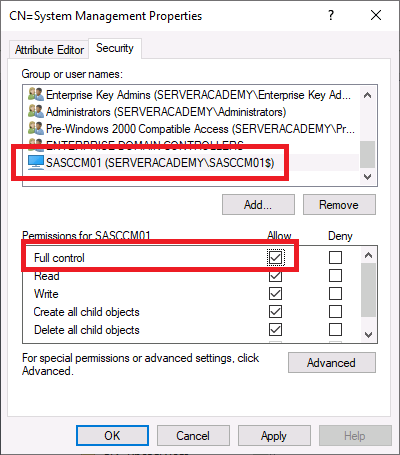
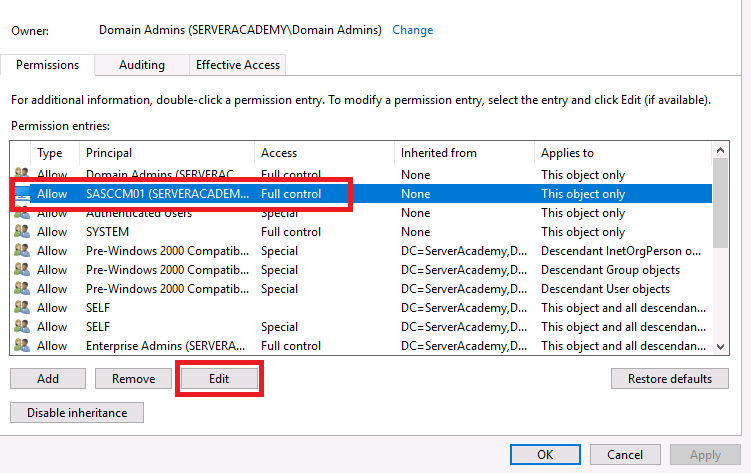
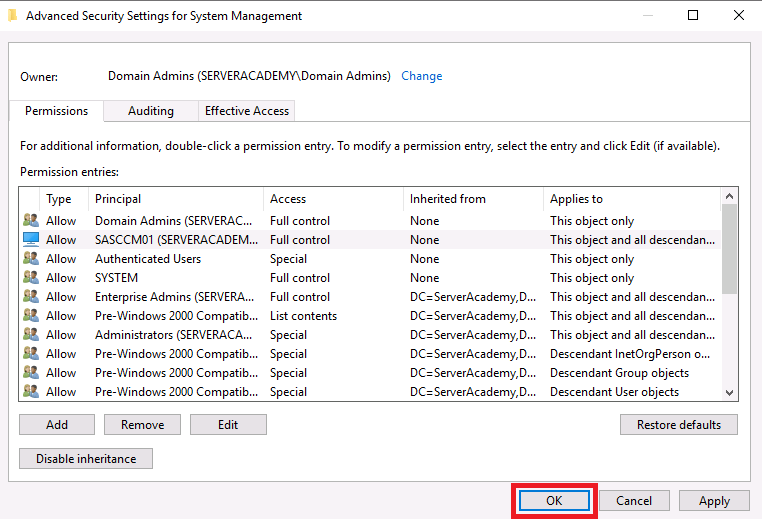
Next click Advanced, select the SCCM server, and click Edit:
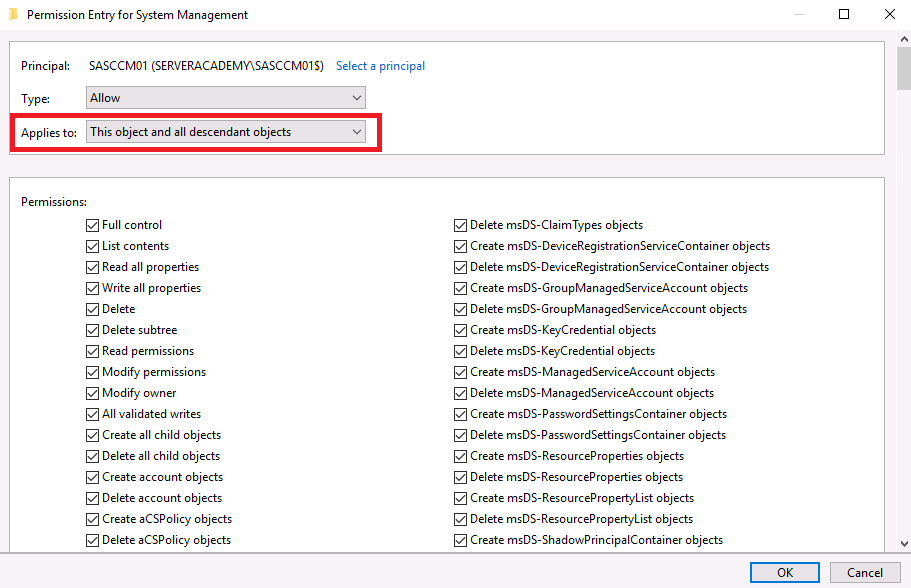
Change the Applies to drop-down box to This object and all descendant objects:
Click OK on both Security Settings windows and close ADSI edit:
And that’s it!


