Configure Windows Firewall with Group Policy for SCCM

Full-Access Members Only
Sorry, this lesson is only available to Server Academy Full-Access members. Become a Full-Access member now and get instant access to this and many more premium courses. Click the button below and get instant access now.
Instructions
Q&A (0)
Notes (0)
Resources (0)

Saving Progress...
Resources
There are no resources for this lesson.
Notes can be saved and accessed anywhere in the course. They also double as bookmarks so you can quickly review important lesson material.
In this lecture, we are going to be creating a Group Policy Object that is going to configure the Windows Firewall of our SCCM clients.
Now this lecture is going to be completed from the Windows Domain Controller in our case SADC01.
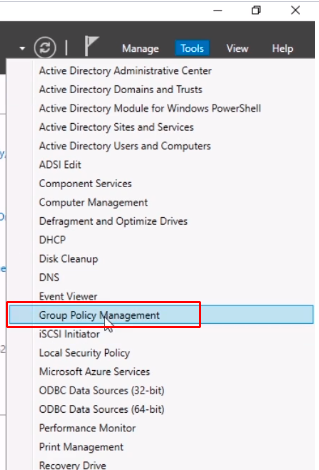
What I am going to do in Server Manager is click Tools > Group Policy Management
Expand Forest which is my ServerAcademy.com, expand Domains, and ServerAcademy.com.
At this point we are going to decide what scope we are going to configure our SCCM clients.
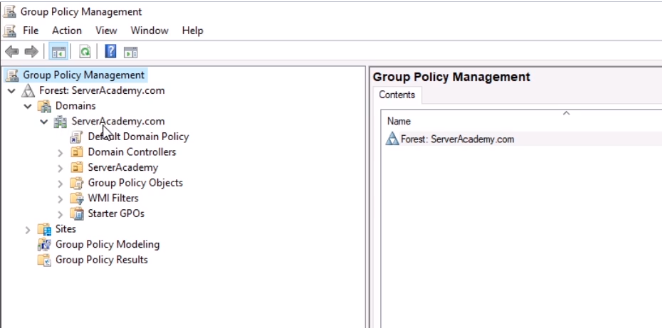
Now, if you have a special OU structure configured where you know you have all of your SCCM clients like maybe Workstations you could create the GPO and link it there.
One thing to keep in mind is that we are going to be opening ports on the firewall so if you want to be security conscious it might not be a bad idea to do some planning, and make sure we only link the GPO to OUs or domains where the computers actually need to have those firewall rules open.
But, what we are going to do for our lab environment is just create the GPO under the root of the Domain which means every computer inside of our domain will have the firewall rules enabled.
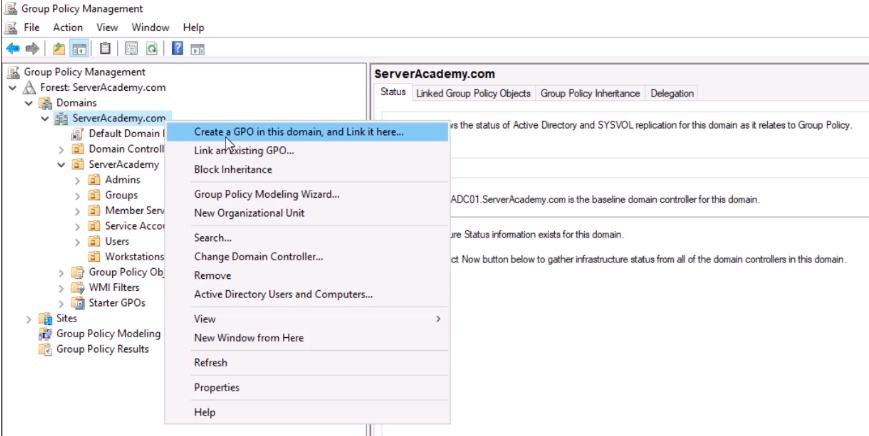
So, let’s go ahead and right-click on the root of the Domain ServerAcademy.com, and let’s select Create a GPO in this domain, and Link it here...
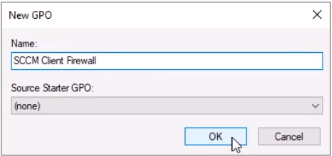
Next, we need to name the GPO. We can just call this something like SCCM Client Firewall, and you can name this whatever you want just make sure that is descriptive enough so that when you come back later and you look at it you see like for example this is configuring the firewall settings for your SCCM clients. Click OK.
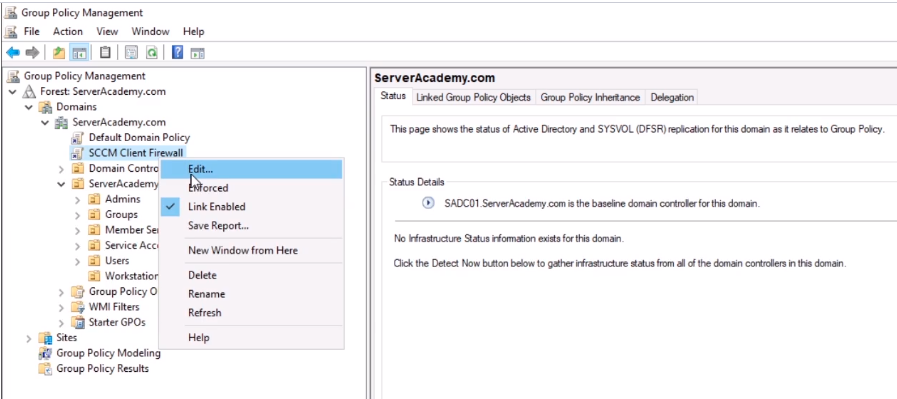
Now, we need to edit the GPO, and we can do that by right-clicking the GPO and choosing Edit.
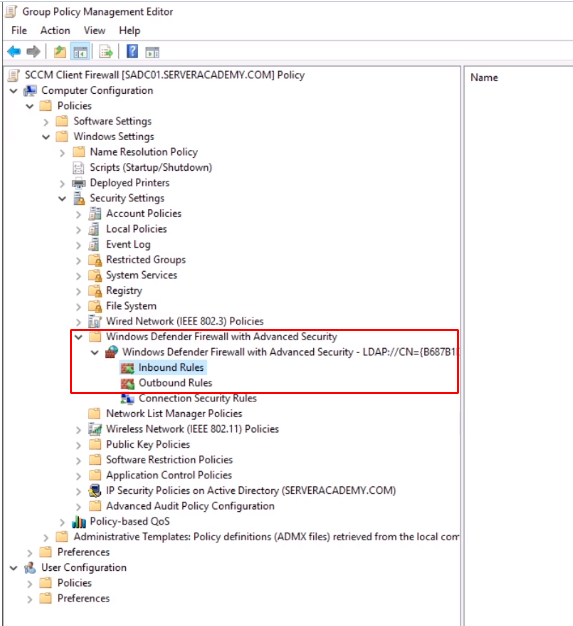
Under the Computer Configuration > Policies > Windows Settings > Security Settings > Windows Defender Firewall with Advanced Security > Windows Defender Firewall with Advanced Security > Inbound Rules.
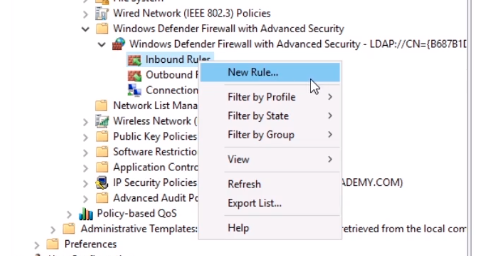
We are going to create a set of Inbound and Outbound rules. Let’s start with the Inbound rules and the first thing we are going to enable is the firewall in Printer Sharing. Right-click on Inbound Rules and select New Rule…
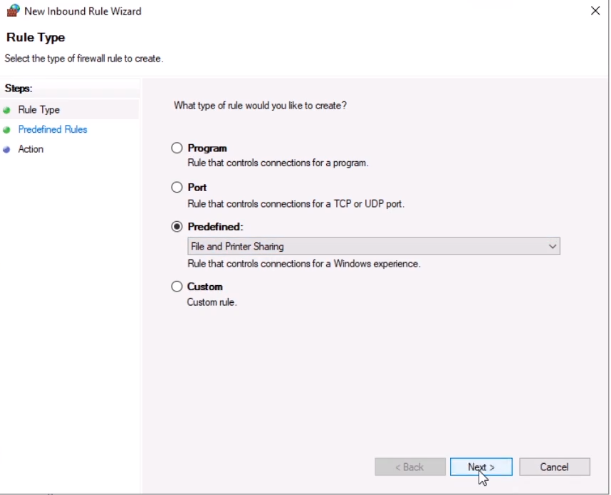
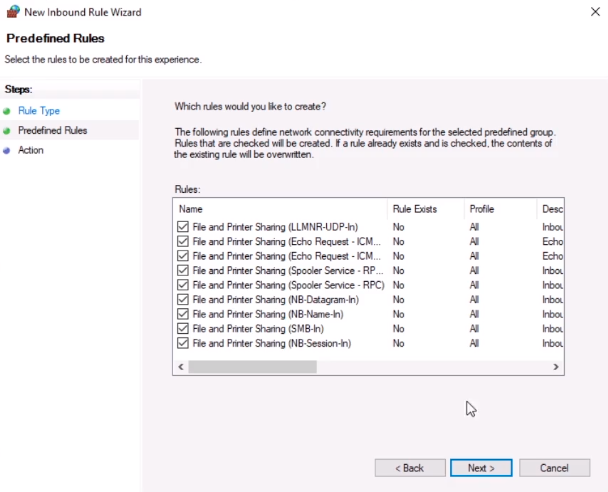
The New Inbound Rule Wizard launches. We can select Program, Port, Predefined, or Custom. We are going to choose Predefined and click on the drop-down to select File and Printer Sharing and click on Next.
Here we have several rules, we are just going to leave all these enabled and click Next.
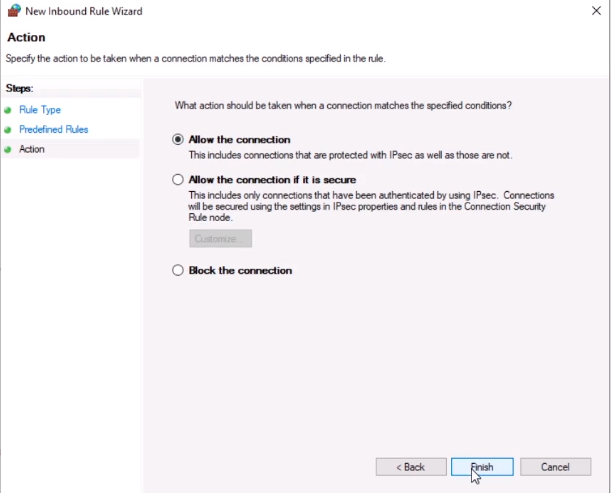
And, we are going to leave the option selected for Allow the connection and click Finish.
One thing to keep in mind is that if you like you can go through here and restrict the firewall settings so that they only accept traffic from your SCCM server.

One way that you can do that is by double-clicking on one of these rules and then we can go under Scope and select Remote IP Address and select These IP Addresses and click on Add to add the actual IP Address of our SCCM server which is 192.168.1.11. This will allow the connection to occur or be accepted if it was from our SCCM server which in this specific case in our ServerAcademy.com IT Lab is 192.168.1.11.
I don’t see the need to do that in my lab environment that I am creating for you guys. What I want you guys to be aware of is where, if you want, if you want to take these extra steps and lock down the firewall ports rules.

Server Academy Members Only
Sorry, this lesson is only available to Server Academy Full Access members. Become a Full-Access Member now and you’ll get instant access to all of our courses.


