Configure DHCP Reservations

Full-Access Members Only
Sorry, this lesson is only available to Server Academy Full-Access members. Become a Full-Access member now and get instant access to this and many more premium courses. Click the button below and get instant access now.
Instructions
Q&A (0)
Notes (0)
Resources (0)

Saving Progress...
Resources
There are no resources for this lesson.
Notes can be saved and accessed anywhere in the course. They also double as bookmarks so you can quickly review important lesson material.
In this lecture, we are going to learn how to create a DHCP Reservation. We are going to create a reservation for our Windows 10 workstation with an IP address of 192.168.0.113.
In order to create the DHCP reservation, we would need to have our Domain Controller and our Windows 10 VM powered on.
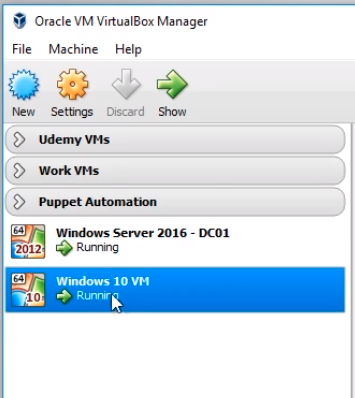
The first step is to grab the MAC Address from our Windows 10 workstation and then we will be ready to create the reservation on our DHCP Server which is ITFDC01. Next, we will configure the Windows 10 VM to use DHCP for our second networking adapter and see if we grab the IP Address we reserved for it.
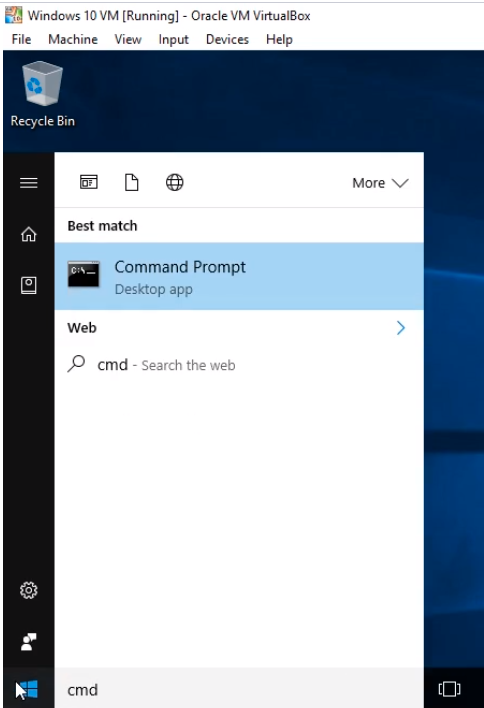
Start by logging in to Windows 10 VM. Open Command Prompt by clicking the Windows button and search for cmd.
Start Command Prompt by selecting it from the list.
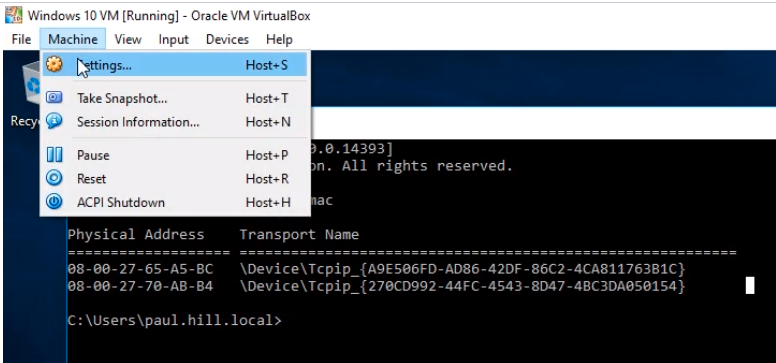
We can grab the MAC Address of our VM by typing the getmac command.

Notice there are two MAC addresses presented. This is because we are using two network adapters. We can figure out which MAC address belongs to each network adapter by looking at the advanced settings of our VM networking configuration.
On the VM window, click Machine and Settings...
Click the Network tab and select Adapter 2. Expand the Advanced drop-down list and look for the MAC Address.
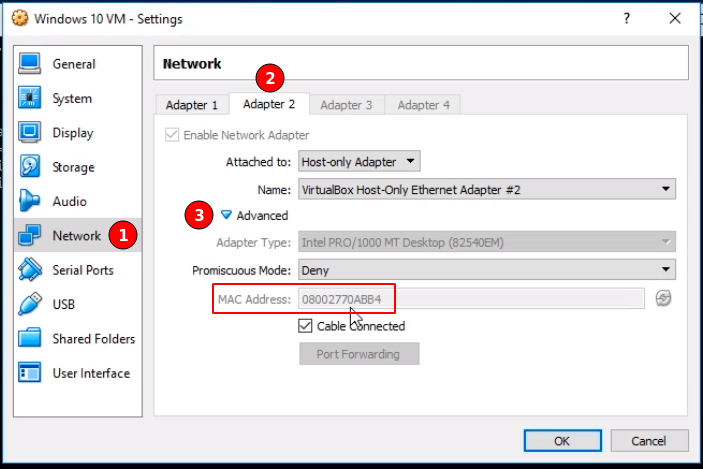
Now we can see that the MAC Address listed here is similar to the second MAC Address listed in the command prompt. This is the MAC Address we will use to create the DHCP reservation because this is the MAC Address of the networking adapter that is attached to the same Host-Only network that our Domain Controller is using. Click OK to close the Settings… window.
Now, switch over to our DHCP Server which is ITFDC01, and open the DHCP Management console by opening Server Manager and selecting Tools and DHCP.
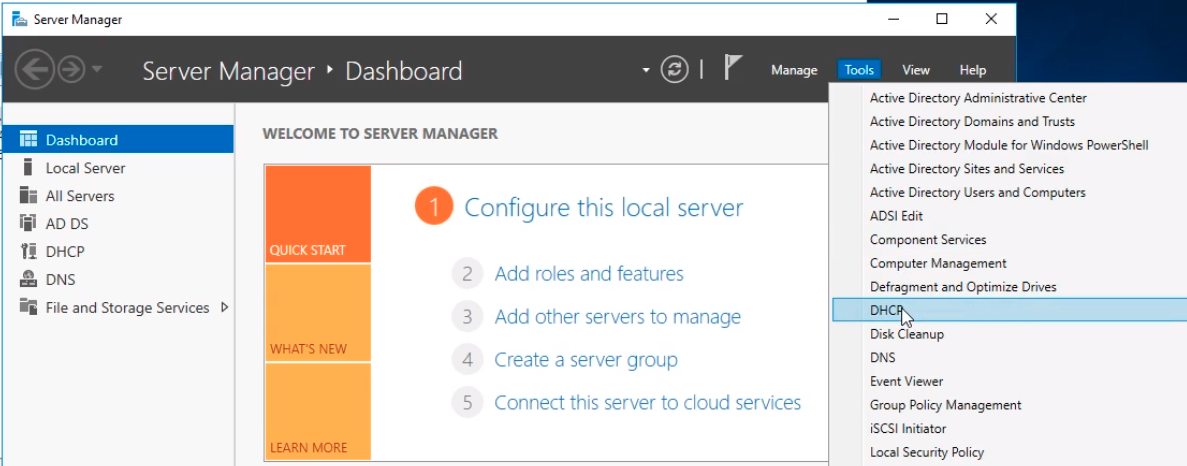
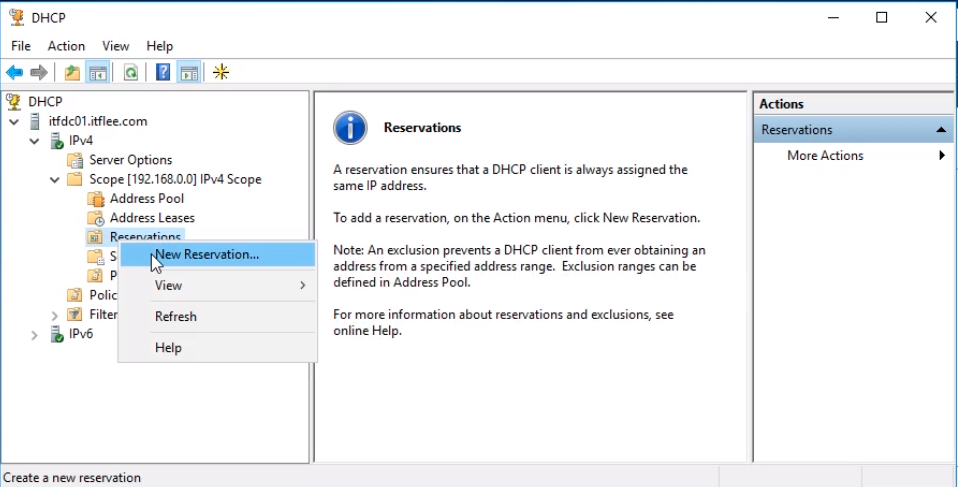
Expand our server, expand the IPv4 node and our Scope, and right-click on Reservations and choose New Reservation…
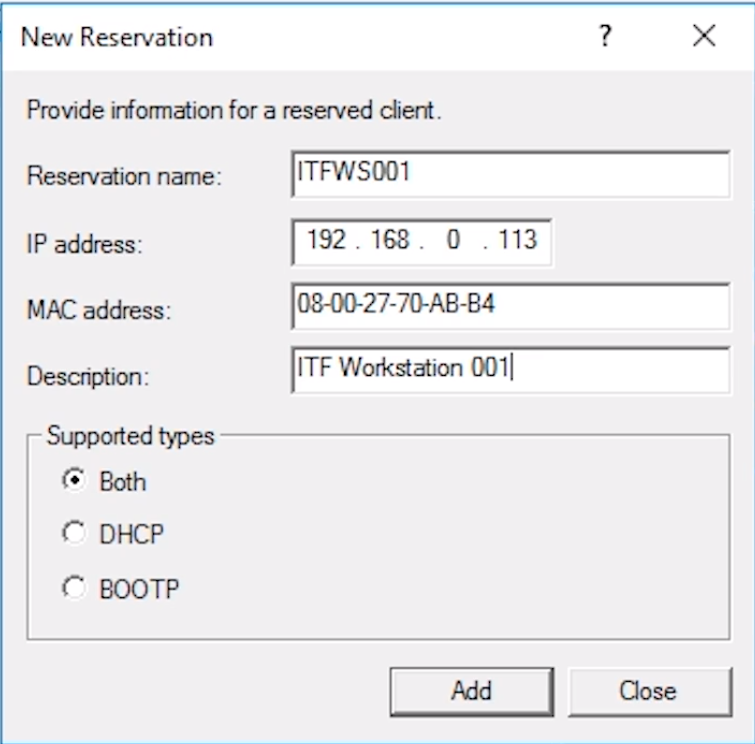
For the Reservation name, we are going to enter the computer name ITFWS001.
For the IP Address, we are going to enter the IP Address we want our computer to receive which will be 192.168.0.113.
For the MAC Address, we are going to enter the MAC Address that we got from the Windows 10 workstation by entering the getmac command which is 08-00-27-70-AB-B4.
For the Description, we are going to enter ITF Workstation 001.
For the Supported types, we are going to leave the default radio buttons selected Both selected.
Click the Add button and then click Close.
TIP: You might be wondering what a BOOTP is. BOOTP or Bootstrap Protocol was designed to dynamically assign IP Addresses when computers boot up or are powered on. BOOTP is also capable of pointing the client computer to an image file containing Operating Systems. Unlike DHCP, BOOTP can only configure TCP/IP settings when a client computer is booted and not when it has already been booted to Windows or while it is up and running at the Desktop.
We can now see the new Reservation listed.
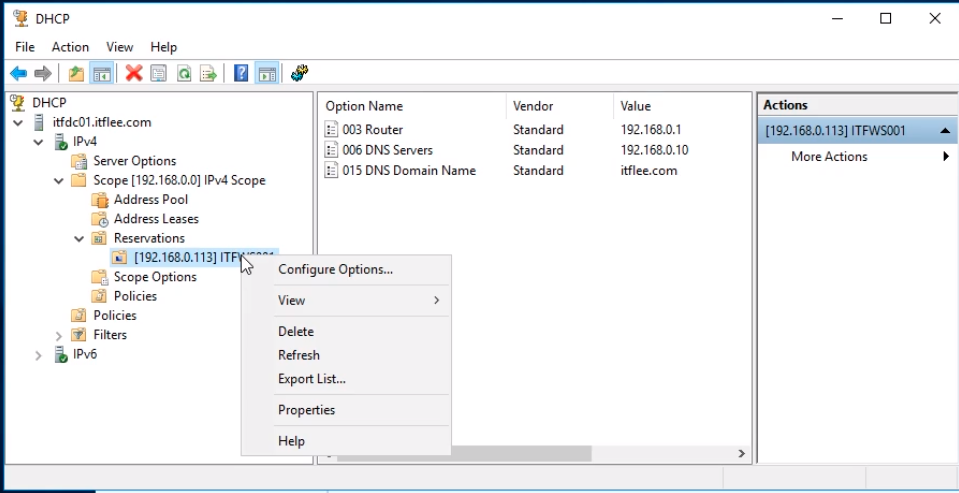
If we Right Click on the new Reservation we can configure the Reservation, Delete it or configure its Properties.
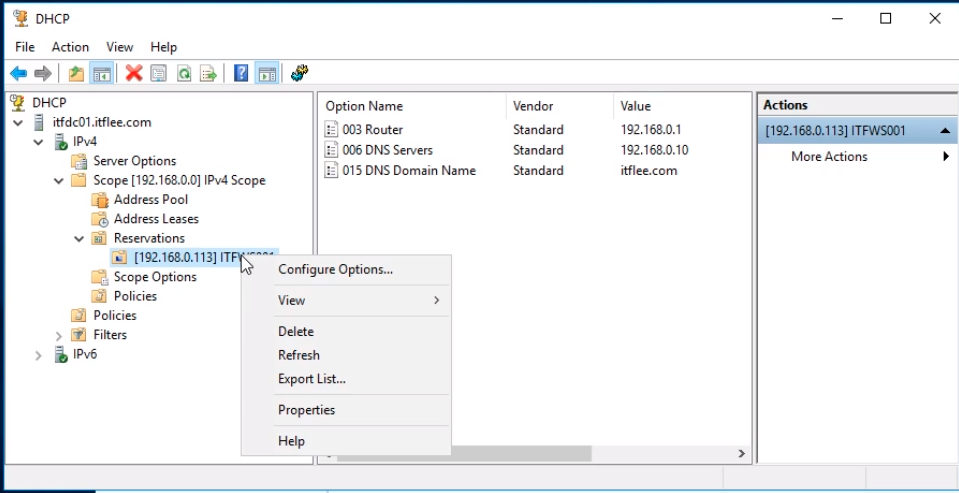
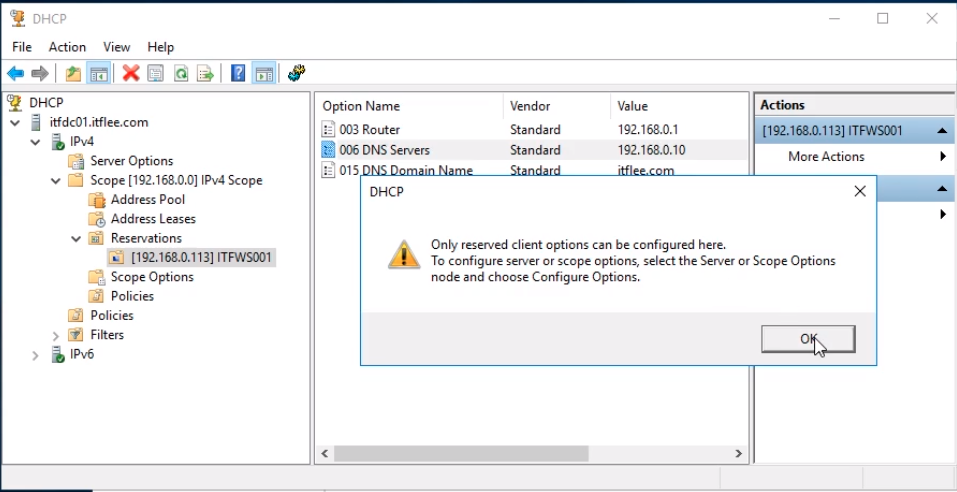
You can also double click on the Reservation and see the settings for the Router, DNS Servers, and DNS Domain Name.
Note that we cannot configure the settings in the middle pane when double-clicking the options displayed as a warning message will pop up.
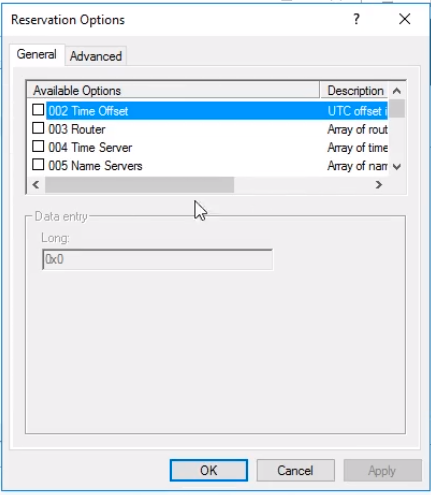
You can change them by Right-Clicking on the Reservation and selecting Configure Options…
The Reservation Options window will appear.
Let's switch over to our Windows 10 VM and switch the IP Configuration to DHCP to see if it grabs the new IP Address settings we’ve reserved for it.

Server Academy Members Only
Sorry, this lesson is only available to Server Academy Full Access members. Become a Full-Access Member now and you’ll get instant access to all of our courses.


Hello, where can i find VM? Which workstation I can use?
Hi Olga Glendza,
When doing the lab, click on the Resources Tab on the right pane. It should display a Windows Server and a Windows PC that acts as a client that you can use.
-Ricardo