Installing Ubuntu Server on your VMs
In this lesson, you'll learn how to install Ubuntu Server on the three virtual machines (VMs) you created in VirtualBox: "Ansible Controller," "Managed Node 1," and "Managed Node 2." This installation is a key step in preparing your IT lab for practicing Ansible automation tasks. We will use a consistent username and password across all VMs for simplicity. In this example, the username will be "paulh," and the password will be "password123." Remember, since this is a lab environment, we're prioritizing convenience and ease of learning over security best practices.
Download Ubuntu Server : Go to the Ubuntu Server download page and download the latest LTS (Long Term Support) version of Ubuntu Server.
Installing Ubuntu Server your VMs
Repeat these steps for all three VMs you created in the previous lectures.
- Mount the Ubuntu Server ISO : Mount the Ubuntu Server ISO to the VM before powering on the VMs.
- Start the VM : In VirtualBox, select the VM and click "Start."
- Follow Installation Prompts : Go through the installation process. When prompted, choose the language, location, keyboard layout, and other basic settings.
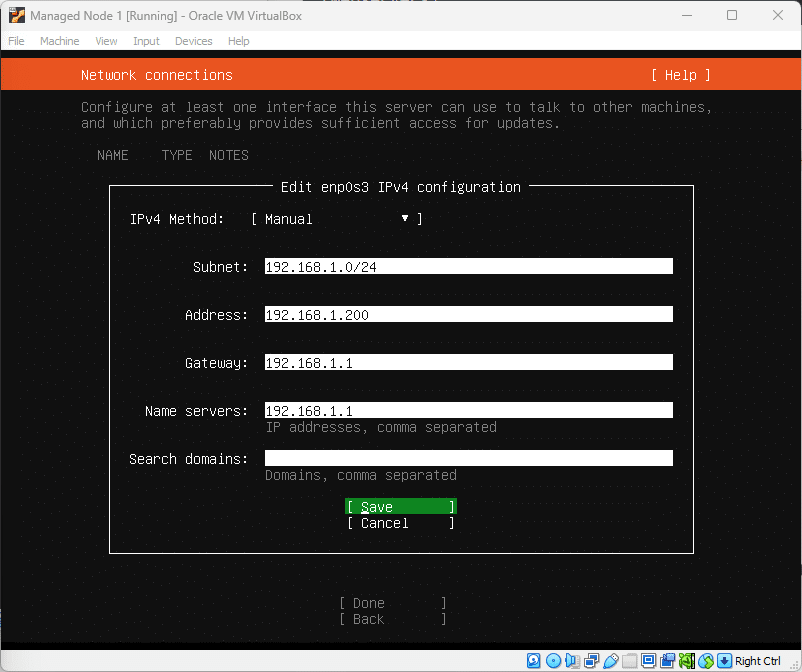
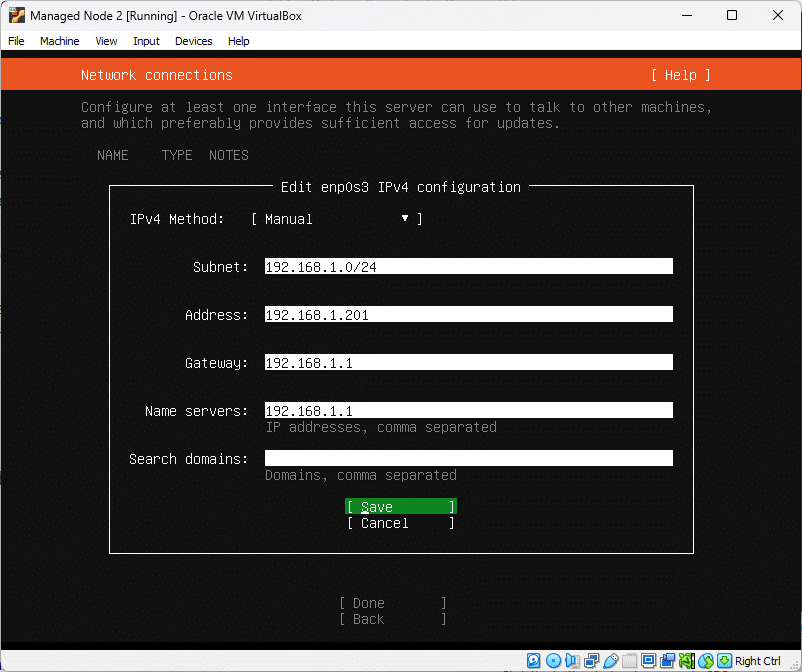
- Configure Network Settings: Since we chose a bridged network adapter, the VMs will be on the same network as our host, and to make configuring these nodes with Ansbile easier, I recommend setting static IP addresses for your Managed Nodes. My home network is
192.168.1.0/24, so I am setting each node to be.200and.201respectively.
- Configure the hostname of seach VM : Name each of your VMs
ansible-controller,managed-node-1andmanaged-node-2respectively. This will be important later on. See this example of the…
No comments yet. Add the first comment to start the discussion.