Creating Your Lab with VirtualBox
This lab is being rebuilt
We are replacing our previous lab platform with new browser-based IT labs. This lesson's hands-on environment is temporarily unavailable while we finish the migration.
Check back soon, or continue with the next lesson in your course if your instructor has pointed you there.
In this lesson, you will learn how to set up a virtual lab environment using Oracle VM VirtualBox. By the end of this lesson, you will have three virtual machines (VMs) configured: one acting as the "Ansible Controller" and the other two as "Managed Node 1" and "Managed Node 2." These VMs will be connected via a bridged network adapter, allowing both your host machine and the VMs to communicate on the same network. This setup is crucial for practicing Ansible tasks in a controlled environment.
Setting Up VirtualBox
- Download and Install VirtualBox : If you haven't already, download Oracle VM VirtualBox from the official website and install it on your computer. Follow the installation prompts suitable for your operating system.
- Open VirtualBox : Launch VirtualBox to start creating your virtual machines.
Creating the "Ansible Controller" VM
- Create New VM : In VirtualBox, click on "New" to create a new virtual machine. Name it "Ansible Controller."
- Allocate Memory and Processors : Allocate at least 2GB of RAM and 2 processors for optimal performance.
- Create a Virtual Hard Disk : Choose to create a virtual hard disk now. Select VDI (VirtualBox Disk Image) as the hard disk file type.
- Hard Disk Size and Type : Set the size of your virtual hard disk (20GB should be sufficient). Select "Dynamically allocated" for efficient use of space.
- Network Settings : Go to Settings → Network. Attach the network adapter to a "Bridged Adapter." This setting allows the VM to communicate with the host machine and other VMs on the same network.
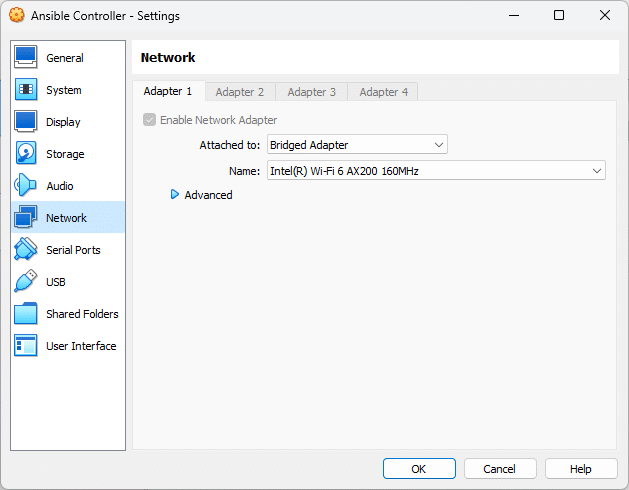 Virtual Box VM Network Settings
Creating "Managed Node 1" and "Managed Node 2" VMs
Repeat the same steps to create two more VMs, naming them "Managed Node 1" and "Managed Node 2." Ensure each VM has at least 2GB of RAM and is configured with a bridged network adapter. The hard disk size and type should also be the same as the "Ansible Controller."
Conclusion
Now you have successfully set up three virtual machines in VirtualBox: one Ansible Controller and two Managed Nodes. These VMs will serve as the foundation for your Ansible practice environment. In the next lesson, we'll proceed with installing Ubuntu Server on these VMs, which will be your next step in creating a functional IT lab for Ansible experiments.
Remember, setting up your own IT lab is a valuable learning experience. It not only aids in understanding Ansible's workings but also gives you practical knowledge in managing virtual environments.