Overview
This tutorial describes the steps to assign a static IP address on Windows Server 2016 through both the GUI and Windows PowerShell.
Jump to a specific section:
Method 1) Through the GUI with Server Manager
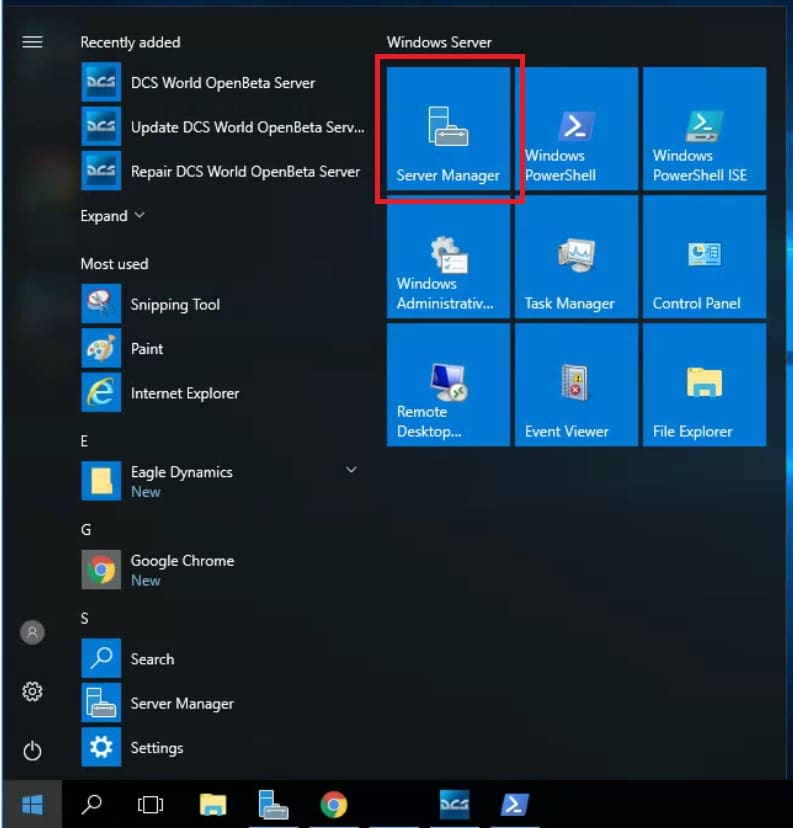
First - open Server Manager by clicking the Windows button and selecting Server Manager:
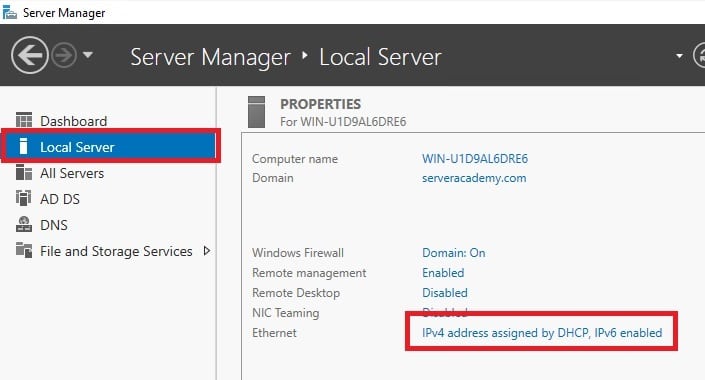
Next - click Local Server followed by the blue text next to "Ethernet":
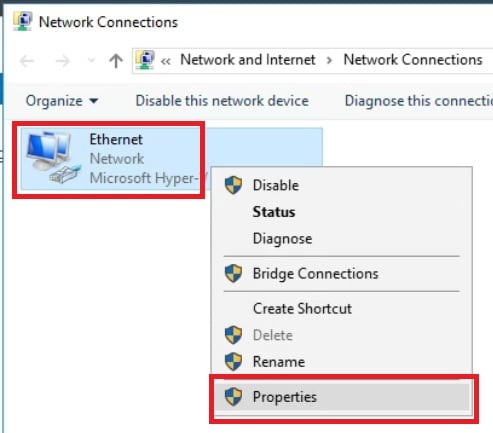
This will open Network Connections. From here, right click on your Ethernet adapter and chose "Properties".
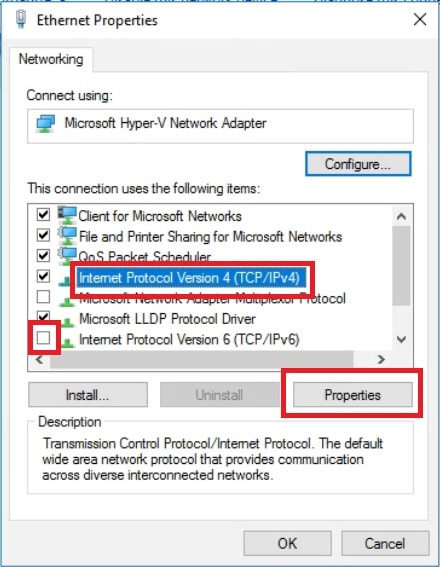
Uncheck TCP/IPv6 (most likely won't use it, if you need it you will know), select TCP/IPv4 and Properties
Select Use the following IP address and enter your desired IP, subnet mask and default gateway. This will require that you also specify a preferred or alternate DNS server as shown below:
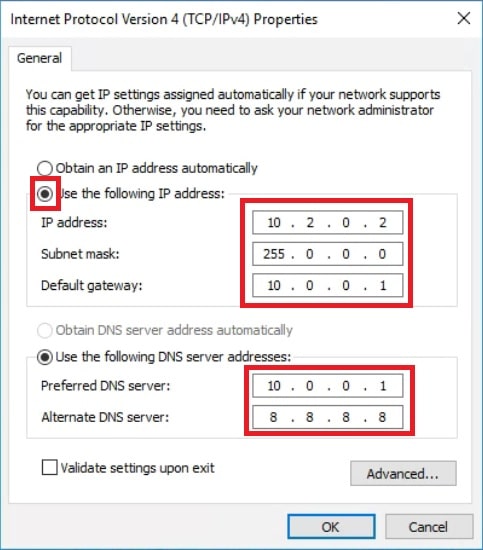
Click OK, and OK again to close the properties windows to make sure your settings took effect.
If you have no idea what your settings should be and assuming your computer is already connected to the internet, you could look at your automatic IP configuration by running "ipconfig /all" in command prompt or Windows PowerShell.
Method 1) Assign a static IP With Windows PowerShell
First you need to open PowerShell. If you are running Server core, then PowerShell will be open by default but if not, select the Windows button and search for and launch PowerShell as an administrator:
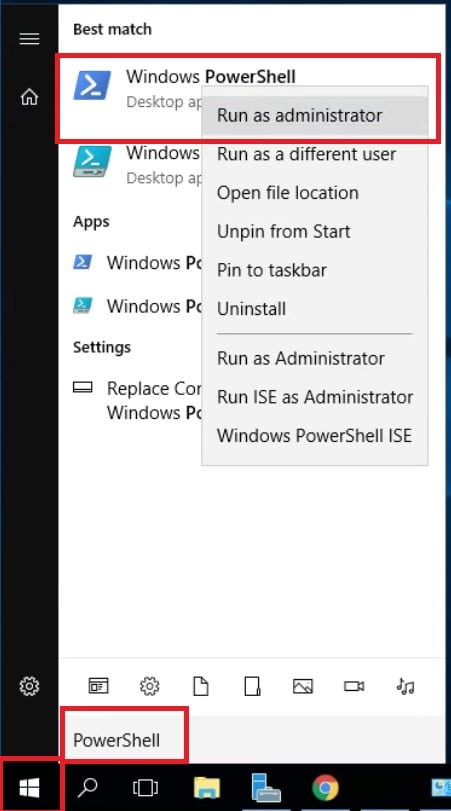
Once you have PowerShell open, we can assign a static IP in two steps:
- Get your network adapter index
- Assign static IP address, subnet mask, default gateway and DNS settings
Let's start by running the command below to get our network adapter index:
Get-NetAdapter
We are going to take the output of the ifIndex value which in my case is two, and we will pass that on to the next command when we assign an IP address:
New-NetIPAddress -InterfaceIndex 2 -IPAddress 10.2.0.2 -DefaultGateway 10.0.0.1 -PrefixLength 8
Set-DnsClientServerAddress -InterfaceIndex 2 -ServerAddresses 10.0.0.1,8.8.8.8
And that's it! Let me know your thoughts below...


