Creating an AWS EC2 Instance

Server Academy Members Only
Sorry, this lesson is only available to Server Academy members. Create a free account now to get instant access to this and more free courses. Click the Sign Up Free button below to get access to our free courses now, or sign in if you have an account.
Instructions
Q&A (0)
Notes (0)
Resources (0)

Saving Progress...
Resources
There are no resources for this lesson.
Notes can be saved and accessed anywhere in the course. They also double as bookmarks so you can quickly review important lesson material.
In this lecture, we are going to create an EC2 instance in AWS.
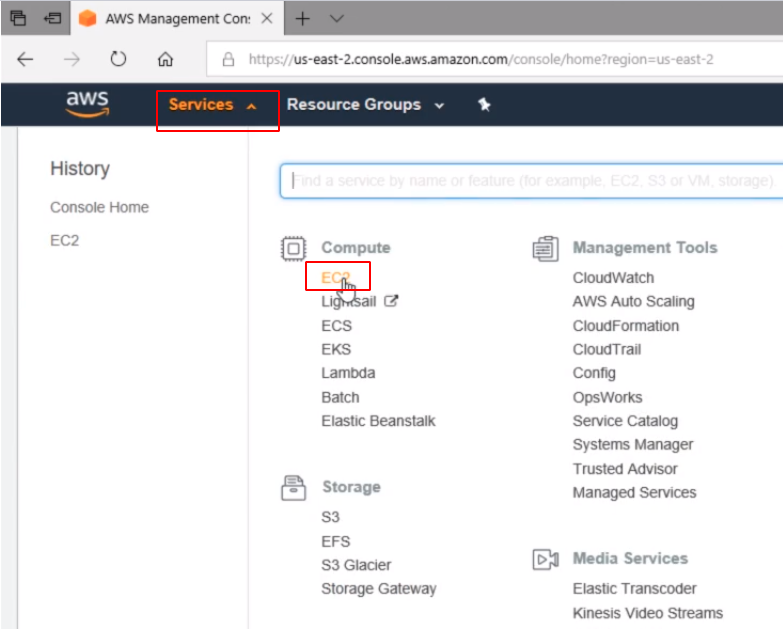
So I have logged into the Dashboard and what I am going to do is click on Services and under Compute click on EC2.
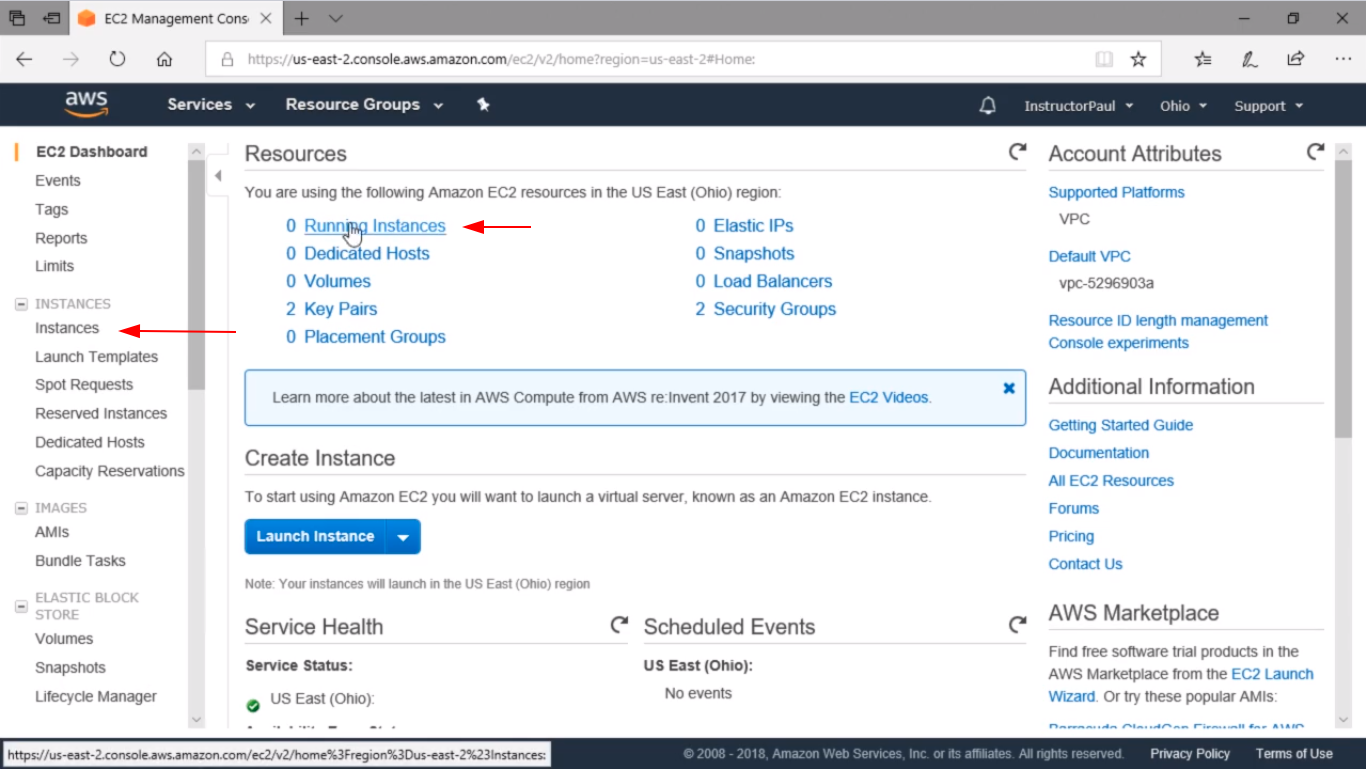
Here I can see I have 0 Running Instances, 0 Dedicated Hosts, and you’ll notice I have 2 Key Pairs, and 2 Security Groups. You are not going to have all these they all will say 0. Just ignore those values just because I’ve created a couple of VMs before under this account but don’t worry about any of that.
What you are going to do is click either Running Instances or we could choose Instances from the left menu pane.
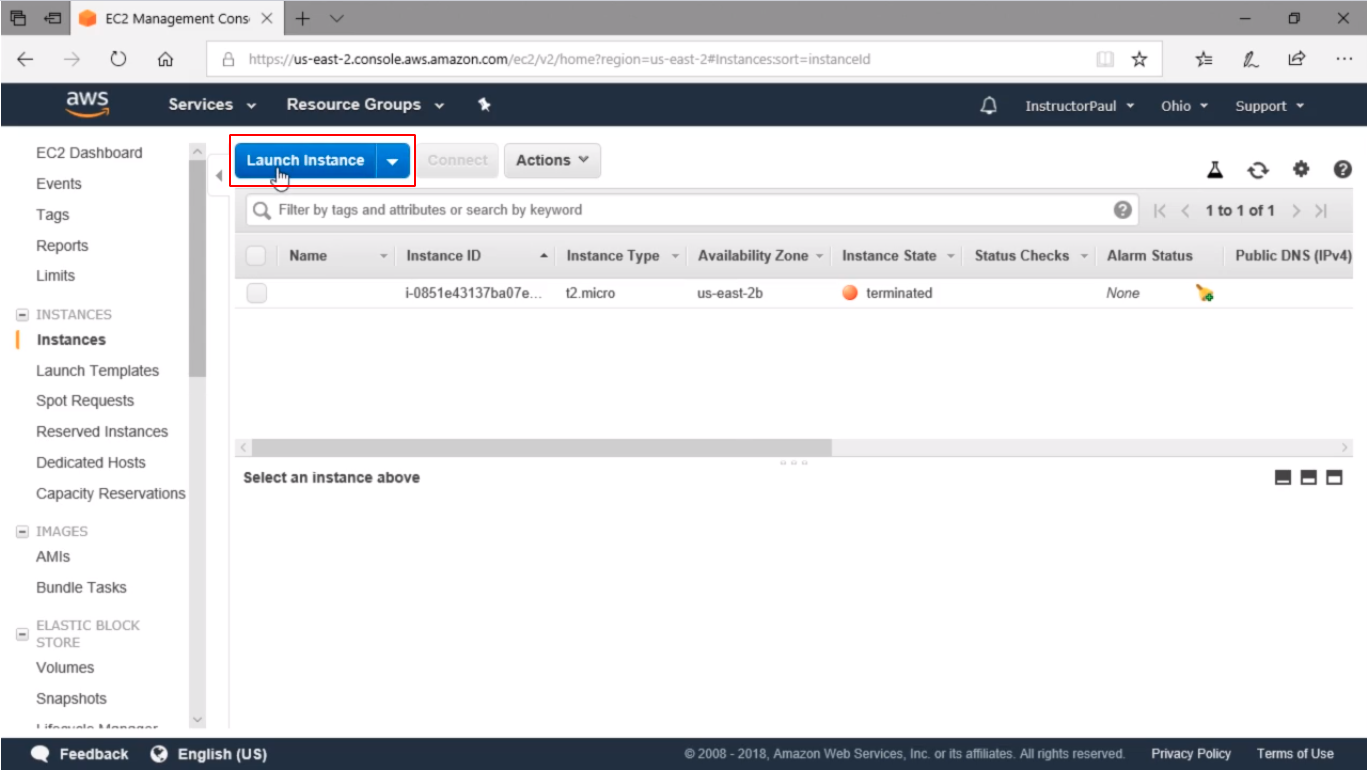
And here is an instance where you can see that I have terminated. So, you are going to see nothing in the results more than likely unless you created an Instance before.
What you are going to do now is click this Launch Instance blue button and we are going to make a new instance.
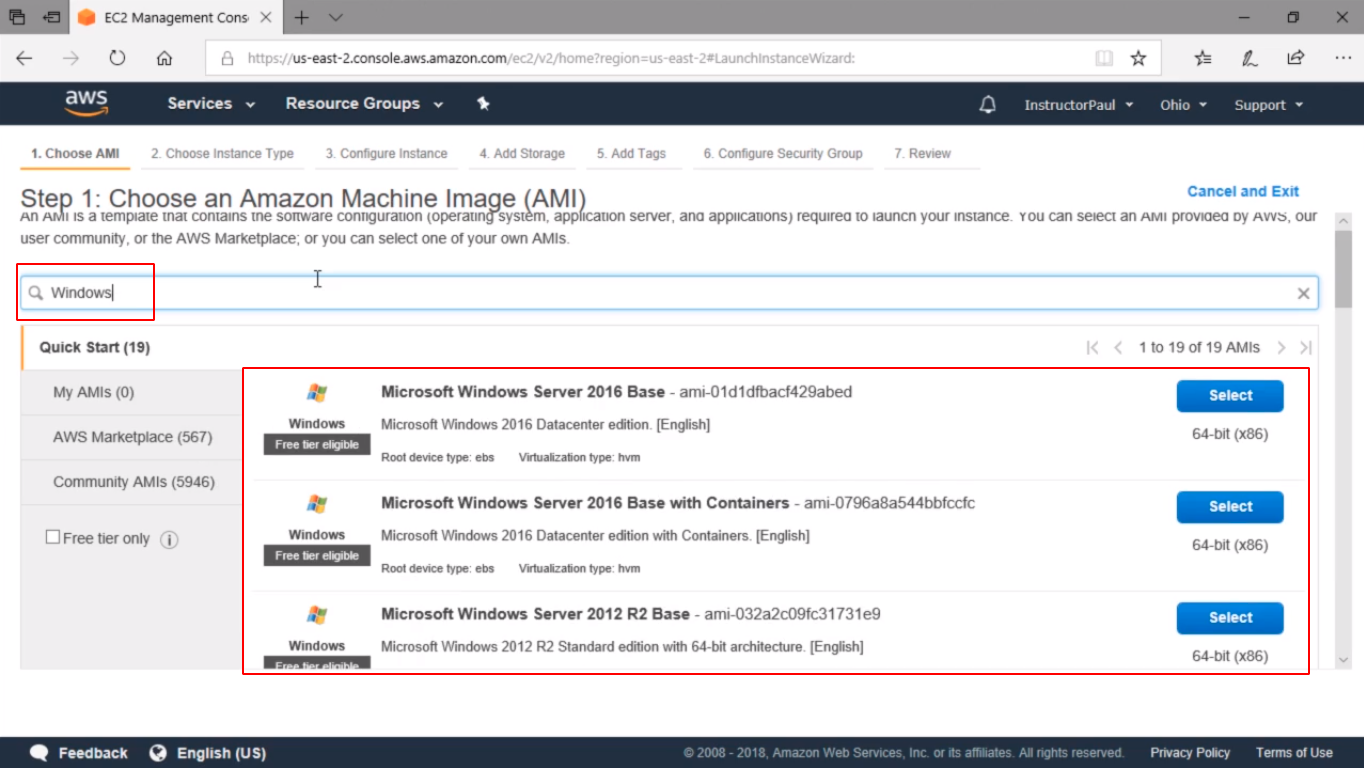
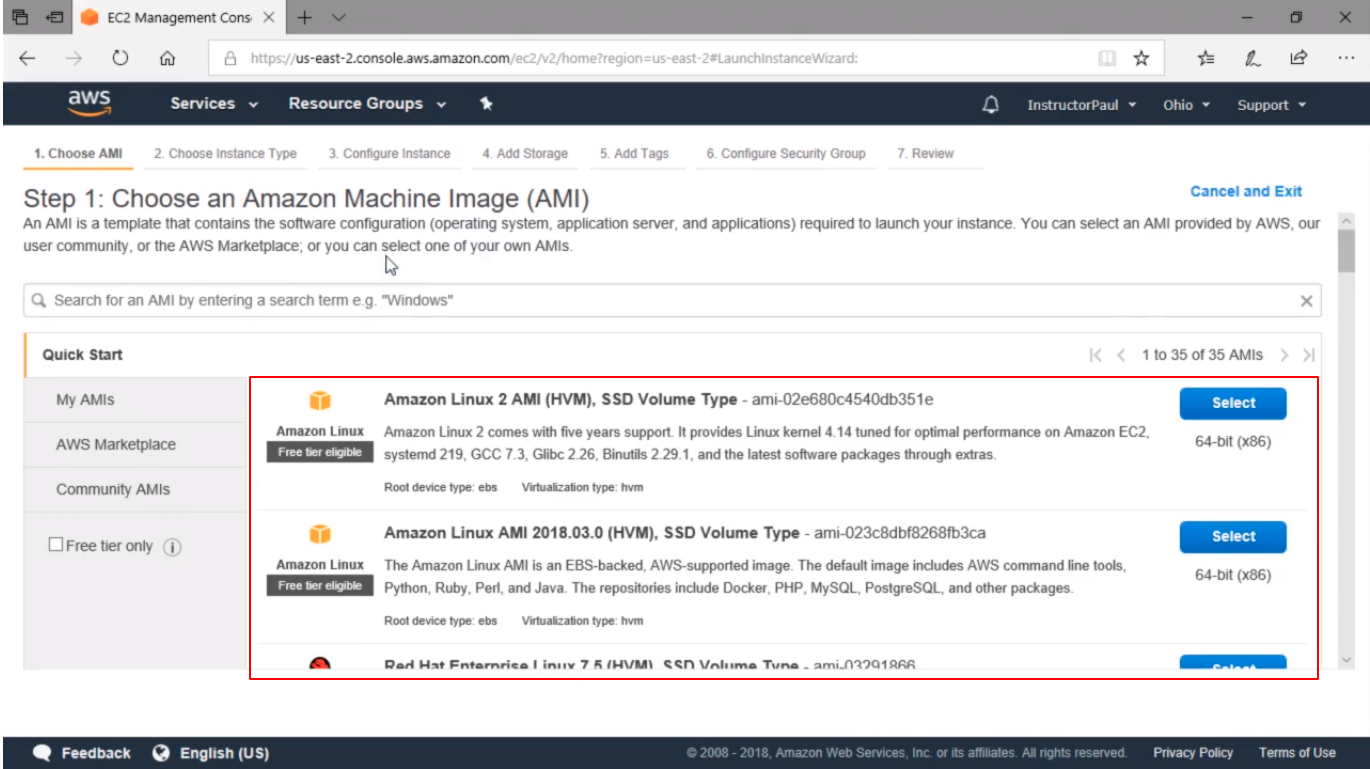
Here we have QuickStart, My AMIs, AWS Marketplace, and Community AMIs. What we are going to do is click on QuickStart and on the search box we're going to search for Windows and press Enter.
Here we can see all types of AMIs, which are Amazon Machine Images, and these are just to help us get up and running really fast with AWS.
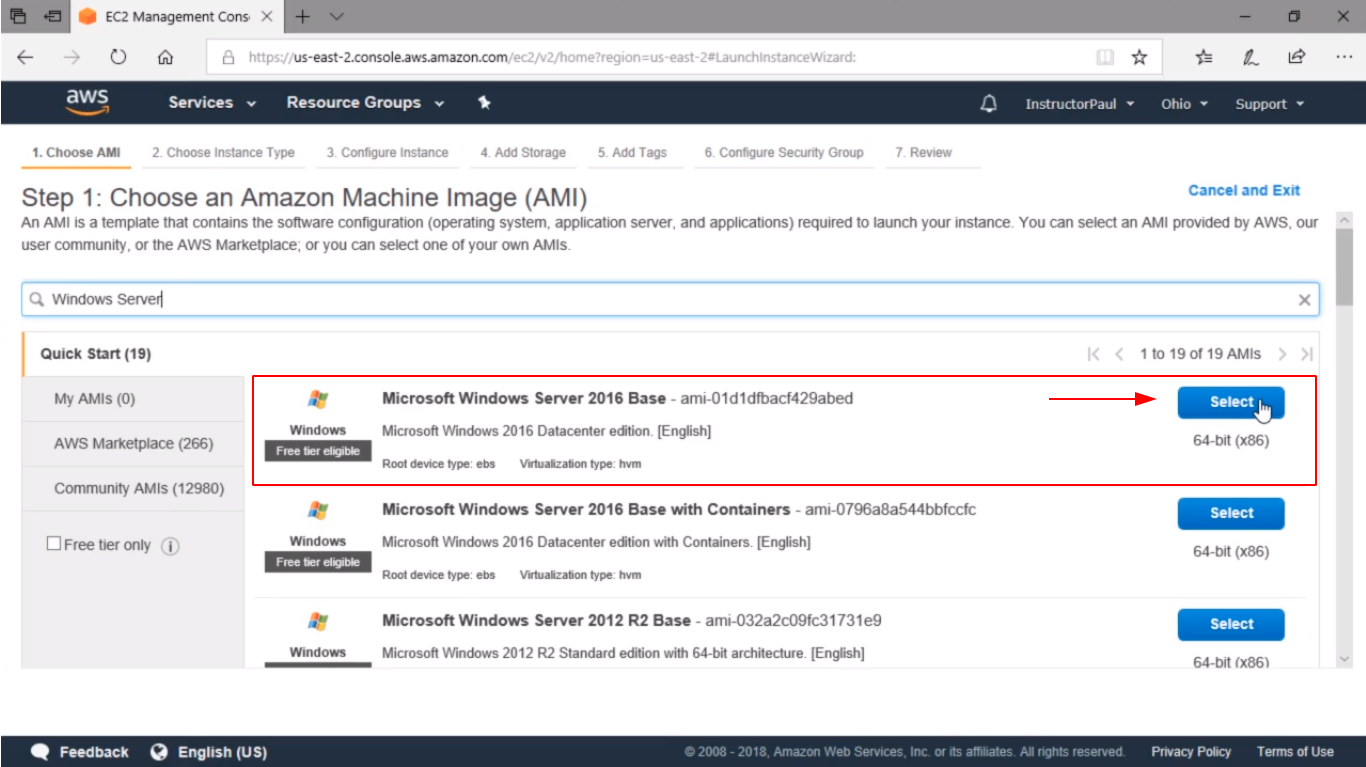
Here we can choose Server 2012 R2 Base or just 2012, we have 2008 and all the way back to 2003. We also have Servers with Containers, Servers with SQL Server installed. These are just setups so we can just click the Select button and get a new server set up in a matter of minutes, and it is really fast and it is really nice.
What we are going to do is just choose Windows Server 2016.
Another thing I’d like to point out is that we backspace and delete Windows from the search results and press Enter we can also choose Linux.
There’s Amazon Linux, RedHat, Ubuntu Server, Deep Learning AMIs, all kinds of stuff we can choose.
But we will just type Windows Server and press Enter we will choose from the results Microsoft Windows Server 2016 Base. Now I am going to click Select.
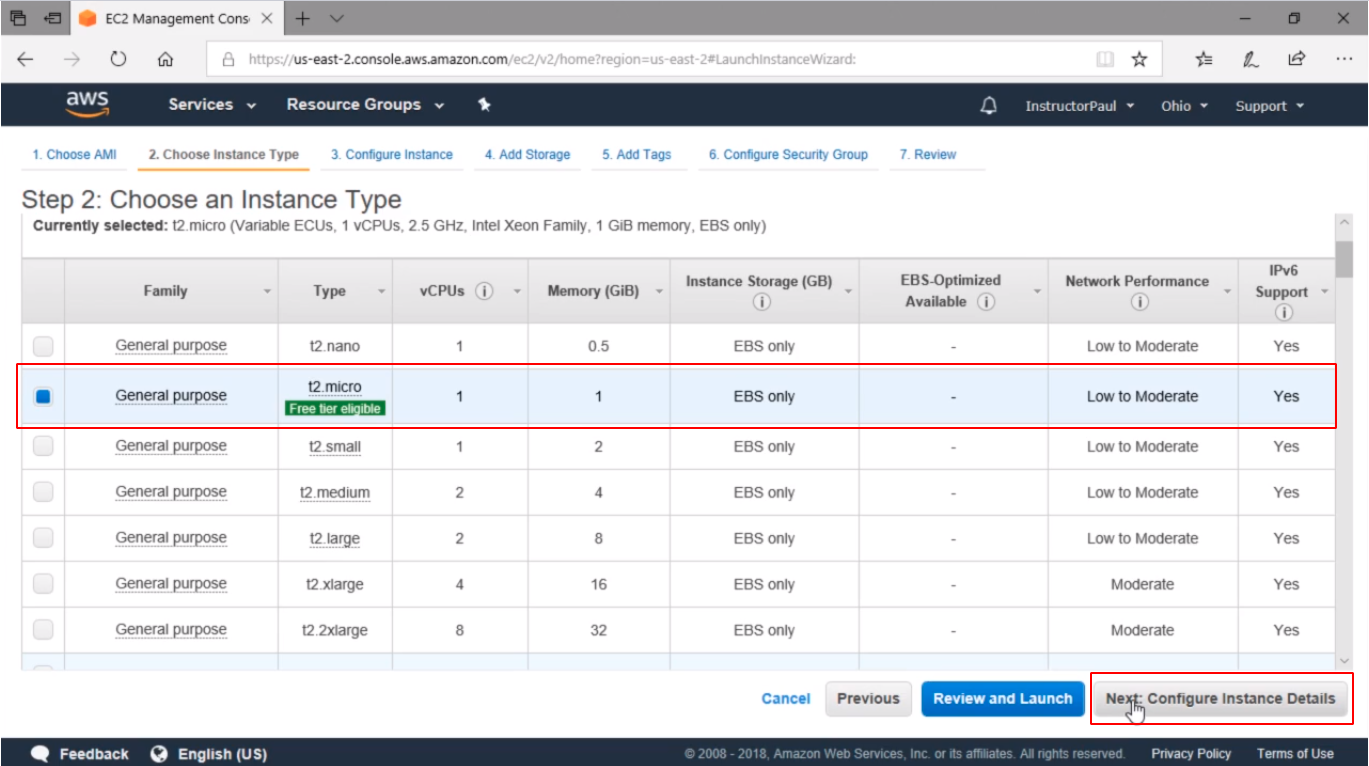
Here we need to choose the Instance Type. We are going to choose the default which is the Free Tier. That is 1 CPU, 1 GB of Ram, and Network Performance is Low to Moderate. You can choose larger if you’d like but I just don’t want to overkill it and we don’t want to get charged so we are just going to go for the cheapest and that is this General Purpose t2.micro.
We can click Review and Launch but we need to do more so we are going to click Next: Configure Instance Details.
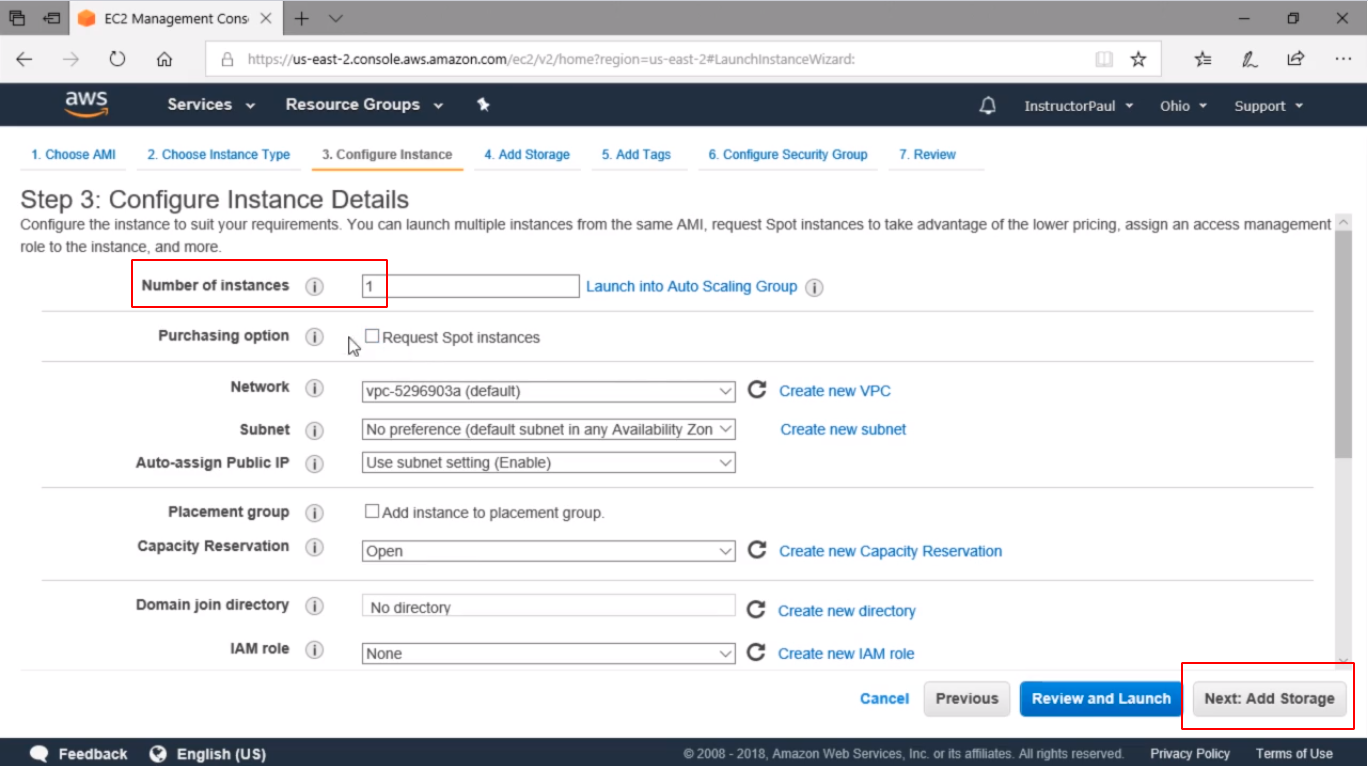
First, we are going to choose only 1 instance in the Number of Instances so we don’t want to change that number. We don’t want to Request Spot Instances. What we want to do is leave all these settings at default and we are going to click Next.
If we have different networks and different subnets we could choose those options. For example, if we had a Staging subnet, a Production, a Test, and all of that, we are just going to leave all the settings at default since we don’t have any of that.
Click the Next: Add Storage button.
Here in Add Storage remember that Free Tier allows customers to use up to 30 GB.
If I want to have more than 1 VM, if I want to have 3 then I’ll need to divide this number by 3 so that would be 10 GB each.

Server Academy Members Only
Want to access this lesson? Just sign up for a free Server Academy account and you'll be on your way. Already have an account? Click the Sign Up Free button to get started..


I followed your procedure exactly as in the video but cannot connect to the instance. I only get an error page with 3 reasons why i cant connect and none of those reasons was mentioned in the instruction.
Ive tried to remake the instance 4 times following the video and my notes as well as aws doc. instruction to no avail. It is quite frustrating…
Hi Dusten Maxwell
If you see that the instance was created and is running, it might be an issue of networking.
Check the following steps:
Create VPC and subnets How to Create VPC and Subnet
Create Internet Gateway How to Create and Attach Internet Gateway
Now, select the VPC you created, subnet, and enable public IP. Check the Security Group to have the RDP port enabled as on the video.
Ricardo
Great lesson, thank you. As you mentioned, the layout has changed and you could benefit from an updated video with the new layout. Other than that, everything worked like a charm.
I created a account for the EC2. But Amazon has totally changed the site are there any new directions for the new Amazon look?
Hi Linton Smith
It changed once after we created the video, and now they are changing the GUI again. This is normal for cloud providers to do, and if things look different or you see more options, the concepts should be the same, just that these options might be located in different parts of the GUI.
Ricardo
At 04:54 –> “Here the firewall rule as we can see is of Type RDP, Protocol TCP, Port 3389. Under the Source select My IP and enter your IP Address from where you will be accessing the server and we can also type a Description like Allow me to connect”. My question is how do I know what is my IP address that let me access the server? Thank you in advance.
Hi Adi Nugroho
Sometimes amazon makes it easy and autodetects your IP. Another way would be to type in Google “what is my IP” and you will see it there in one of the search results.
Ricardo
Excellent lesson. Yes, the layout has changed, but as long as you take your time, look around thoroughly, all the same options are still there, just some in different locations. Thanks for the great course!
heads up the layout is much different in 2025. I got through it but it was a struggle. Especially trying to figure out how to name the tags. everything is different where to click and add what you need to add from start to finish. But you can get it to work.
Thanks for the heads-up dinman68!
Right, it changes ever now and then that is difficult for Paul to be recording the videos, but I am glad you got it to work.
We will update the video in the future when recording for the AWS practitioner.