In this lesson, you will learn how to get started with Microsoft 365. Before continuing this tutorial, please make sure to check the following requirements: Sign up for any Microsoft 365 subscription: Business Enterprise Developers Education Valid and verified owned company or individual domain. Step 1: Connect your domain to…
In this lesson, you will learn how to get started with Microsoft 365. Before continuing this tutorial, please make sure to check the following requirements:
- Sign up for any Microsoft 365 subscription:
- Valid and verified owned company or individual domain.
Step 1: Connect your domain to your Microsoft 365 tenant.
- On your browser, login to Microsoft 365 Admin Portal via https://portal.office.com
- On the Sign in page, enter your Global Admin username in an email format and then enter your password on the Enter password page. Select Sign in.
- On the Stay signed in? window, select the Don’t show this again check box and then select Yes.
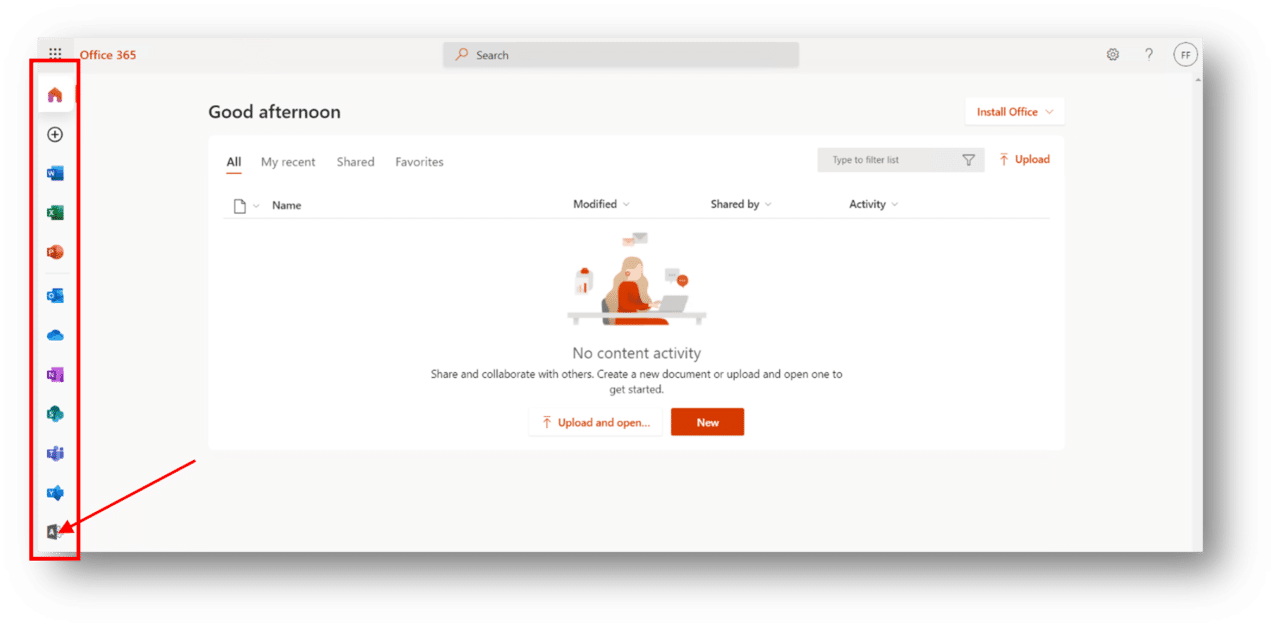
- In the Office 365 home page, in the column of Microsoft 365 app icons on the left-side of the screen, select the Admin icon to navigate to the Microsoft 365 admin center. This will open in a new tab.
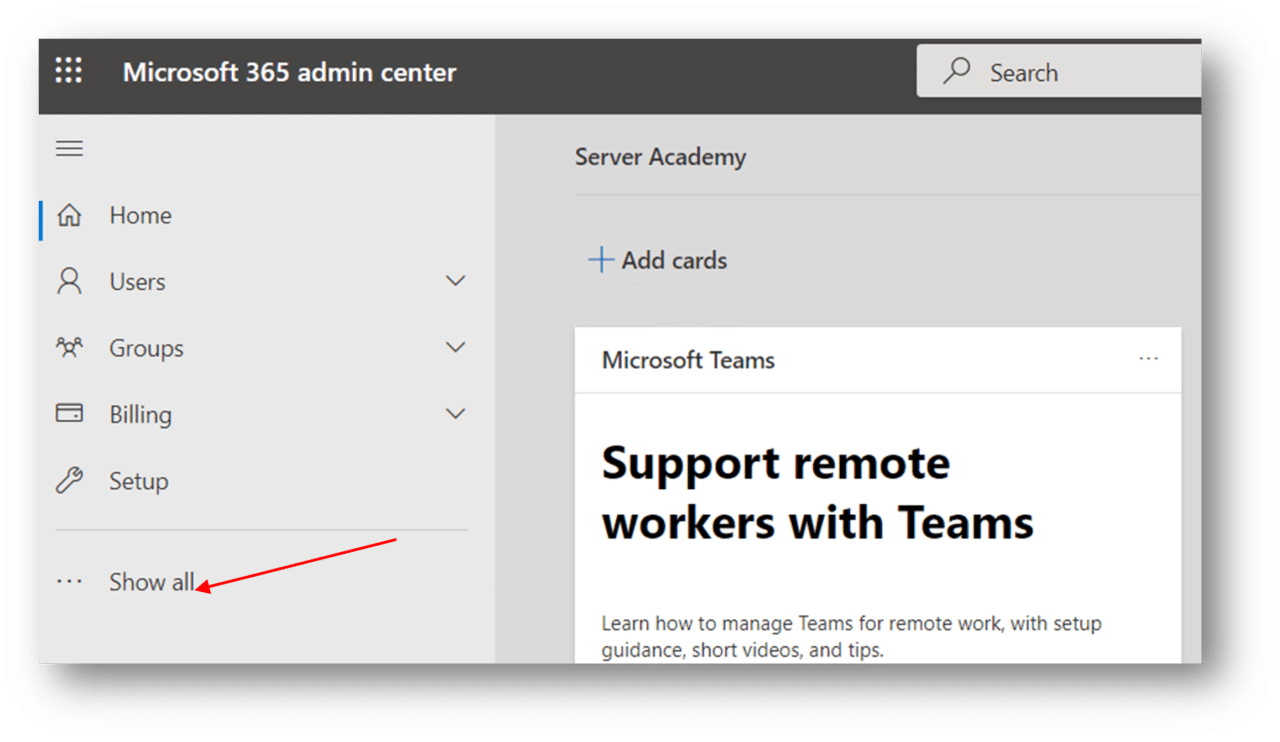
5. From the Microsoft 365 Admin center page, navigate to the left column for the admin menus. Click Show all.
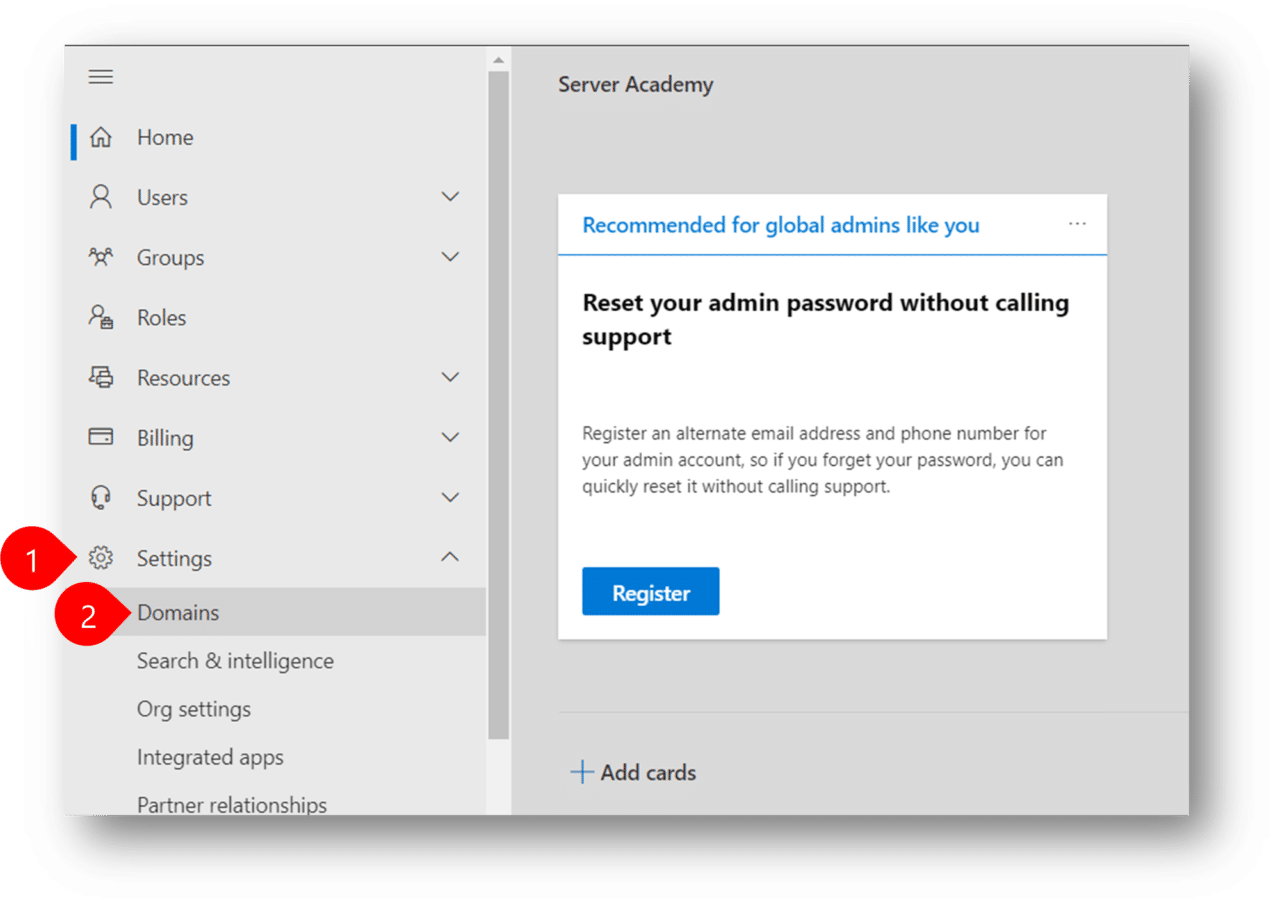
6. On the left menus that will appear, expand Settings and select Domains.
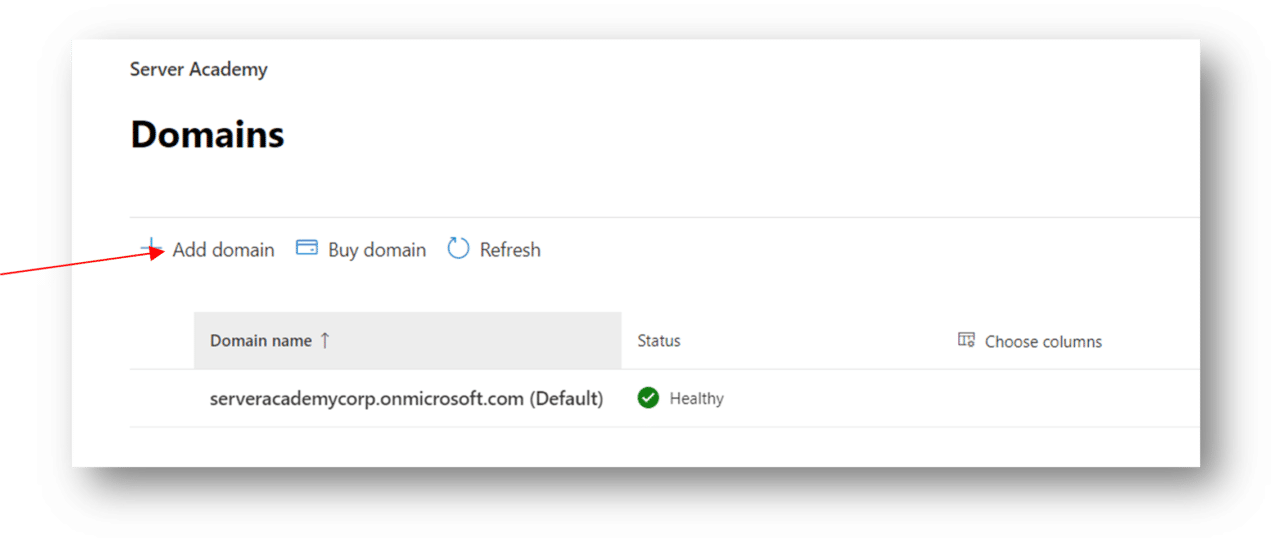
7. From the Domains page, click on Add domain.
8. On the Add a domain page, type your own domain under Domain name field and click on Use this domain. This will verify if the domain you typed is valid and it will also check where your domain host is.

9. On How do you want to verify your domain page, this will tell you where your DNS records are kept. For this example, our domain host is Cloudflare. If in case you do not have the access to your domain host, click on More options. For this example, we will select More options.
If you have the access to your domain registrar, you may click the Verify button. This will ask you to sign into your domain host.
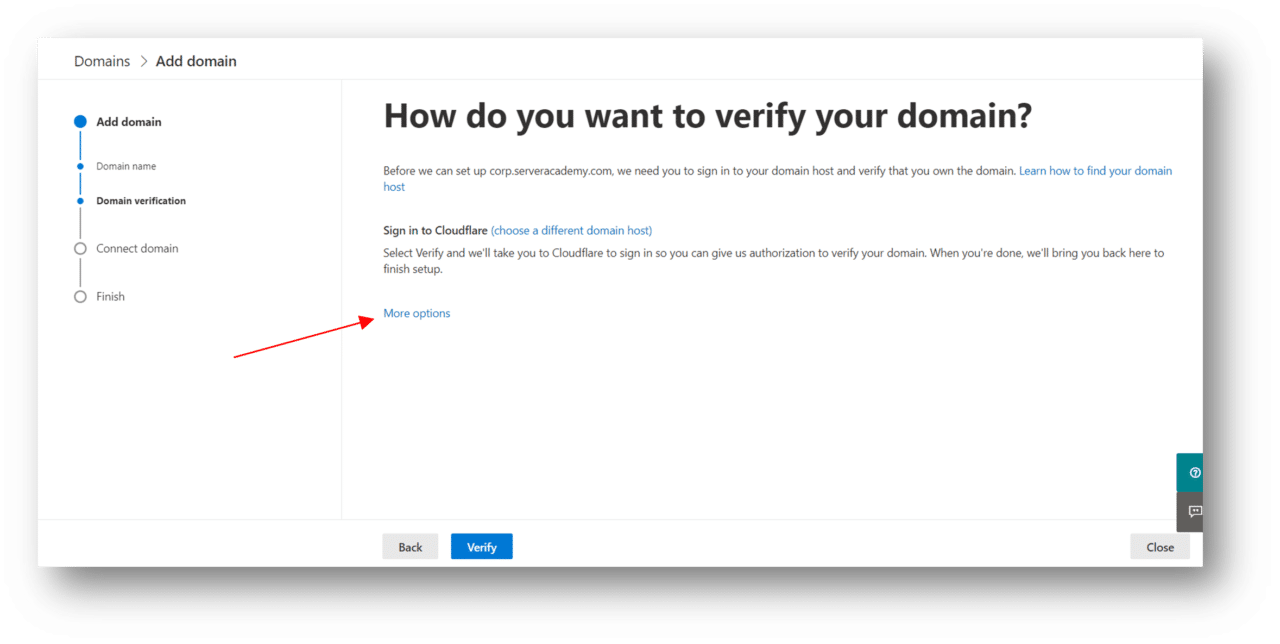
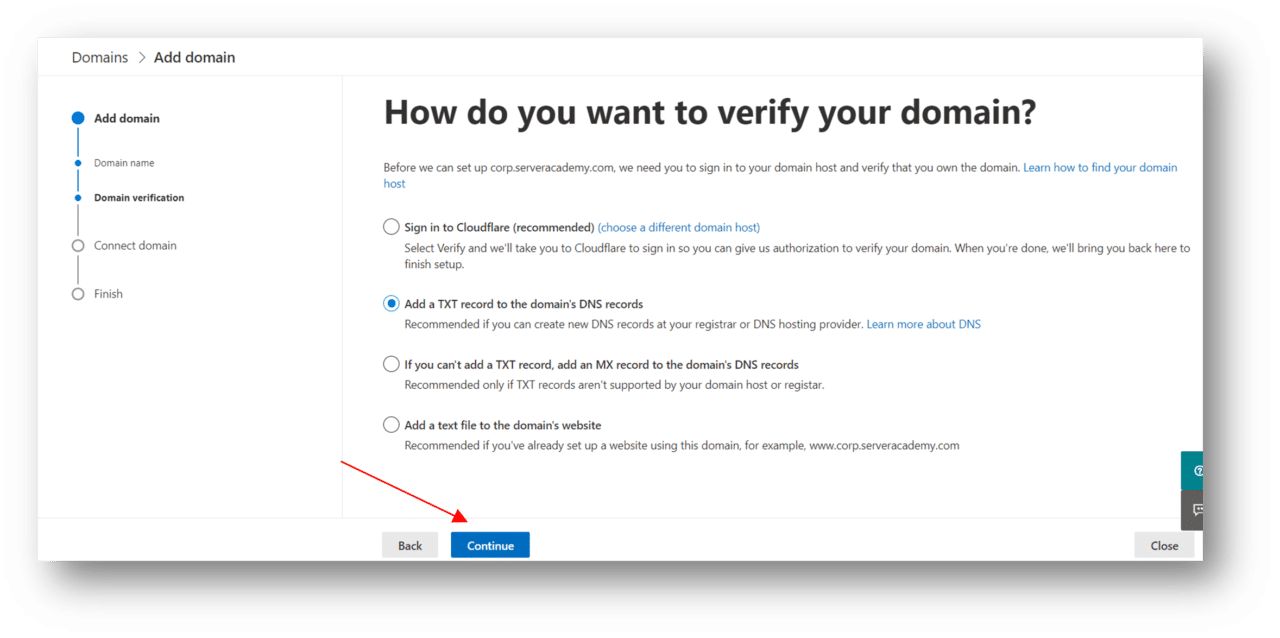
10. On the same page after clicking More options, select Add a TXT record to the domain’s DNS records or choose whichever is applicable for your settings. Select Continue. This will verify if the TXT records were correctly added to your domain host.
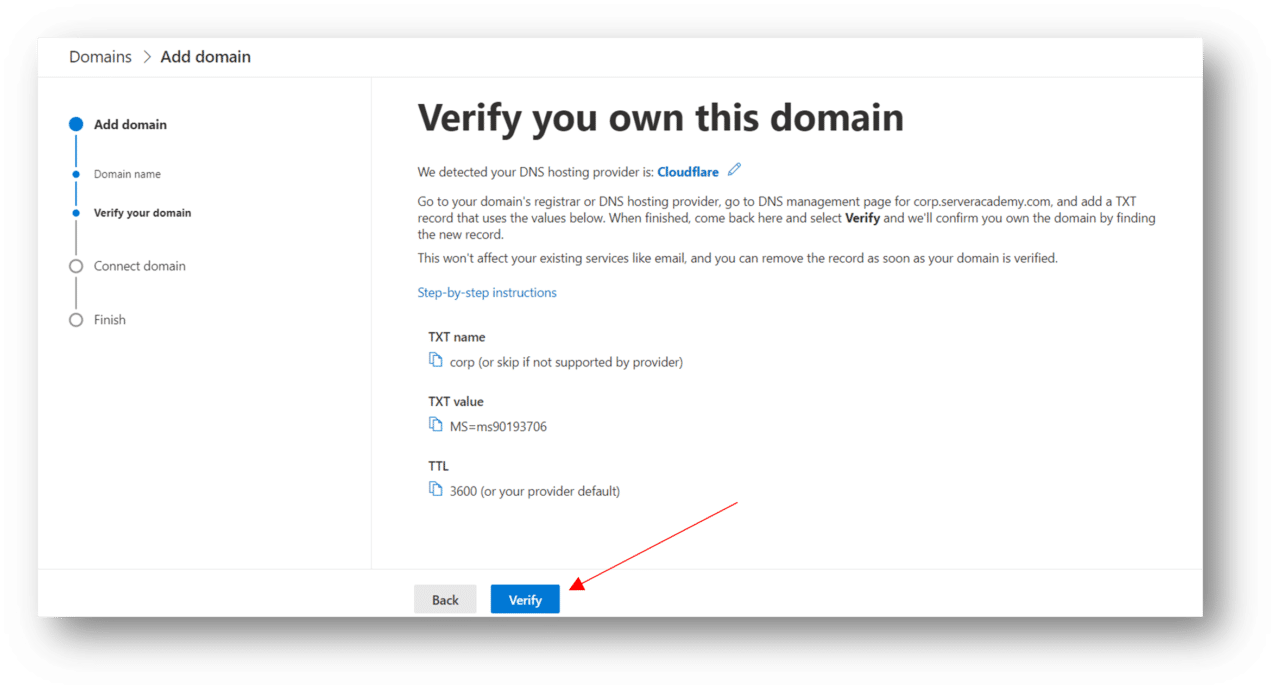
11. On Verify you own this domain page, follow the instructions provided in adding the TXT records to your DNS records. Once the TXT records are added, click the Verify button.
Once your ownership of the domain is verified, the next page will provide you more records to add to your DNS records. These records are important for Microsoft 365 services to properly work such as Exchange Online, Skype for Business (Microsoft Teams) and Intune and Mobile Device Management.
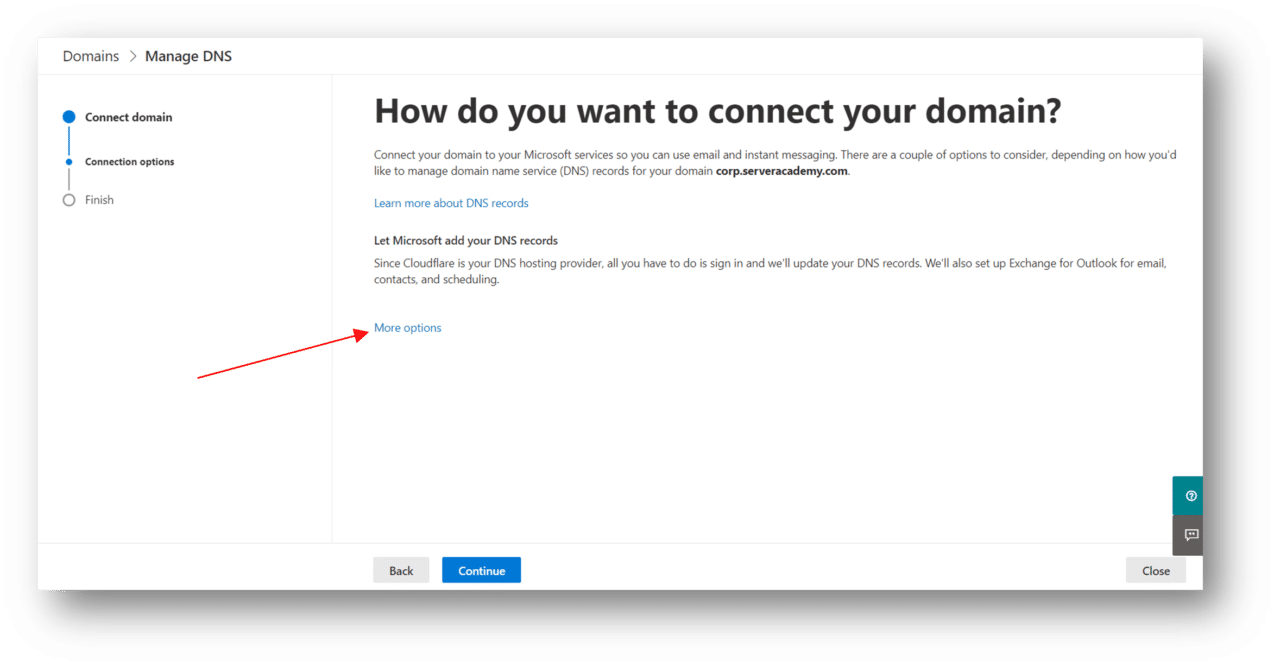
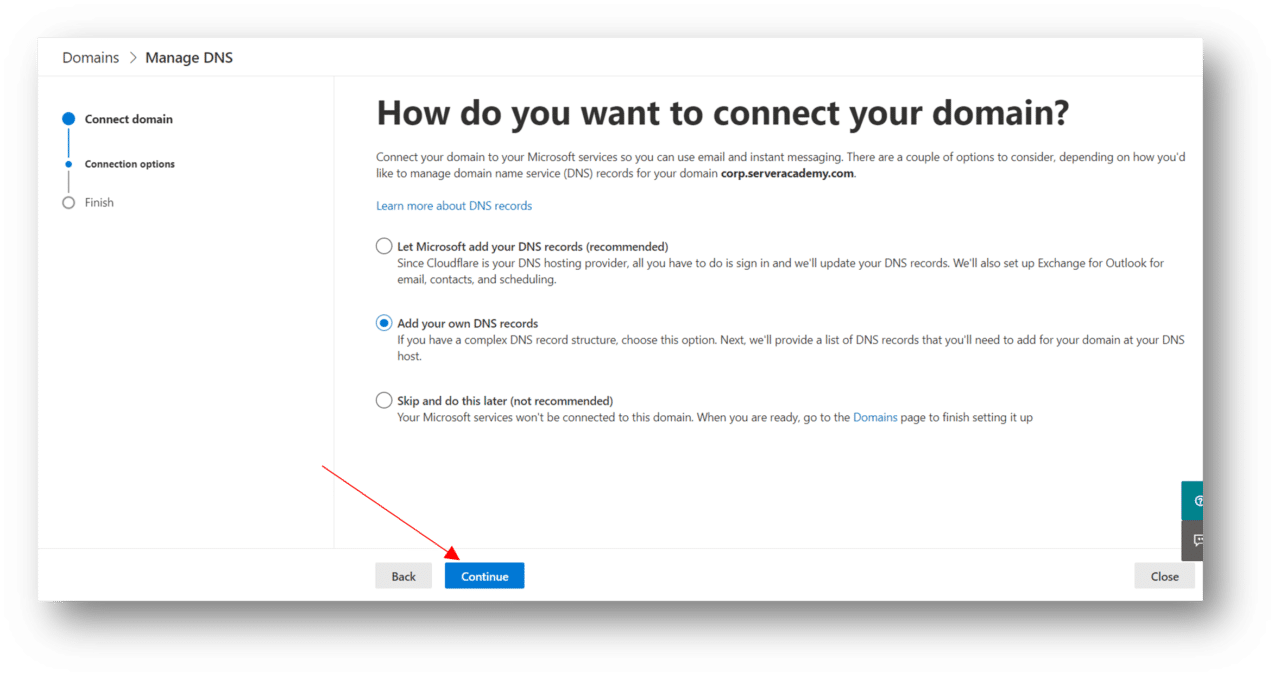
12. On How do you want to connect your domain page, click on More options. If in case you do not have the access to your domain host, click on More options. For this example, we will select More options.
If you have the access to your domain registrar, you may click the Continue button. This will ask you to sign into your domain host.
13. On the same page after clicking More options, select Add your own DNS records or choose whichever is applicable for your settings. Select Continue.
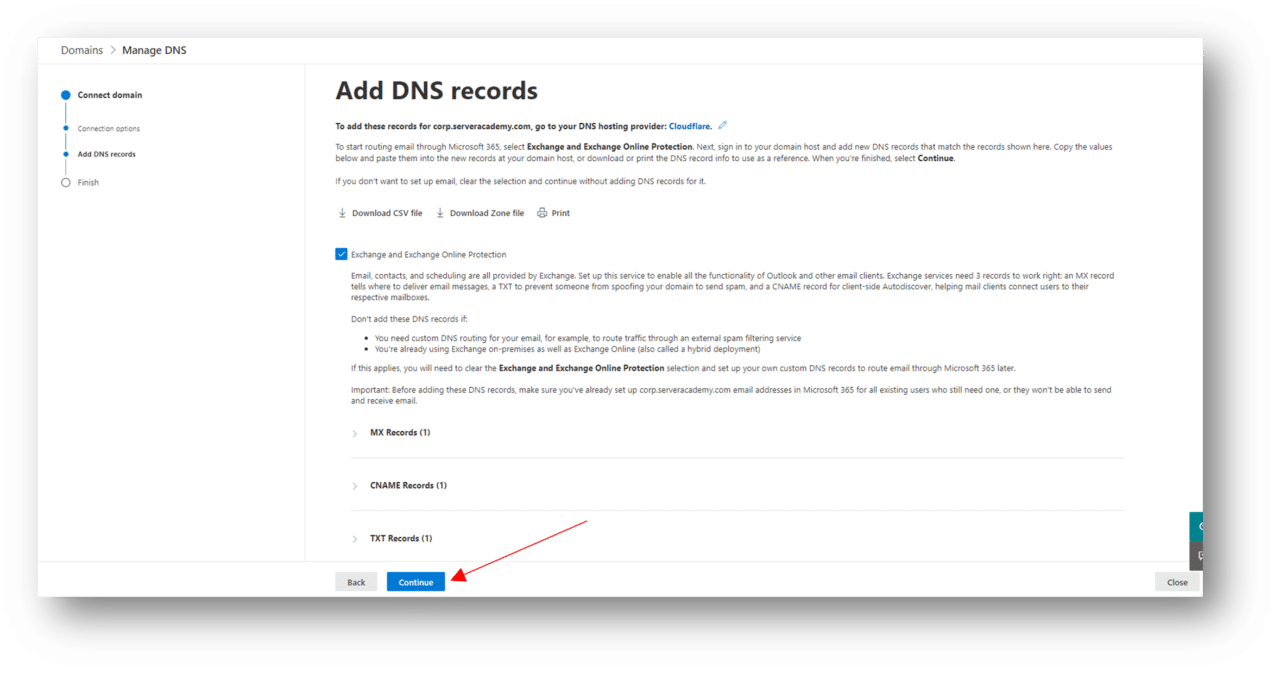
14. On the Add DNS records page, it will provide you the complete details of the DNS records that you will need to add on your domain host such as MX, CNAME and additional TXT records. You also have the options to download the DNS records as CSV file or directly get the Zone file if your domain host has this method. After adding the necessary DNS records, click on Continue.
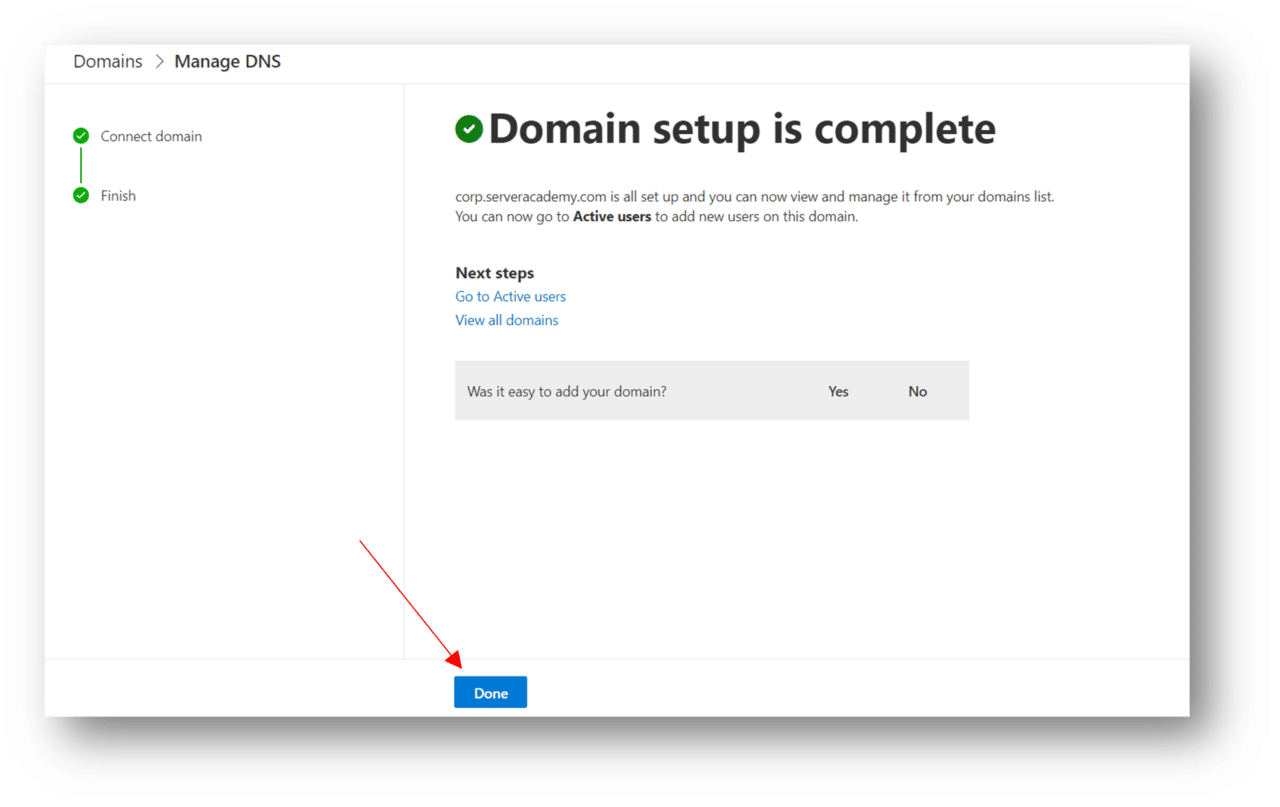
15. If all records are properly added and verified you will get a Domain setup is complete page, if not it will tell you if there are some records that needs adjustment or if some records are missing. If correctly setup, click on Done.
Step 2: Adding users to your Microsoft 365 tenant.
Note: If you want to sync your On-premise users from your local active directory, check the tutorial here.
- From Microsoft 365 admin center page, expand the Users menu and select Active users.

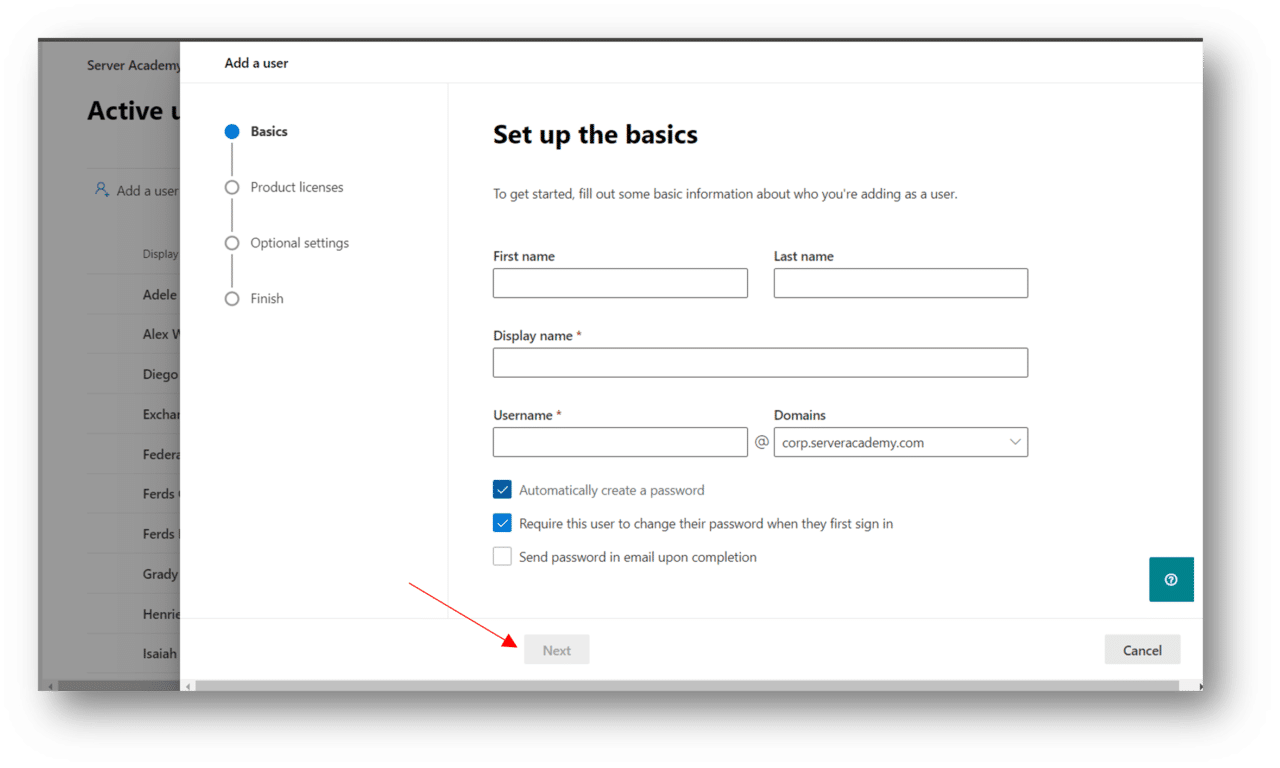
2. On the Active users page, click on Add a user. From the Set up the basics page, fill out all the necessary required information such as Display name and username. After filling in all necessary information, click on Next.
Note: If you have multiple domains added on your Microsoft 365 tenant, select the appropriate domain you want to assign for the user you are adding. Password can either be manually or automatically assign. If you want to receive the user credential after creating it, check the Send password in email upon completion.
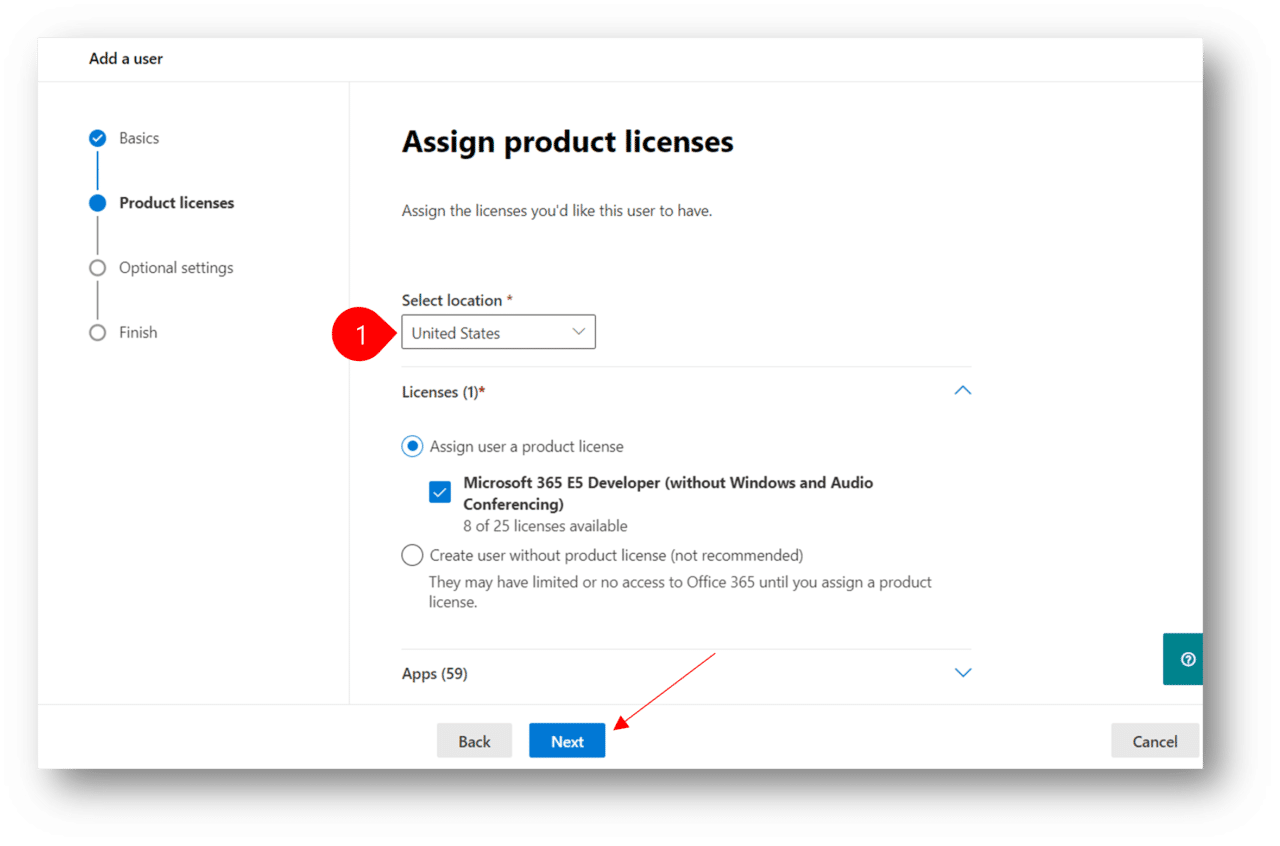
3. On the Assign product licenses page, choose the location of your user under Select location. Check the license that you want to assign for the user you are creating, under Assign user a product license. Click Next.
Note: If you want to customize the services or applications included on the license you are assigning, expand the Apps menu and uncheck the applications you do not want to allow the user to have access with.
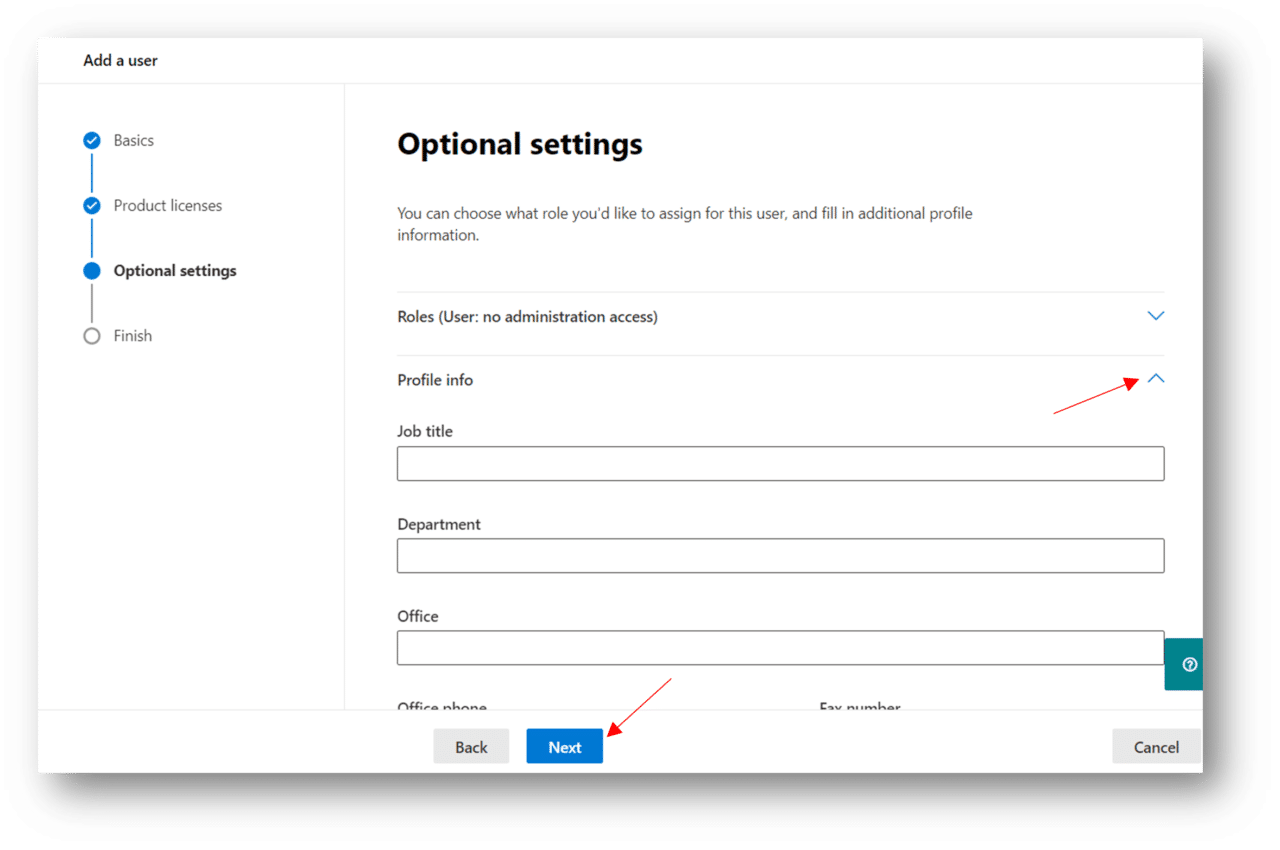
4. On the Optional settings, expand the Roles (User: no administration access) if you want to assign an admin role to the user you are creating. Expand Profile info and fill in the necessary information applicable for the user. (This is not a required action). Click Next.
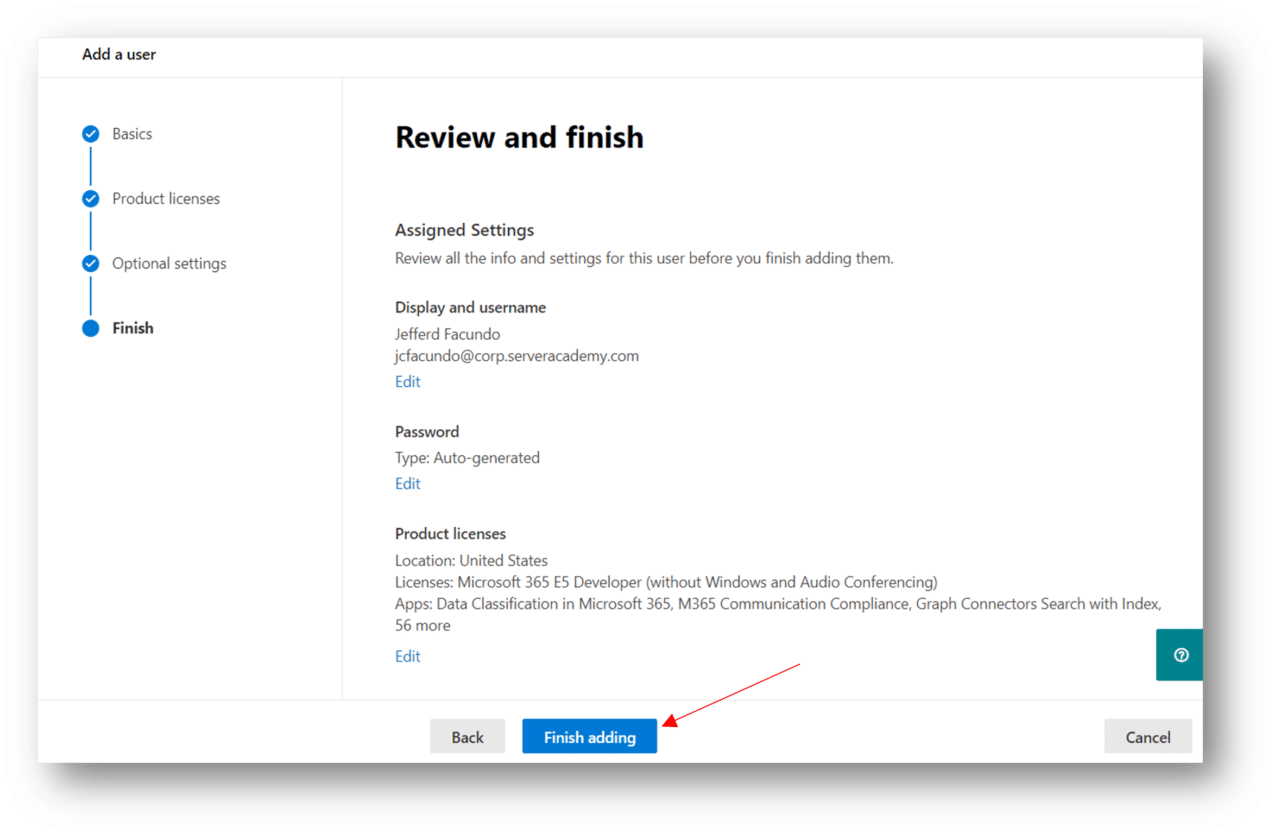
5. On the Review and finish page, review all the necessary details you have setup for the user. You may click Back if you need to update information from the previous pages, if not click Finish adding.
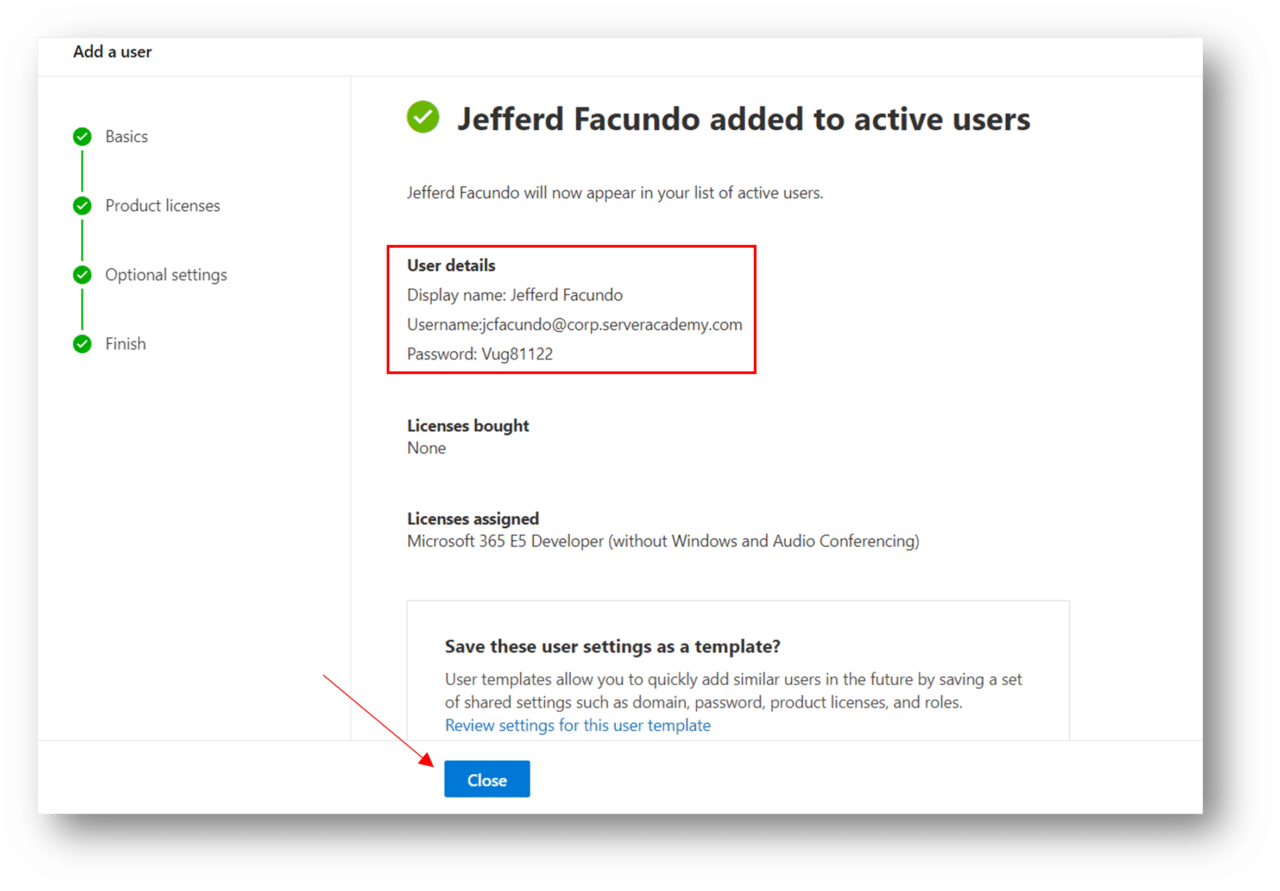
6. On the added to active users page, copy the User details (If you’ve opted to receive the password in email upon completion, you may also forward it to your user). It will contain the username and temporary password for your user. You will need to provide these details to your user. After copying the User details, click Close.
7. Under Active users page, you will see the user you have recently added. From this page, you may delete, modify, or reset the password of this user if you need to. You will also see the Sync status of this user. Sync status will tell you where the user is created – either On-Premise or In Cloud.

Next Step: Importing Multiple Users.


