In the lesson you will access the Exchange Admin Center for Exchange Online and create a mail flow rule that checks for sensitive information in emails sent from inside your organization. Step 1. Log in to Exchange Admin Center for Exchange Online. On your browser, login to Microsoft 365 Admin…
In the lesson you will access the Exchange Admin Center for Exchange Online and create a mail flow rule that checks for sensitive information in emails sent from inside your organization.
Step 1. Log in to Exchange Admin Center for Exchange Online.
- On your browser, login to Microsoft 365 Admin Portal via https://admin.microsoft.com
- On the Sign in page, enter your Global Admin username in an email format and then enter your password on the Enter password page. Select Sign in.
- On the Stay signed in? window, select the Don’t show this again check box and then select Yes.
- From the Microsoft 365 Admin center page, navigate to the left column for the admin menus. Click Show all.

5. On the left menus, scroll down to Admin centers and select Exchange. This opens the new Exchange admin center for Exchange Online.
Note: For the purpose of this tutorial, you will use the classic Exchange admin center because the new Exchange admin center does not yet include the entire Exchange Online feature set.
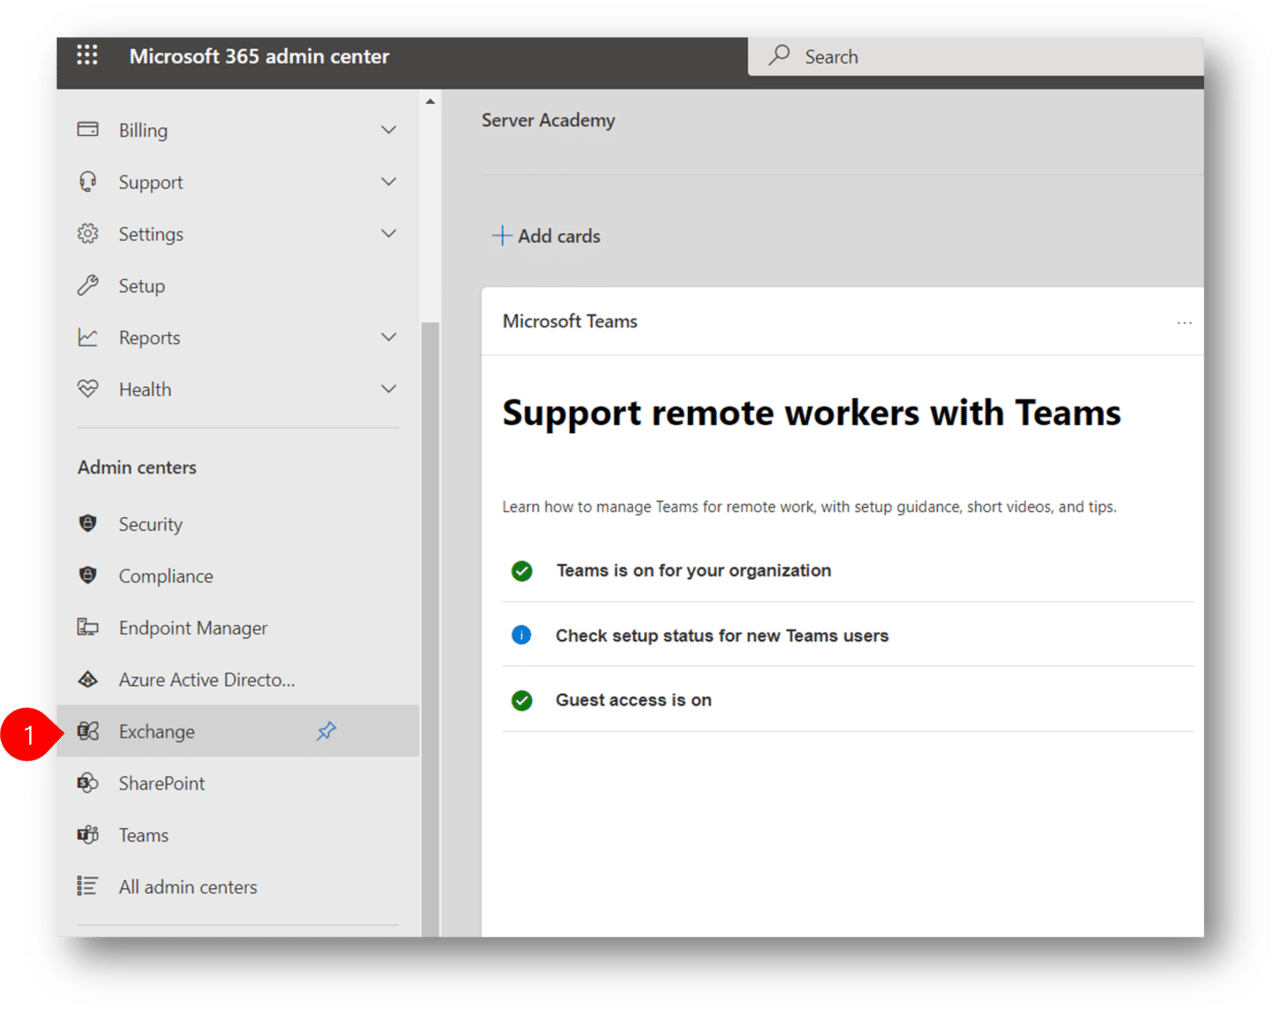
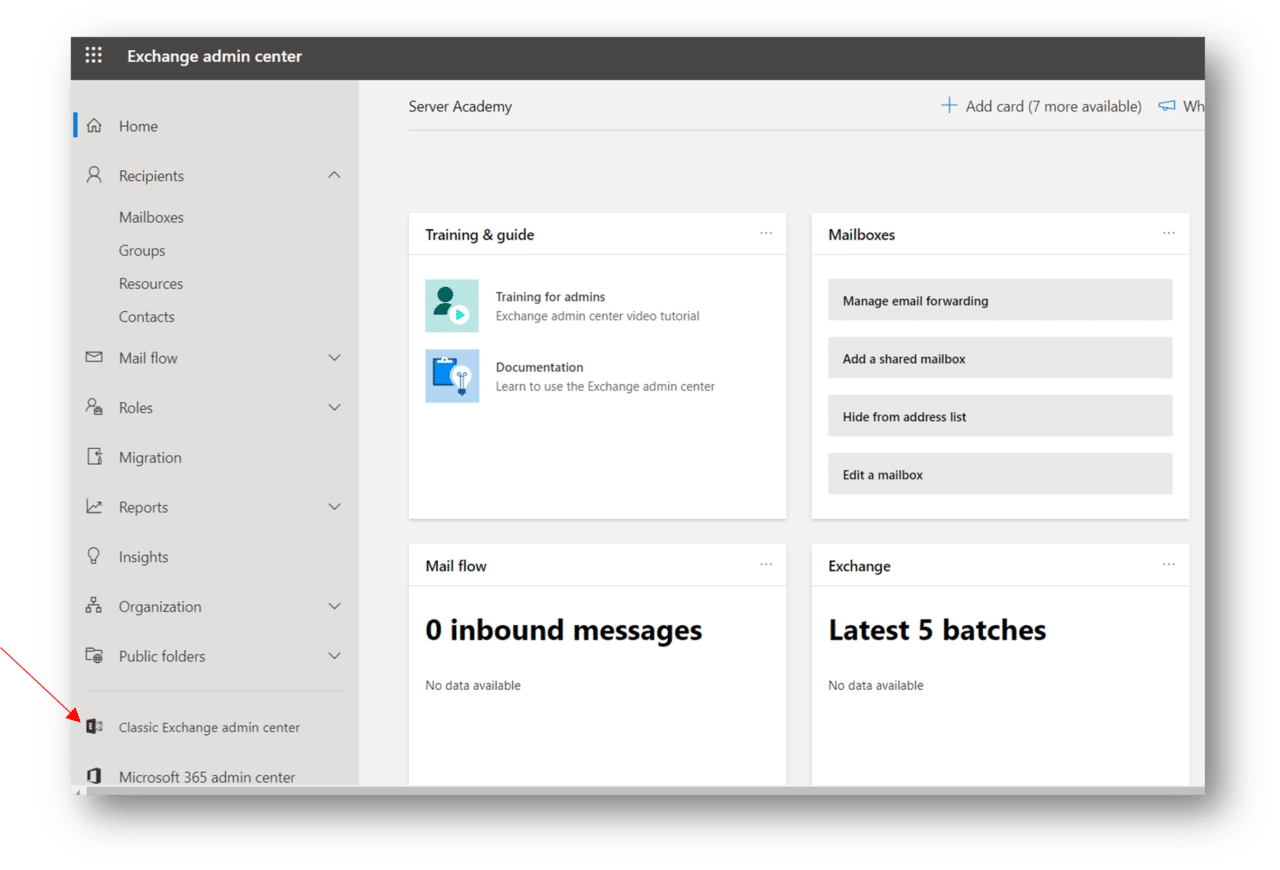
6. From the new Exchange Admin center, scroll down on the left-hand navigation pane and click Classic Exchange admin center. This will open in a new tab.
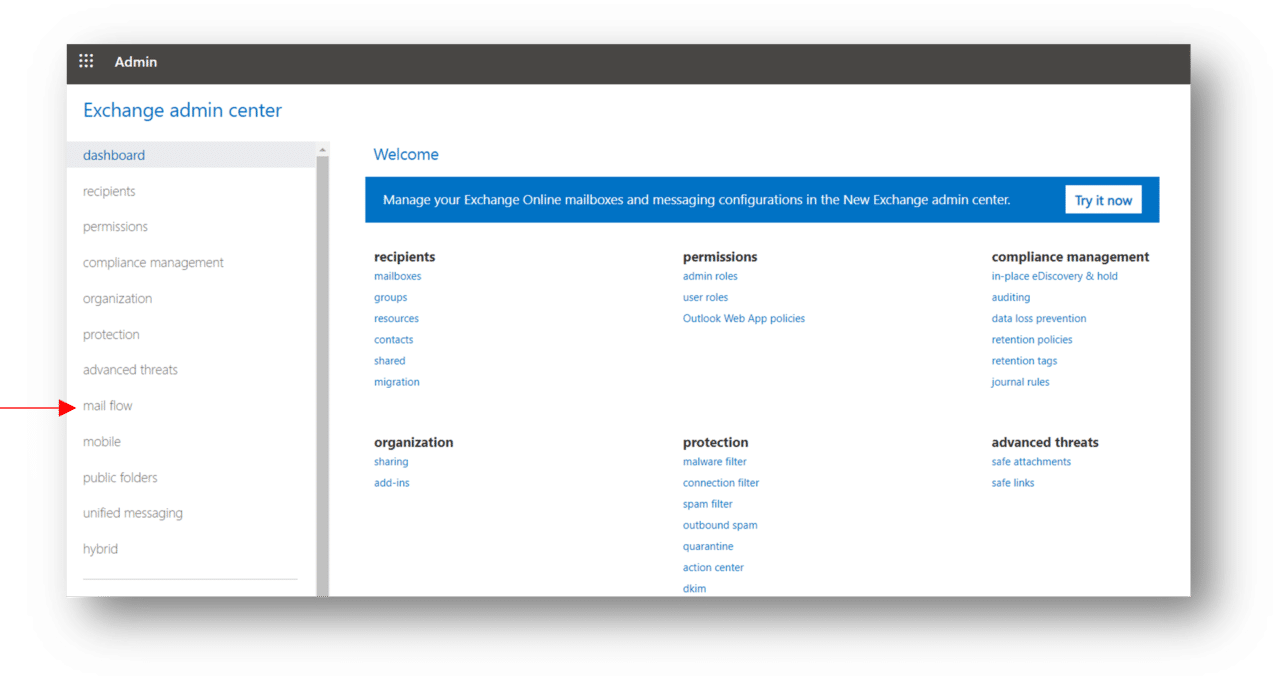
7. In the (classic) Exchange admin center, in the left-hand navigation pane, select mail flow.
Step 2. Creating the mail flow rules.
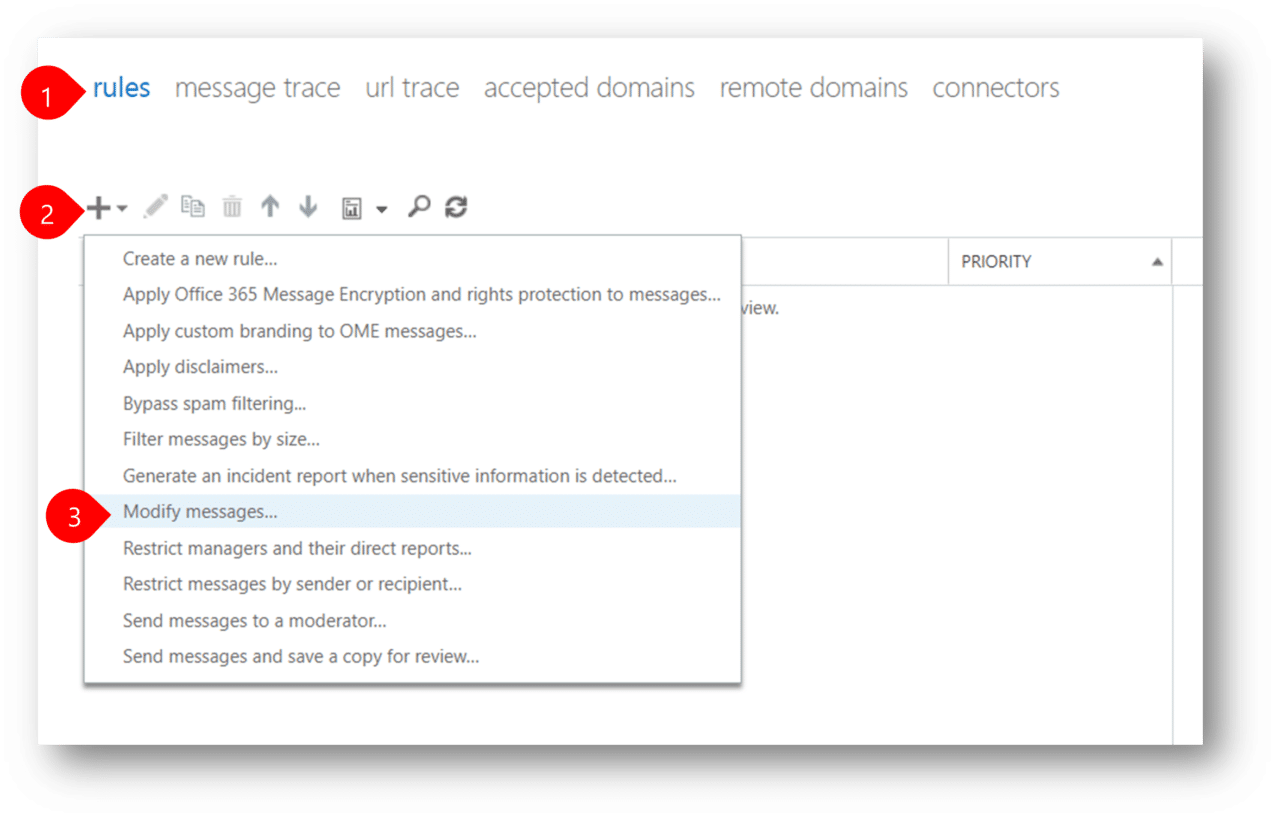
- At the top of the page, the rules tab displays by default. Stay in this tab. Select the plus sign (+) icon in the menu bar, and in the drop-down menu that appears, select Modify messages.
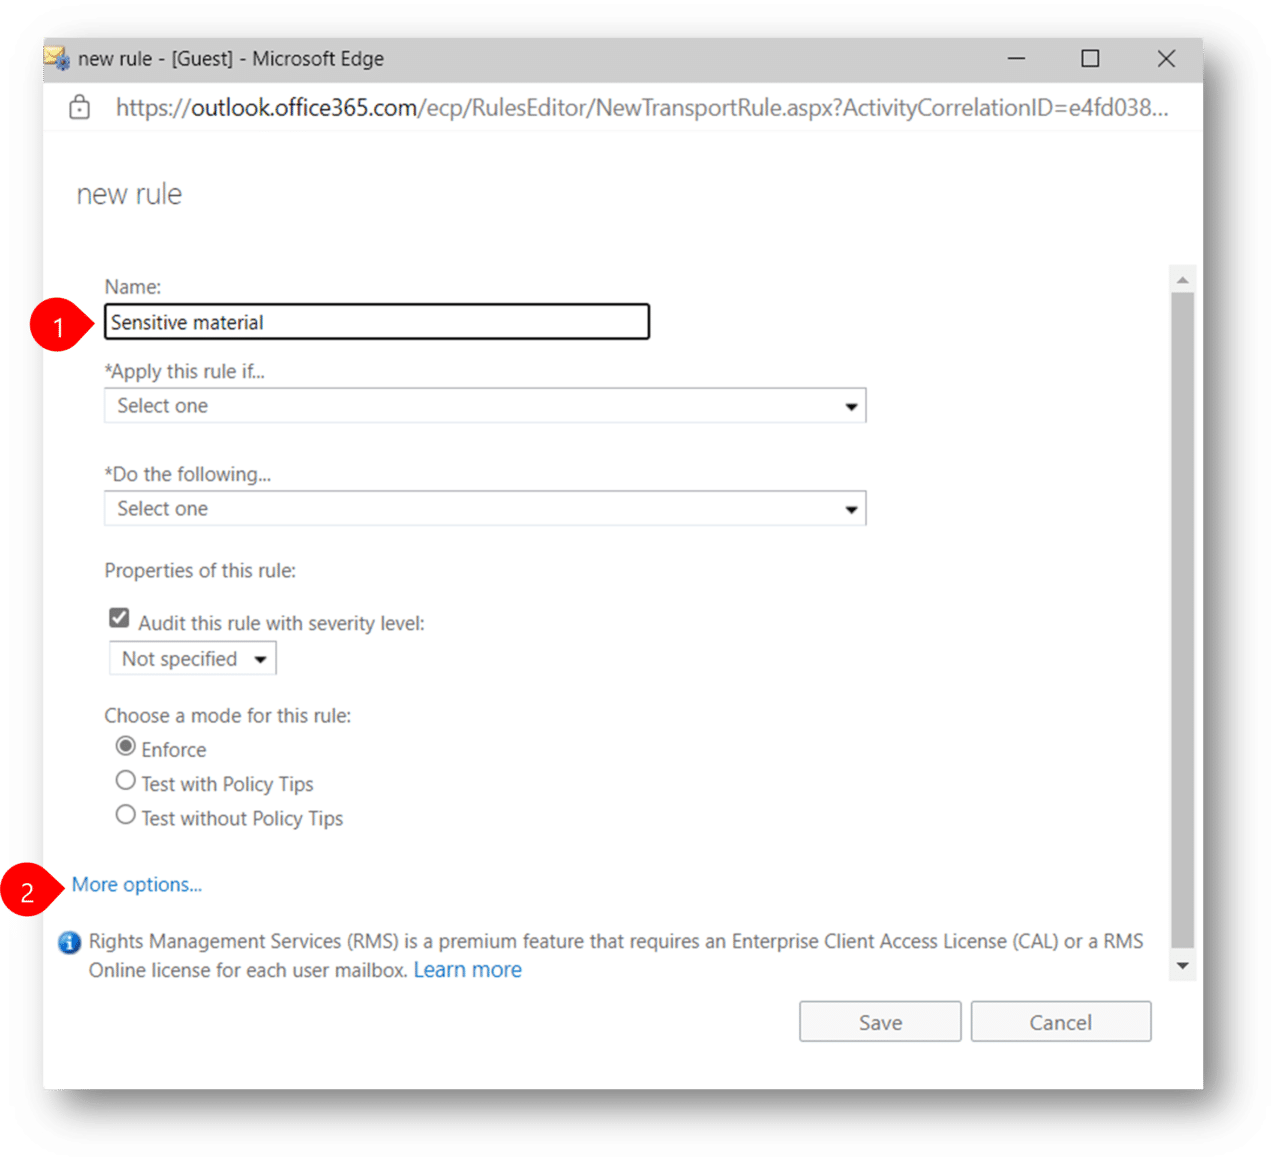
2. In the new rule window that appears, enter Sensitive material in the Name field. Note that by default, you can only enter one condition (the Apply this rule if… field). Since this rule requires multiple conditions, select More options… that appears at the bottom of the window. This displays an add condition button that enables you to enter multiple conditions and actions.
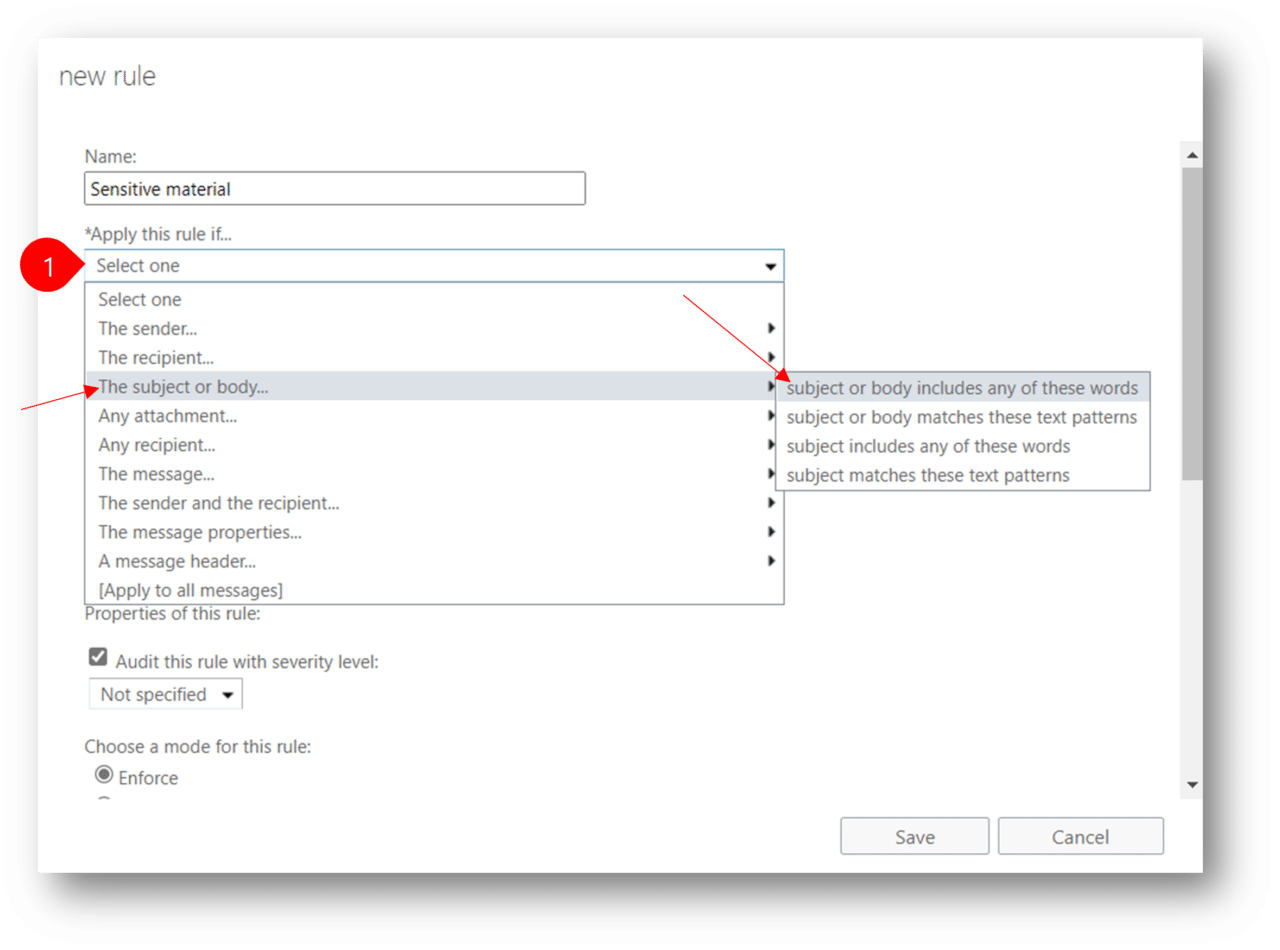
3. To add the first condition, select the drop-down arrow in the Apply this rule if… field. In the drop-down menu that appears, hover your mouse over The subject or body…. In the menu that appears, select subject or body includes any of these words.
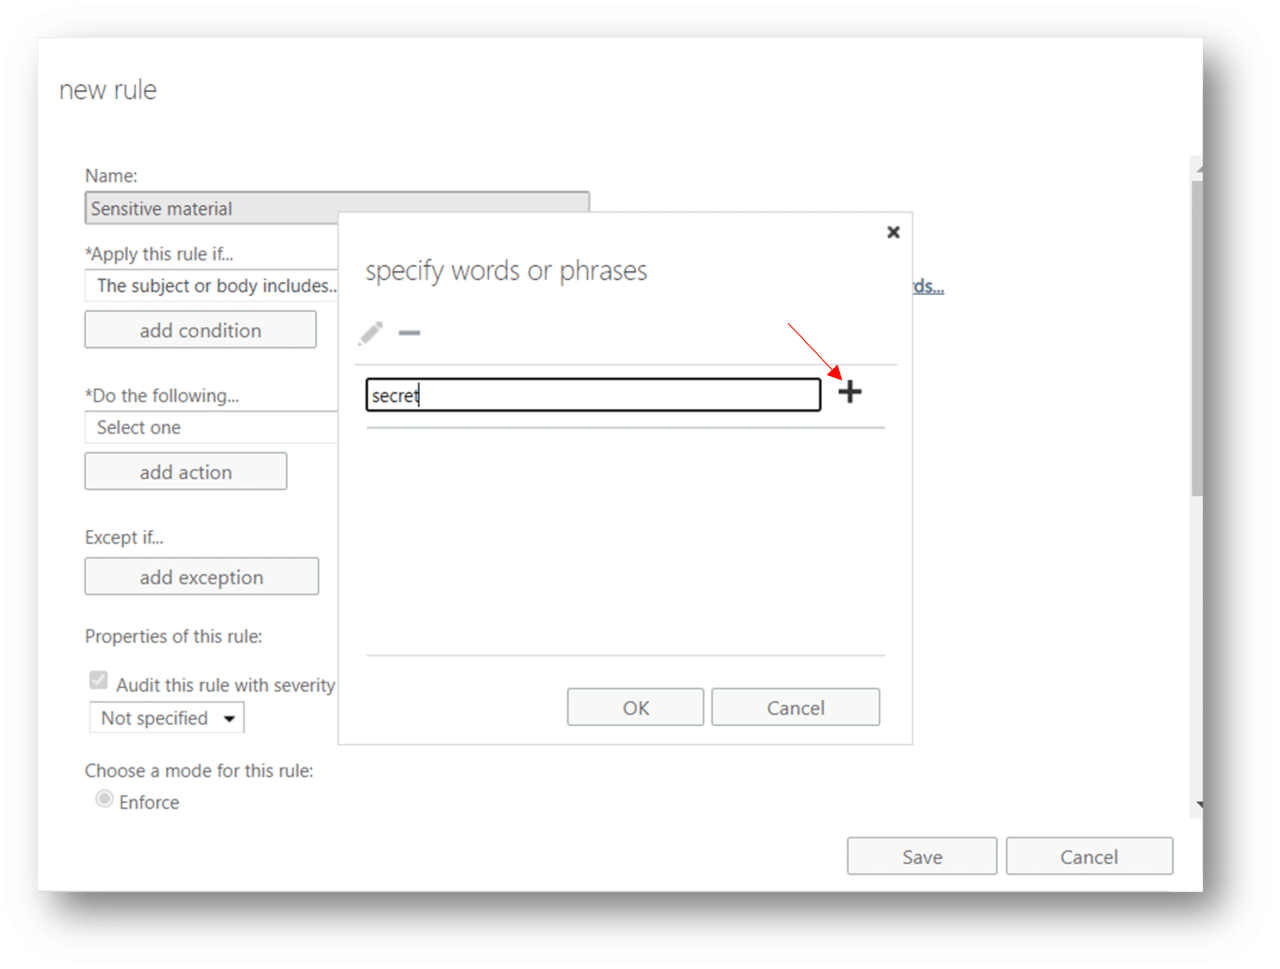
4. This opens a specify words or phrases window. In the text field, enter secret and select plus (+) sign. In the text field, enter classified and select the plus sign, then repeat this step and enter sensitive. (Please note that these words are not mandatory, these are just for the purpose of this tutorial)
5. The three words should display below the text field. Select OK.
6. In the new rule window, the three words should display to the right of the The subject or body includes… condition. Select the add condition button to add another condition.
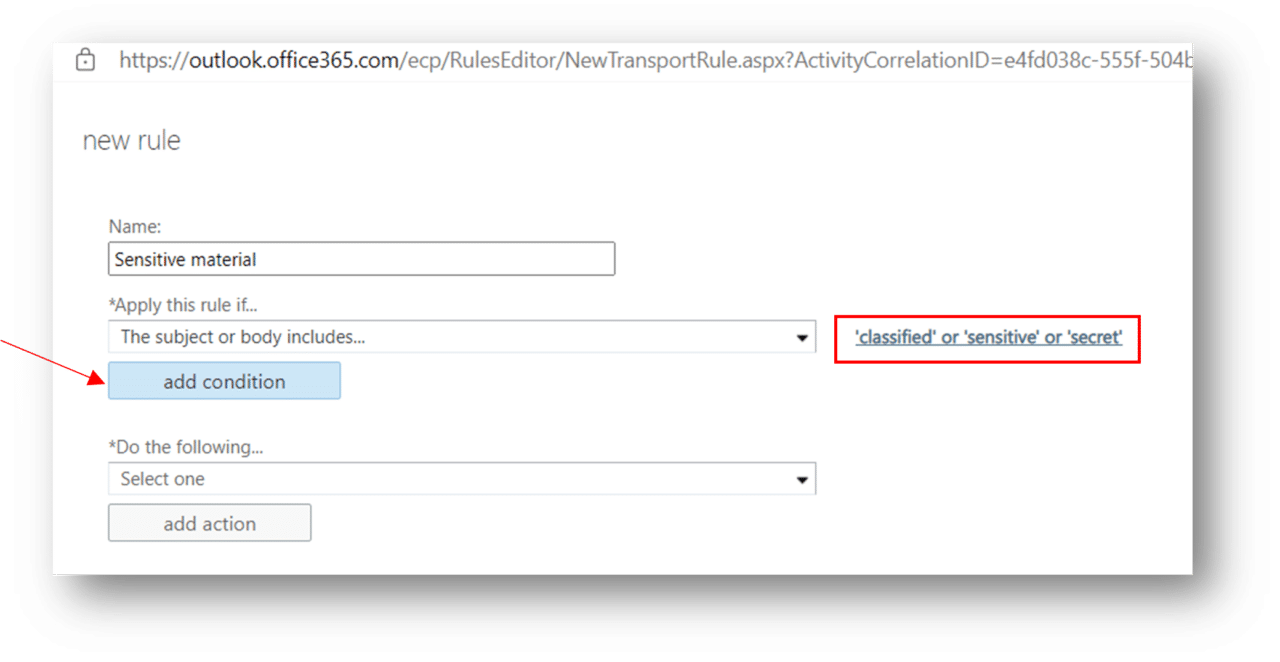
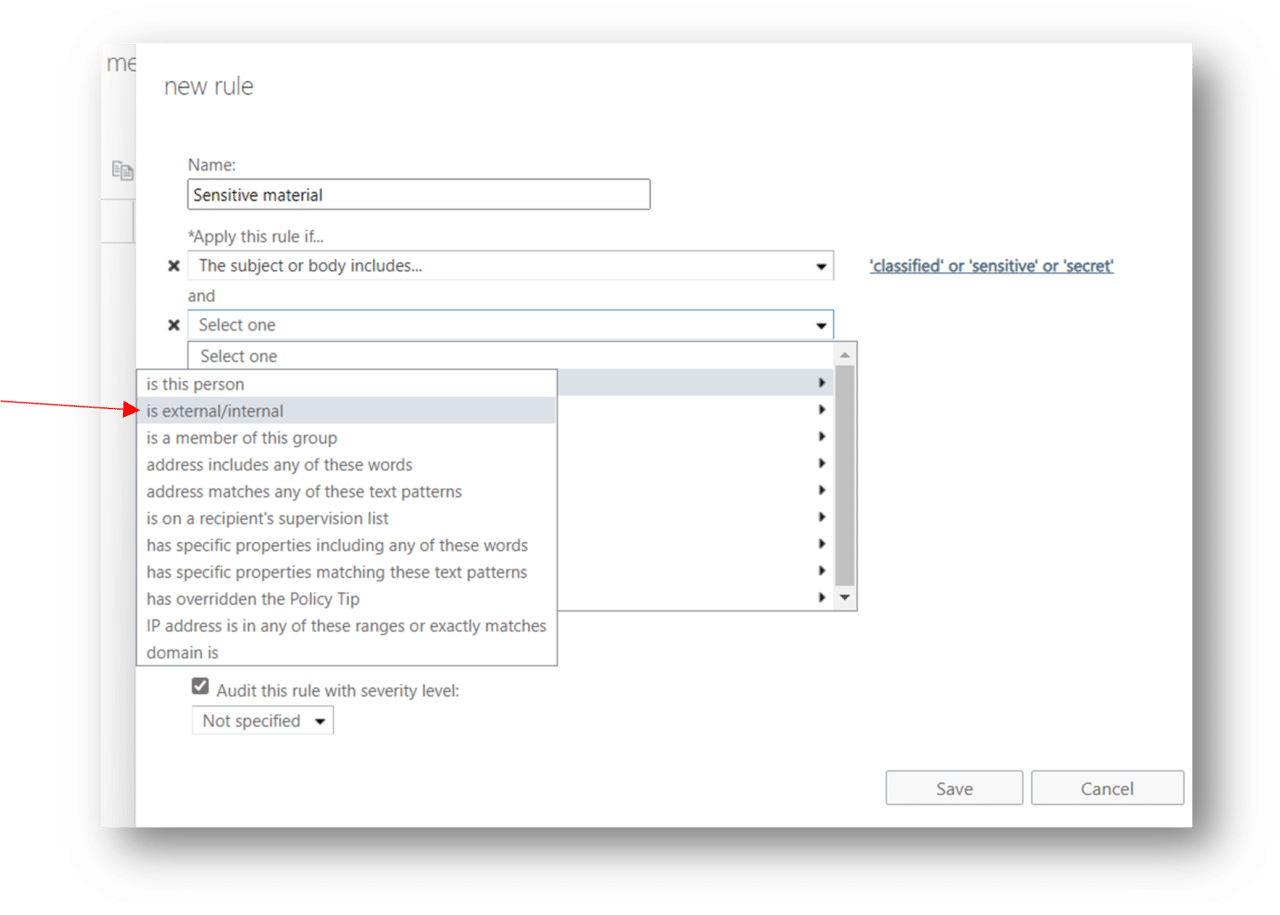
7. Select the drop-down arrow in the second condition field that appears (Note how this creates a Boolean And condition). Hover your mouse over The sender… and in the menu that appears, select is external/internal.
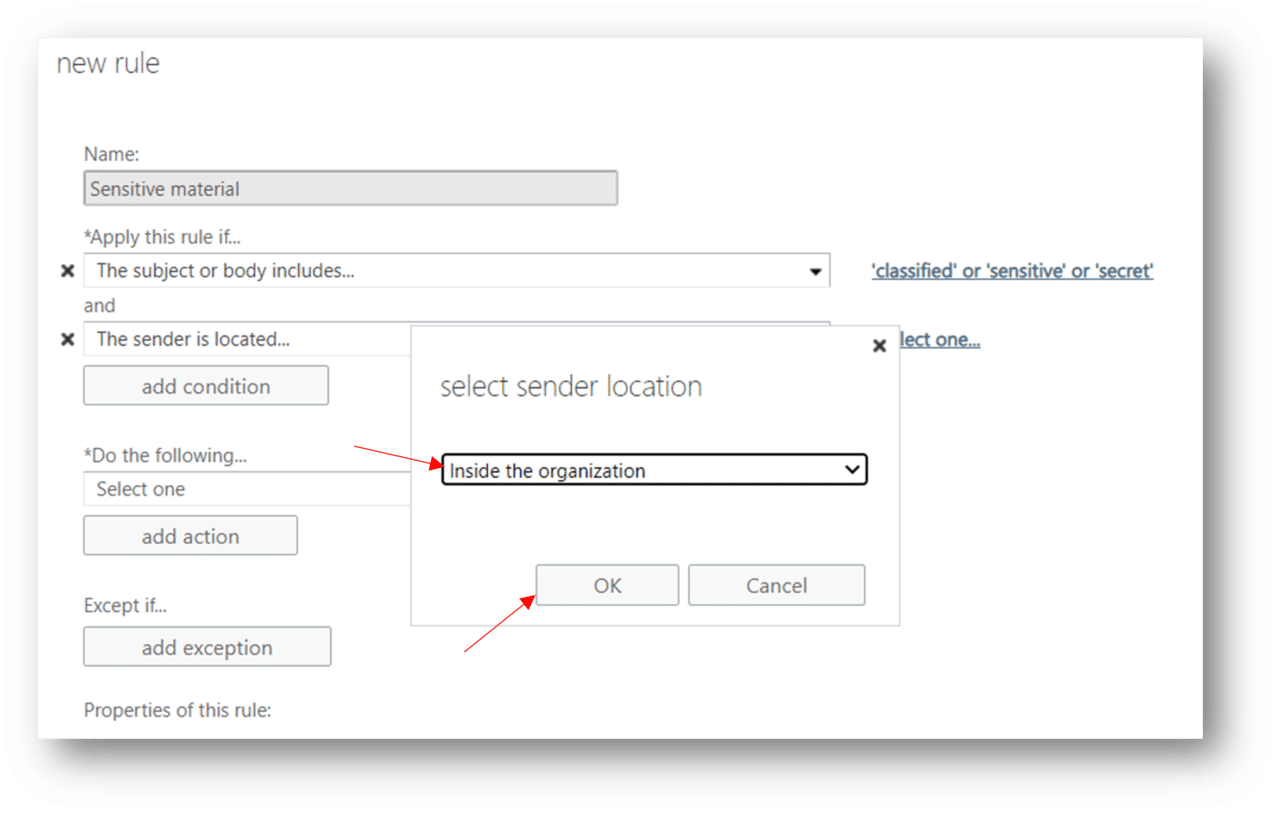
8. In the select sender location window, select the drop-down arrow, select Inside the organization, and then select OK.
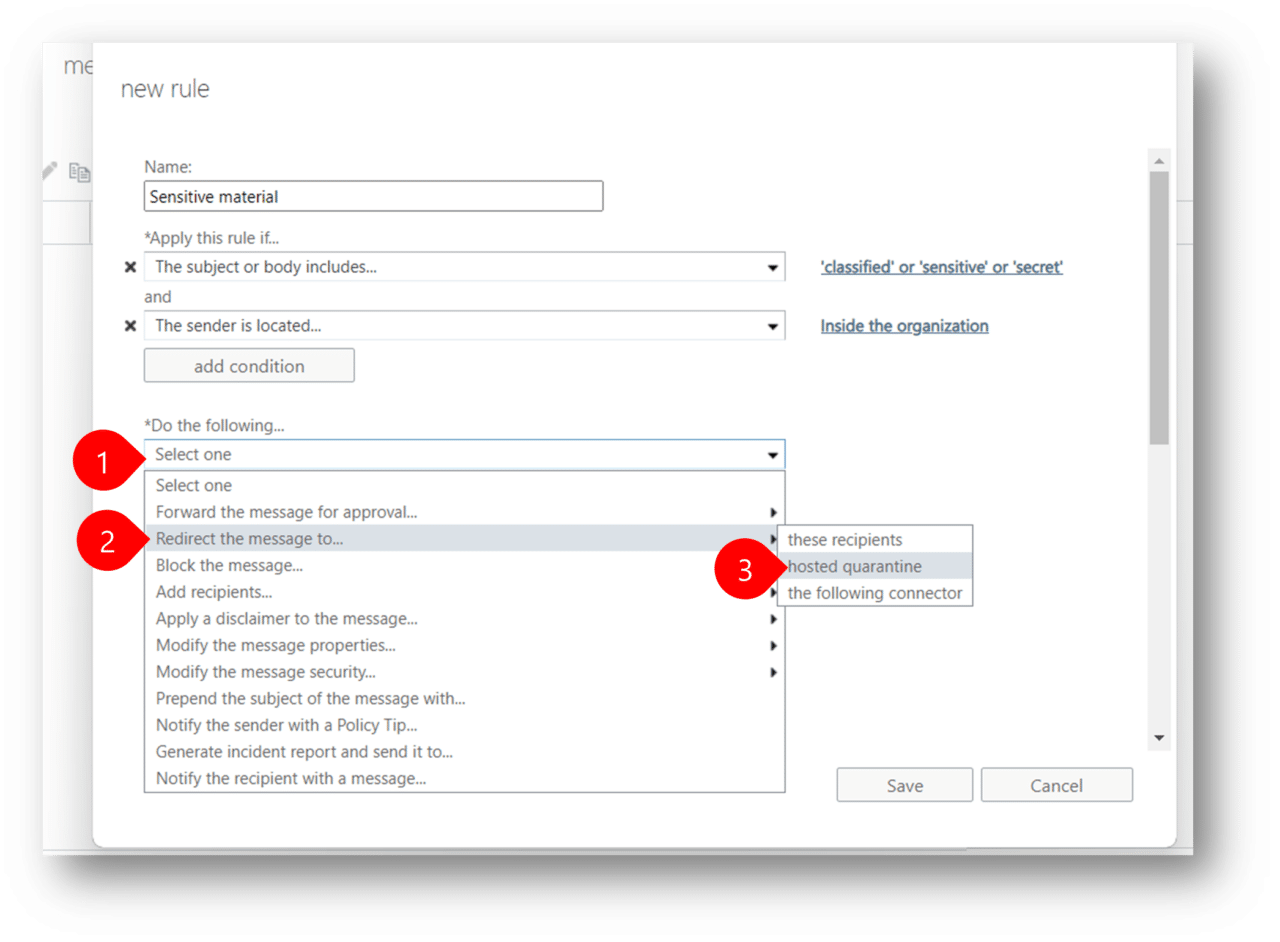
9. Select the drop-down arrow in the Do the following… field. Hover your mouse over Redirect the message to… and in the menu that appears, select hosted quarantine.
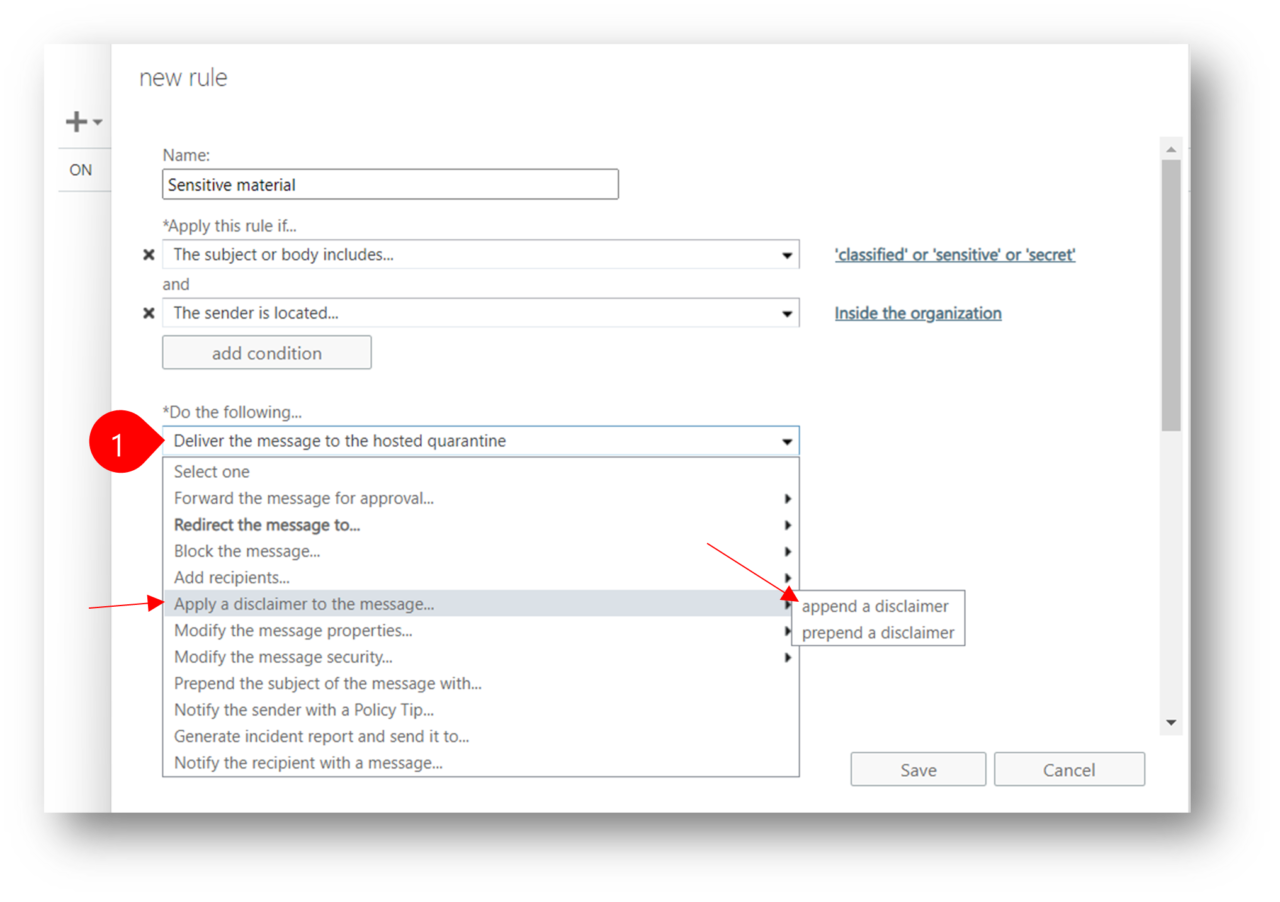
10. Go to *Do the following… Select the drop-down arrow in the action field that appears. Hover your mouse over Apply a disclaimer to the message… and in the menu that appears, select append a disclaimer.
11. To the right of the second action field that displays Append the disclaimer…, select Enter text.
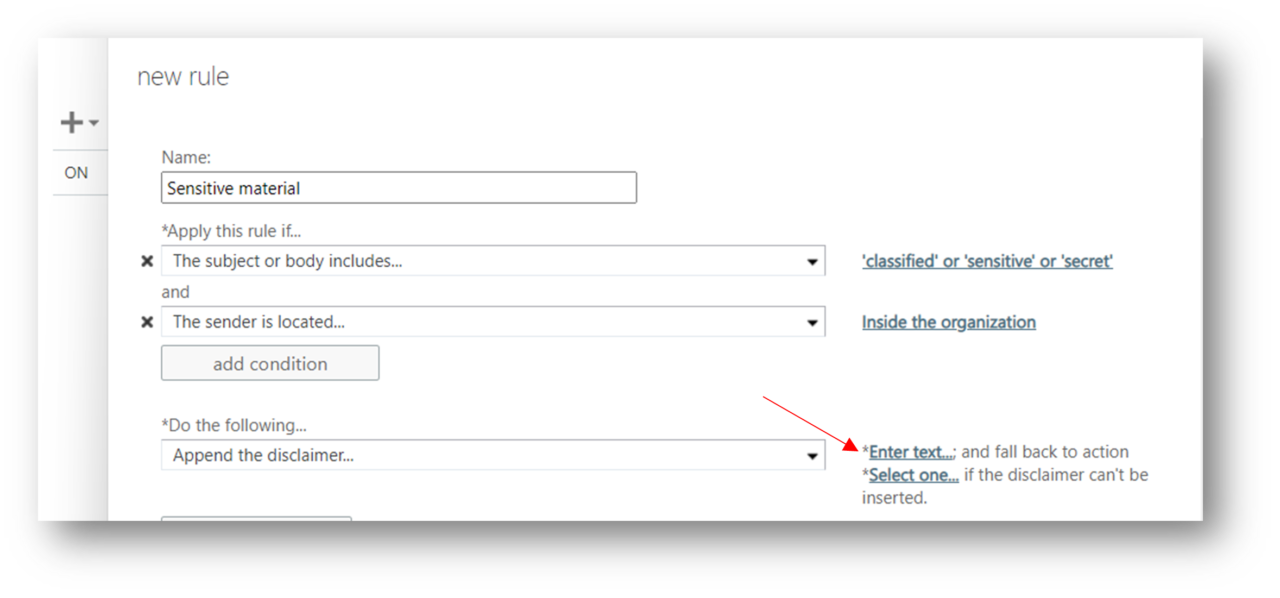
12. In the specify disclaimer text window, enter the following message in the field: This message contains sensitive material that can harm the company or your team. Select OK.
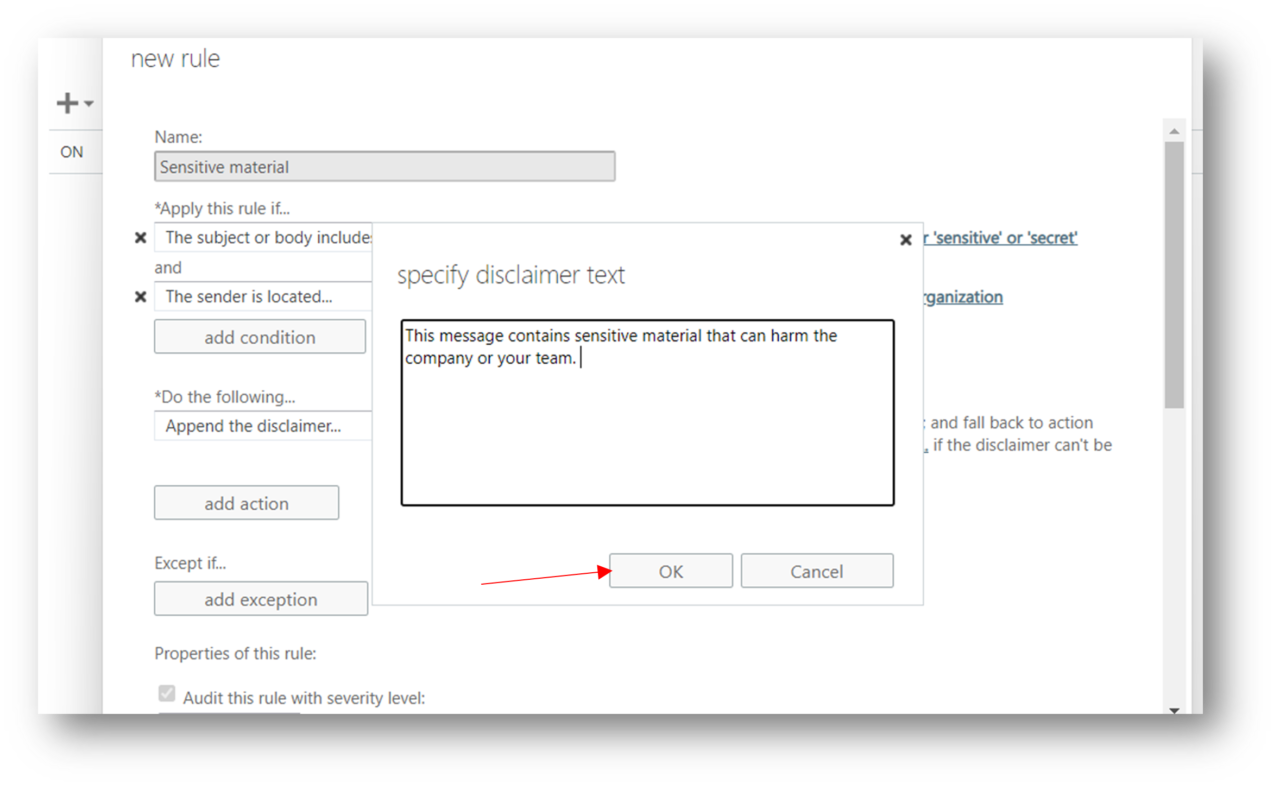
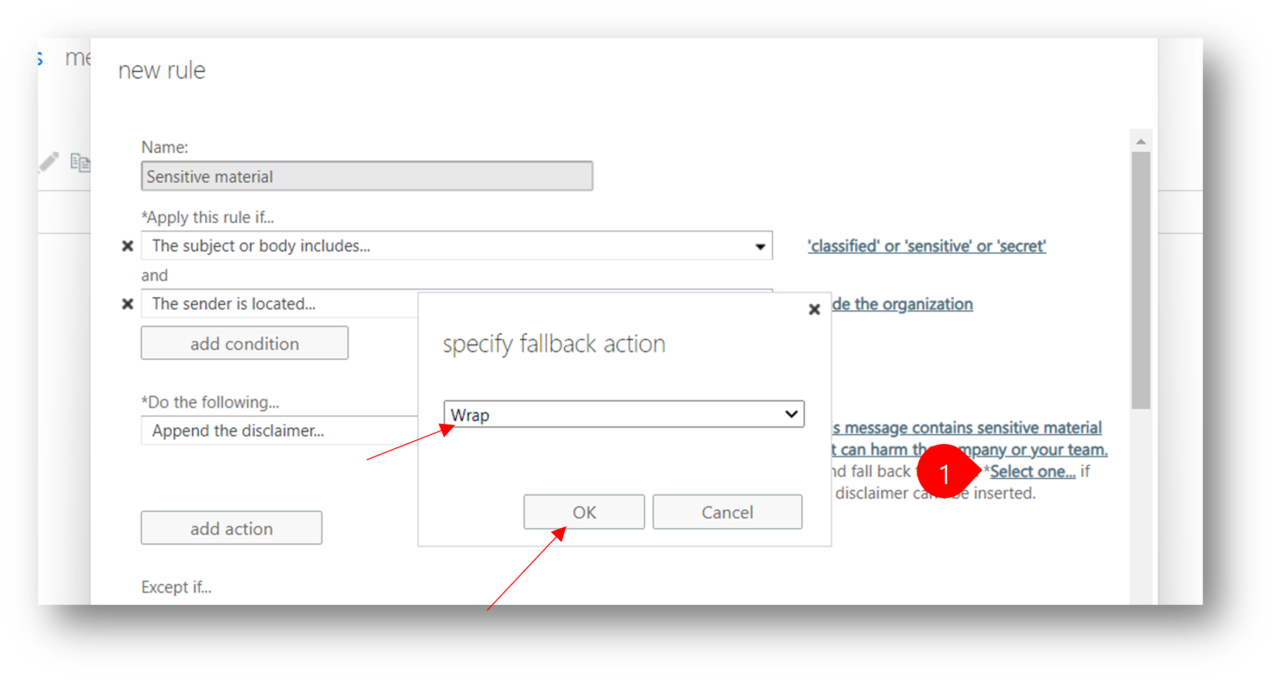
13. In the specify fallback action window, Wrap displays as the default fallback option. This is the option you want to select as the fallback option (Wrap means if the disclaimer cannot be inserted into the original email, it will attach the message to a new disclaimer email) so select OK.
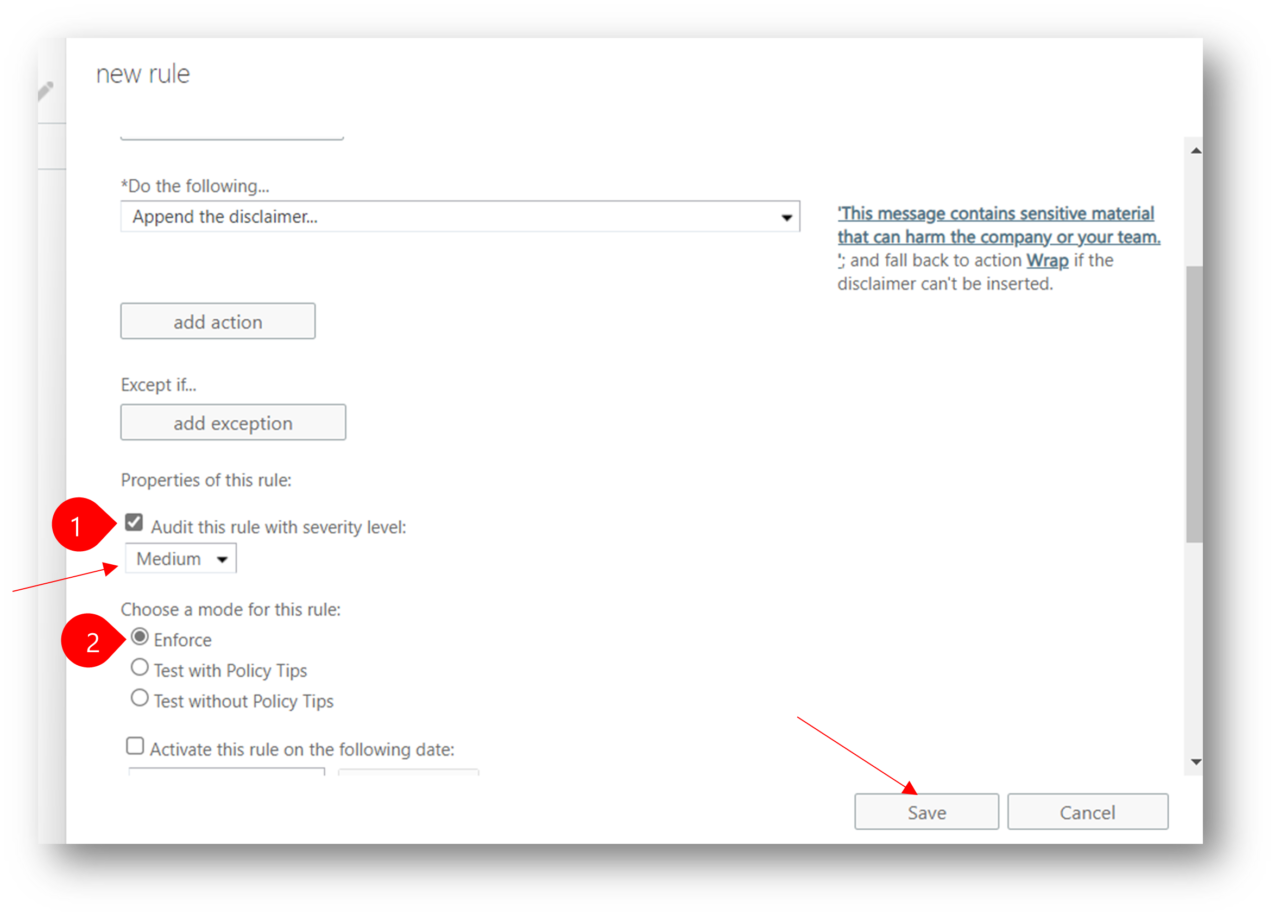
14. Scroll down in the new rule window and under the Properties of this rule section, verify the Audit this rule with severity level: checkbox is selected. If it’s not checked, then select it now. Select the severity level drop-down arrow and select Medium. In the Choose a mode for this rule: option, select Enforce. Select Save.
Step 3. Confirm if the new rule is successfully created.
- The new Sensitive material rule should display in the list of rules. This rule should be selected, and a Sensitive material pane should appear on the right that displays the conditions and actions of this rule. Verify the conditions and actions are correct. If corrections are needed, select the pencil (Edit) icon in the menu bar and make the necessary corrections


