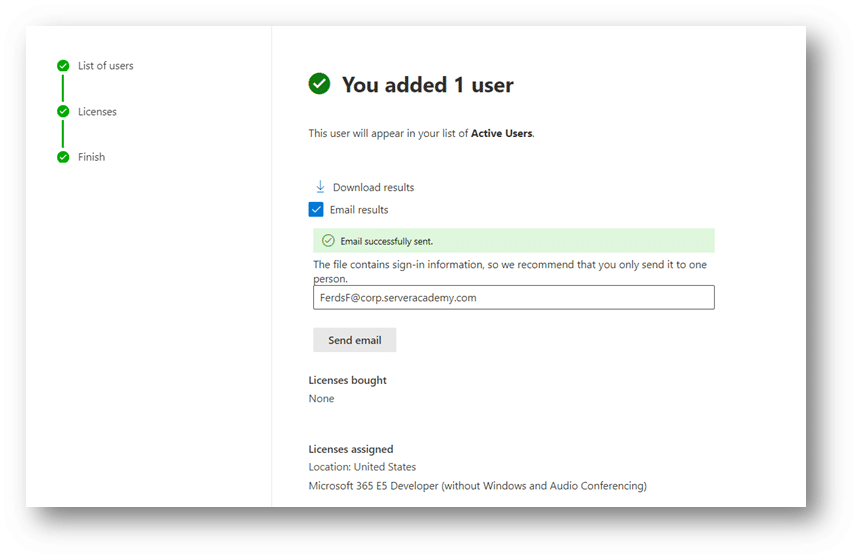
In this lesson, you will learn how to import multiple cloud users to your Microsoft 365 tenant. If you want to learn about getting started with Microsoft 365, click here. Step 1. Create your users’ information into CSV file using the given template in your tenant. On your browser, login…
In this lesson, you will learn how to import multiple cloud users to your Microsoft 365 tenant. If you want to learn about getting started with Microsoft 365, click here.
Step 1. Create your users’ information into CSV file using the given template in your tenant.
- On your browser, login to Microsoft 365 Admin Portal via https://portal.office.com
- On the Sign in page, enter your Global Admin username in an email format and then enter your password on the Enter password page. Select Sign in.
- On the Stay signed in? window, select the Don’t show this again check box and then select Yes.
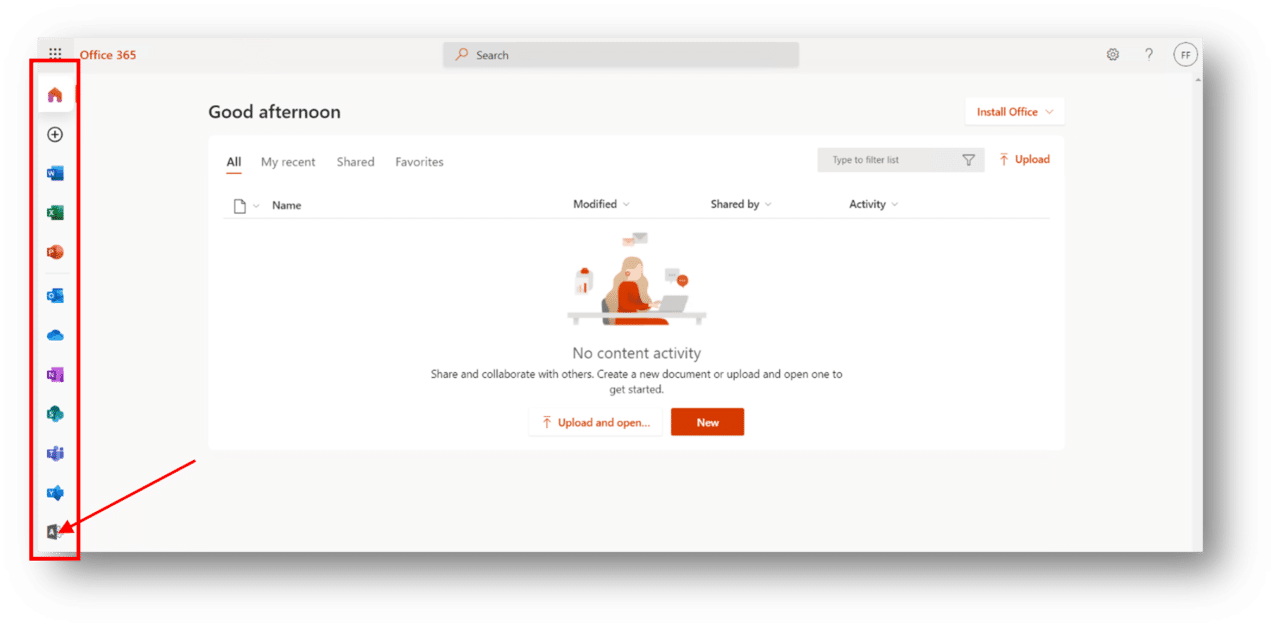
- In the Office 365 home page, in the column of Microsoft 365 app icons on the left-side of the screen, select the Admin icon to navigate to the Microsoft 365 admin center. This will open in a new tab.
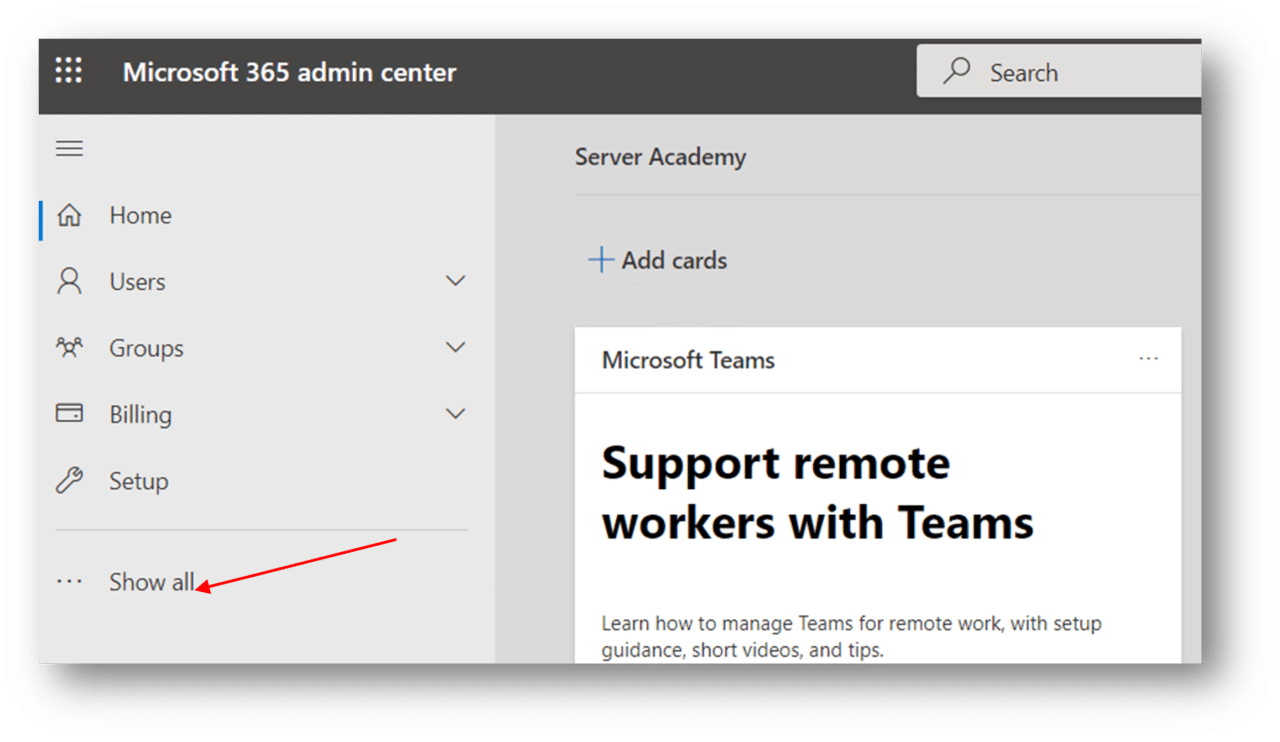
5. From the Microsoft 365 Admin center page, navigate to the left column for the admin menus. Click Show all.
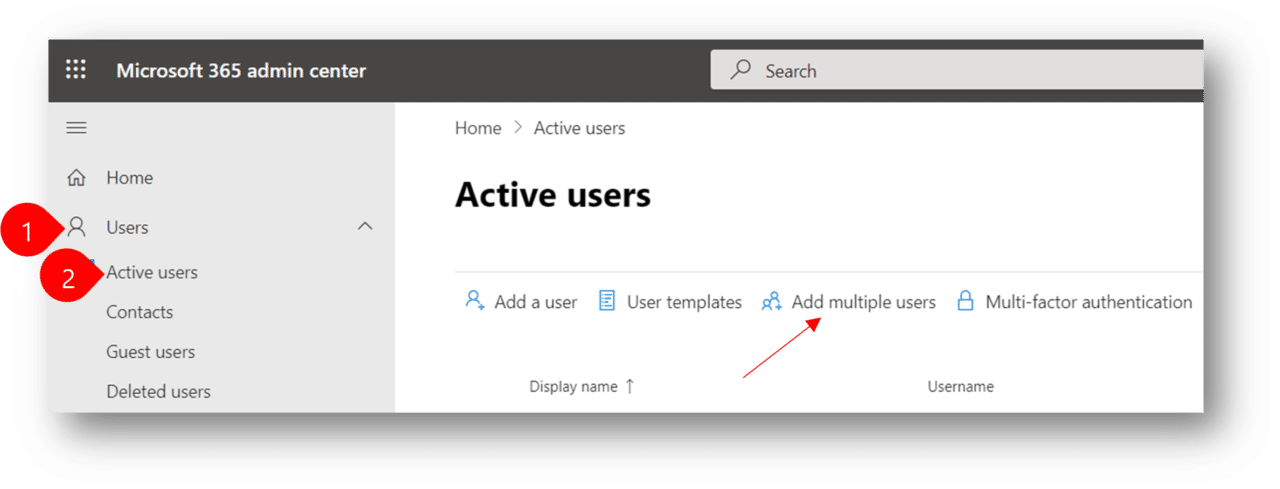
6. On the left menus that will appear, expand Users and select Active users. From the Active users page, click on Add multiple users.
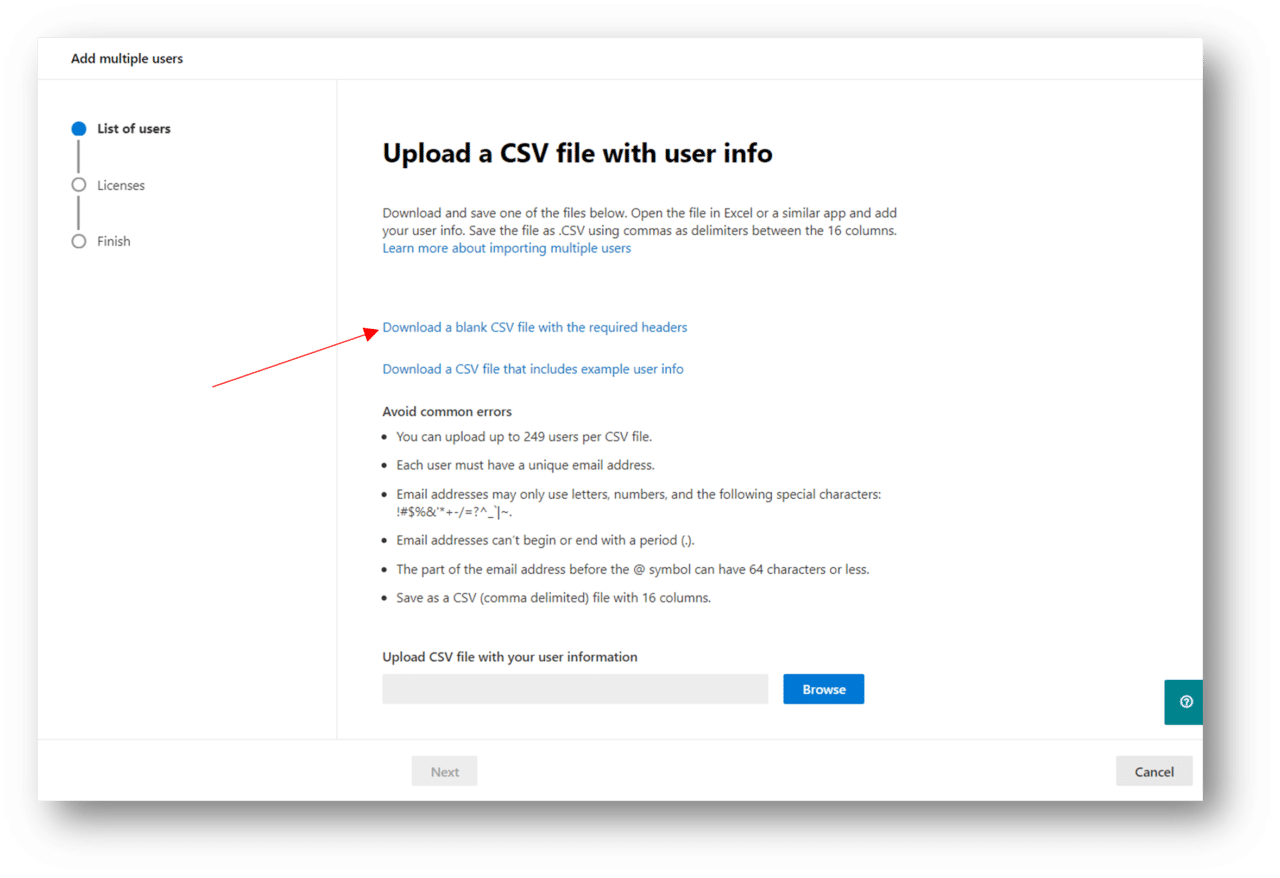
7. On the Add multiple users window, click Download a blank CSV file with the required headers. It will download the csv file template.
8. On the csv file, fill in all the necessary information for your users. You can only upload up to 249 users per CSV file. Take note that you do not necessarily need to fill in all the columns listed on the csv file. Below are the required info you need to fill in:
- Username (this should be in an email format using the domain you have connected to your tenant)
- Display Name (you may fill in First and Last Name separately as well)
- Country or Region (this will be used to provide correct configuration of the license that you will assign to the users)
Please also note to avoid common errors:
- Each user must have a unique email address.
- Email addresses may only use letters, numbers, and the following special characters: !#$%&’*+-/=?^_`|~.
- Email addresses can’t begin or end with a period (.).
- The part of the email address before the @ symbol can have 64 characters or less
Step 2: Import your users from the CSV file you have created.
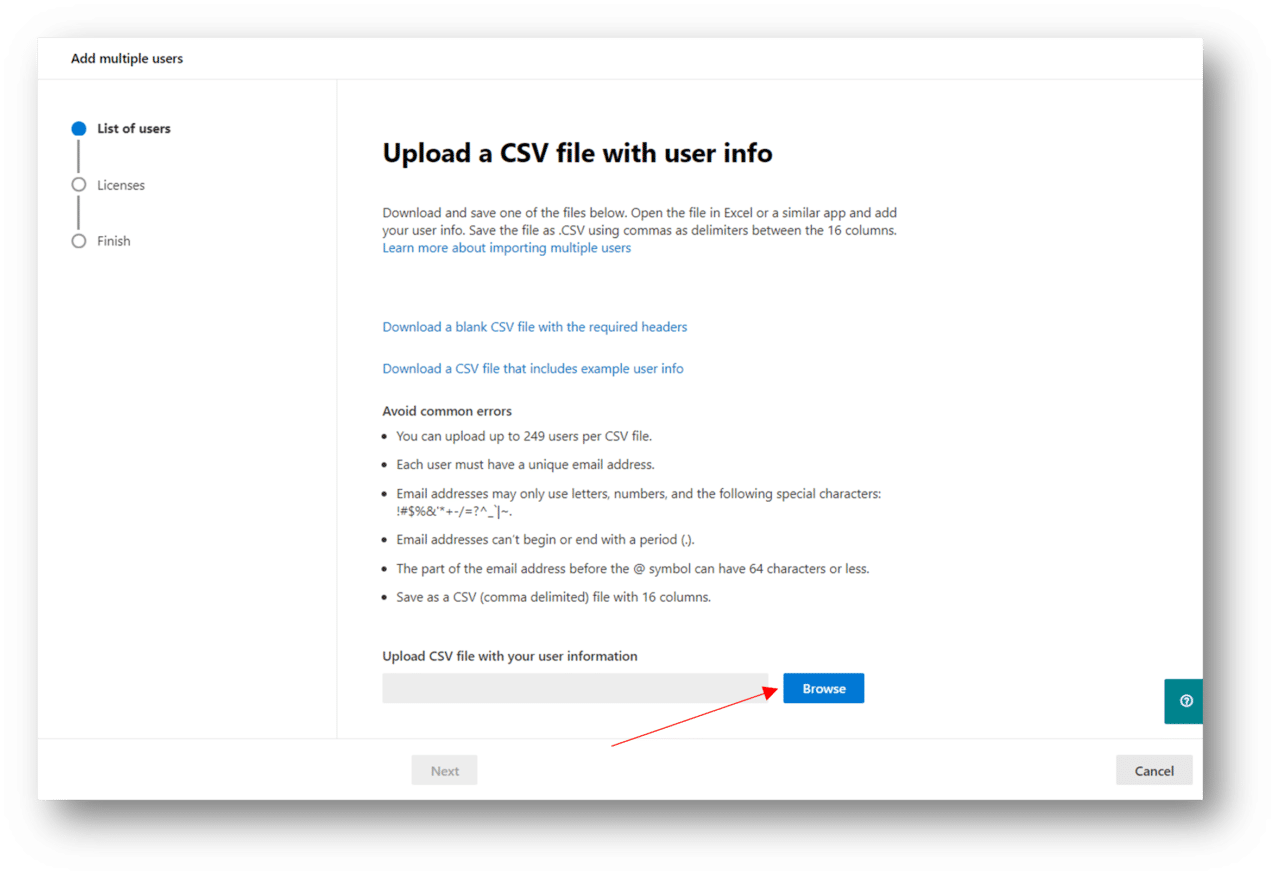
- Once you are done setting up your users’ information on the CSV file, upload it on the Add multiple users window, by clicking the Browse button. It will validate if there are no errors on your csv file. Edit your csv file if needed
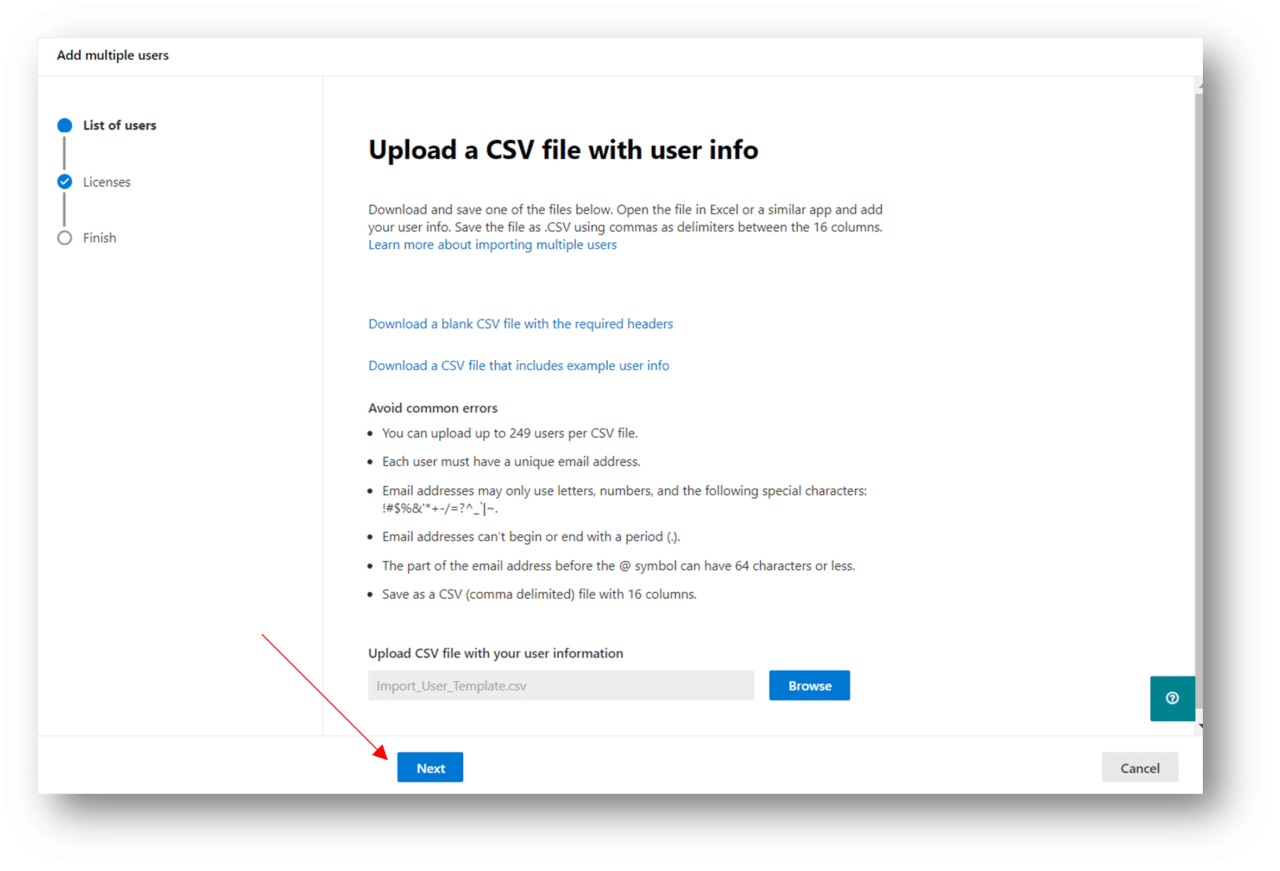
2. If there are no errors on your file, click on Next.
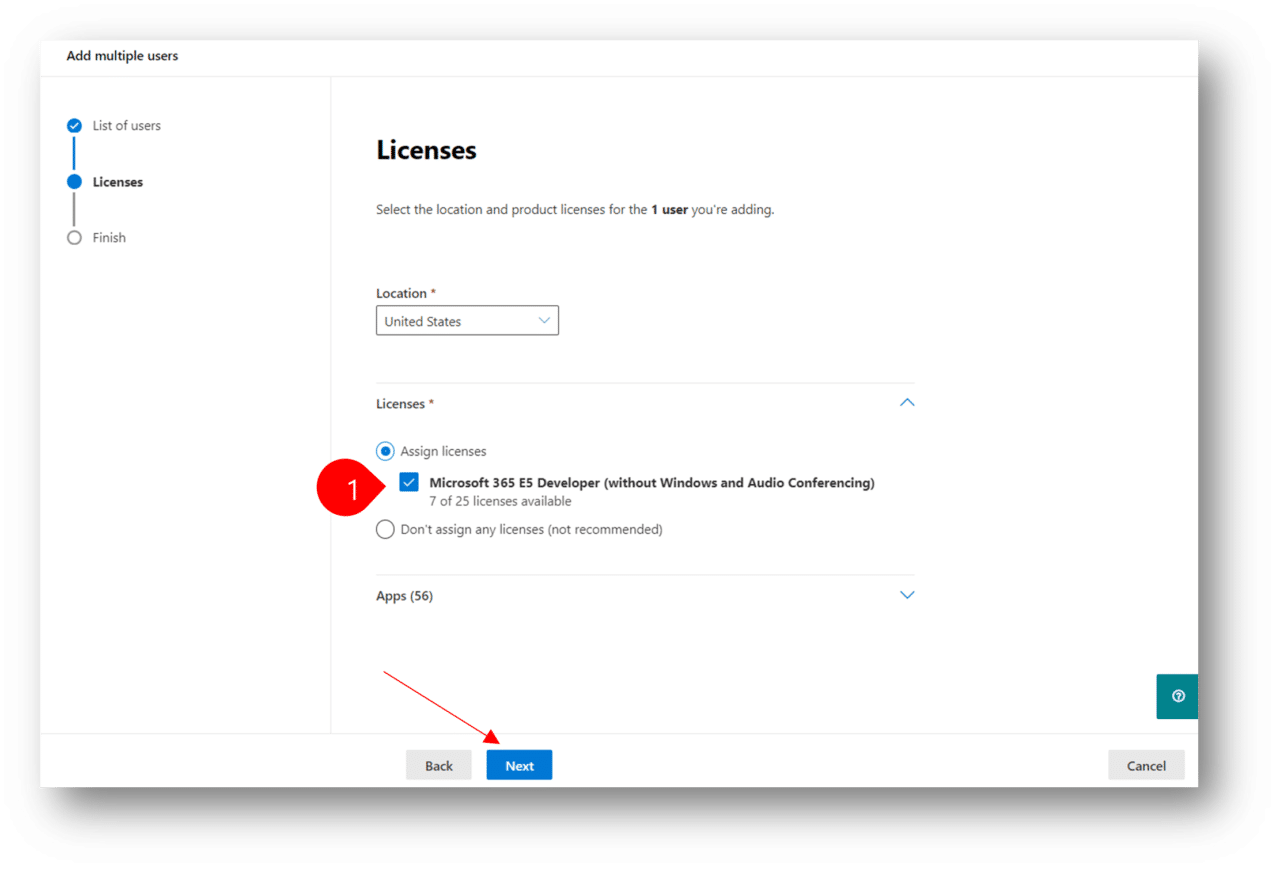
3. On the Licenses window, select the appropriate license you want to assign for your users and click on Next. If you need to customize the application or service you want to enable for the user, expand Apps and enable or disable them.
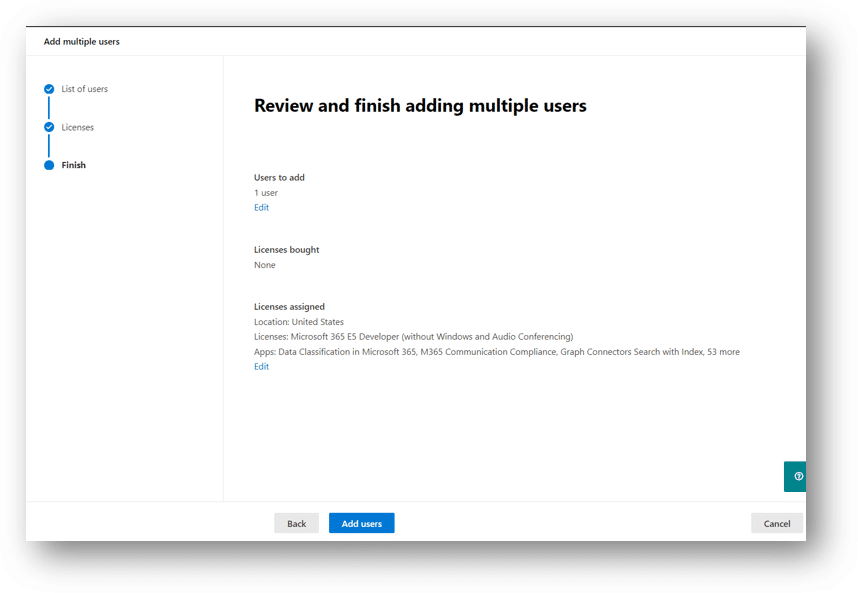
4. On Review and finish adding multiple users, click on Add users if there are no modifications needed for the users you are importing. Note that you can still modify them individually even after importing.
Step 3. Provide the credentials to your users.
On the last window after adding users, you will be provided with two options on how to retrieve the credentials that were generated for your users.
- Download result – this will let you download the generated credentials in a csv file. You may review the csv file and provide the credential information to your users.
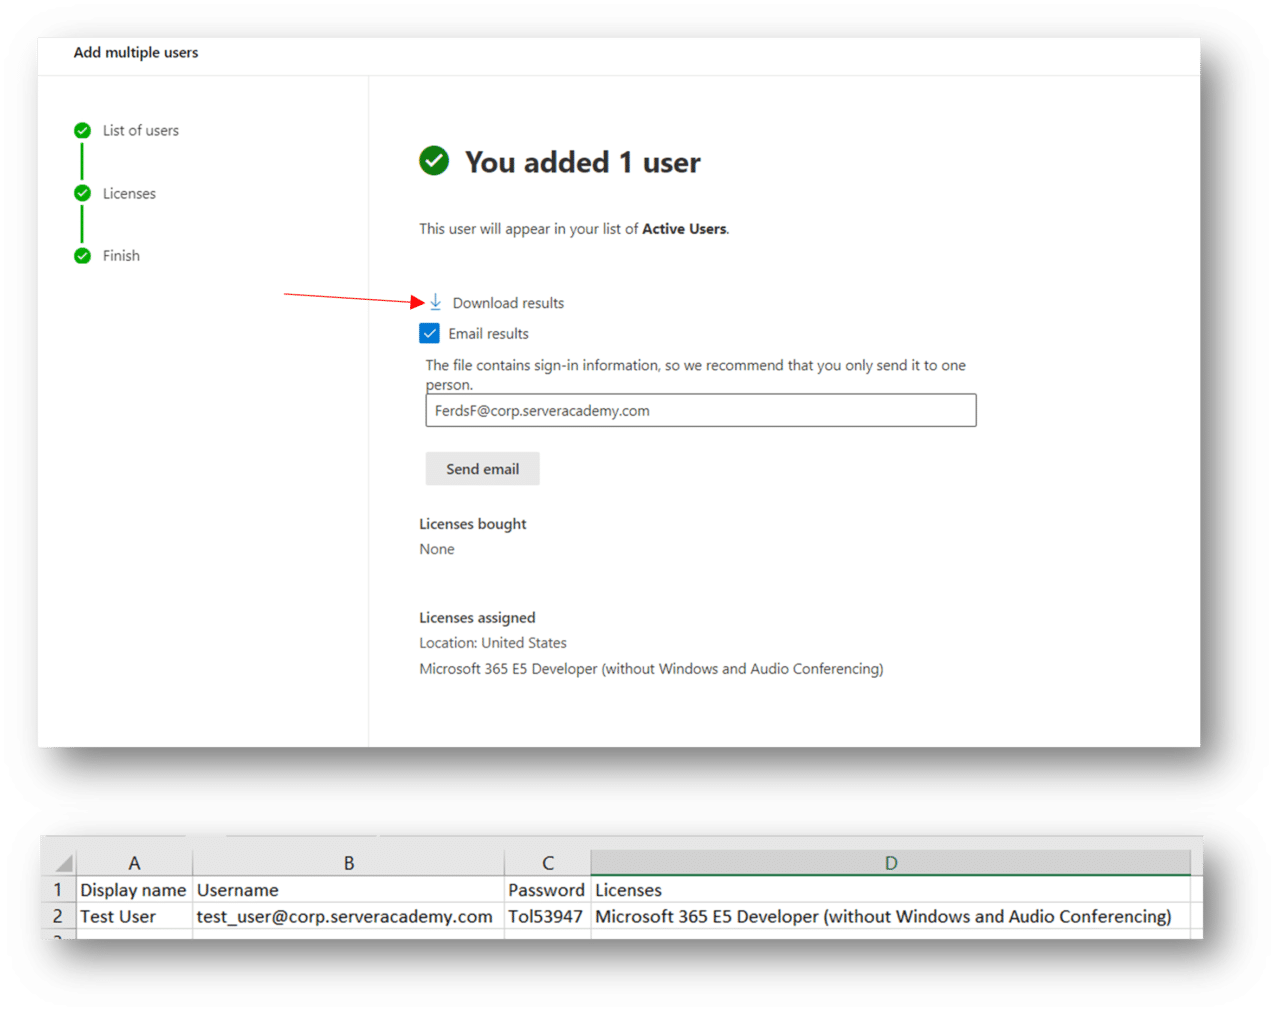
2. Send email – this option will let you receive the credentials through your indicated email. By default, it will fill in your Global Admin email address that you used to login, you can still change this to your preferred email address.
