This tutorial will show you how you can get started learning the technical side of Cyber Security for Windows environments. This tutorial is going to show you how to use STIGs (Security Technical Implementation Guides) to identify low, medium and high vulnerabilities and patch them in your Windows Environments. What…
This tutorial will show you how you can get started learning the technical side of Cyber Security for Windows environments. This tutorial is going to show you how to use STIGs (Security Technical Implementation Guides) to identify low, medium and high vulnerabilities and patch them in your Windows Environments.
What is a STIG?
A STIG is a checklist of known vulnerabilities for a given technology. It tells you what vulnerabilities your service has and how you can fix them. You can use free websites like stigviewer.com/stigs to see the list of STIGs available to you. In this lesson we are going to look at the Windows 10 STIG:

Click here for the direct link to the Windows 10 STIG
Lab Environment
For this post, we will be using the Server Academy IT labs. Specifically, the Active Directory Users & Computers IT lab:

This lab requires a full access membership which you can get here if you don’t already have one. Alternatively you can setup your own lab on Hyper-V or VirtualBox, Install Windows Server 2016 (or whatever year you prefer) and the AD DS server role. Finally install Windows 10 as a client computer and join it to your domain.
Understanding the STIG Overview
At the top of the page you will see an overview. This shows the CAT Is (ones), CAT IIs (twos) and CAT IIIs (threes):
- CAT I – Severe vulnerabilities
- CAT II – Medium vulnerabilities
- CAT III – Low vulnerabilities

You can download this list under the downloads section. Most of the time you will have a vulnerability scanner that can automatically check your computer systems to see which of these vulnerabilities you need to fix – but if you don’t you will want to download the Excel (csv) file so you can track your progress through the STIG.
STIG Findings
Below the STIG overview you will see the list of findings sorted by category (starting with CAT Is):

In the real world, you will want to use the spreadsheet (or scanning software) to document each finding and either it has been fixed or why it cannot be fixed. Sometimes you cannot fix a finding / vulnerability if it will break your network.
Let’s look at the first example: V-220708 titled Local volumes must be formatted using NTFS. Imagine you have hardware or software that is not compatible with NTFS – you would not be able to complete the fix text which is to format the volume with NTFS because it would break your network. In this case you would document why you cannot fix it.
STIGs are an excellent way to become more proficient with IT admin tools like Group Policy, Active Directory and they will increase your overall knowledge of your computer systems because it will have you configuring settings you have never seen before. Use them as a learning tool!
Let’s fix a finding!
Let’s fix V-229832 titled “Anonymous access to Named Pipes and Shares must be restricted.” Under the description we can see that if we don’t fix this that this provides the potential for unauthorized system access. Not good!

Under the fix text, we see that this is fixed by configuring Group Policy.

In our lab, on the domain controller we need to create a new GPO or use an existing GPO if you prefer:

Navigate to the specify GPO path and right-click the setting and select Properties:
Computer Configuration >> Windows Settings >> Security Settings >> Local Policies >> Security Options >> “Network access: Restrict anonymous access to Named Pipes and Shares”

Enable the setting and click OK:

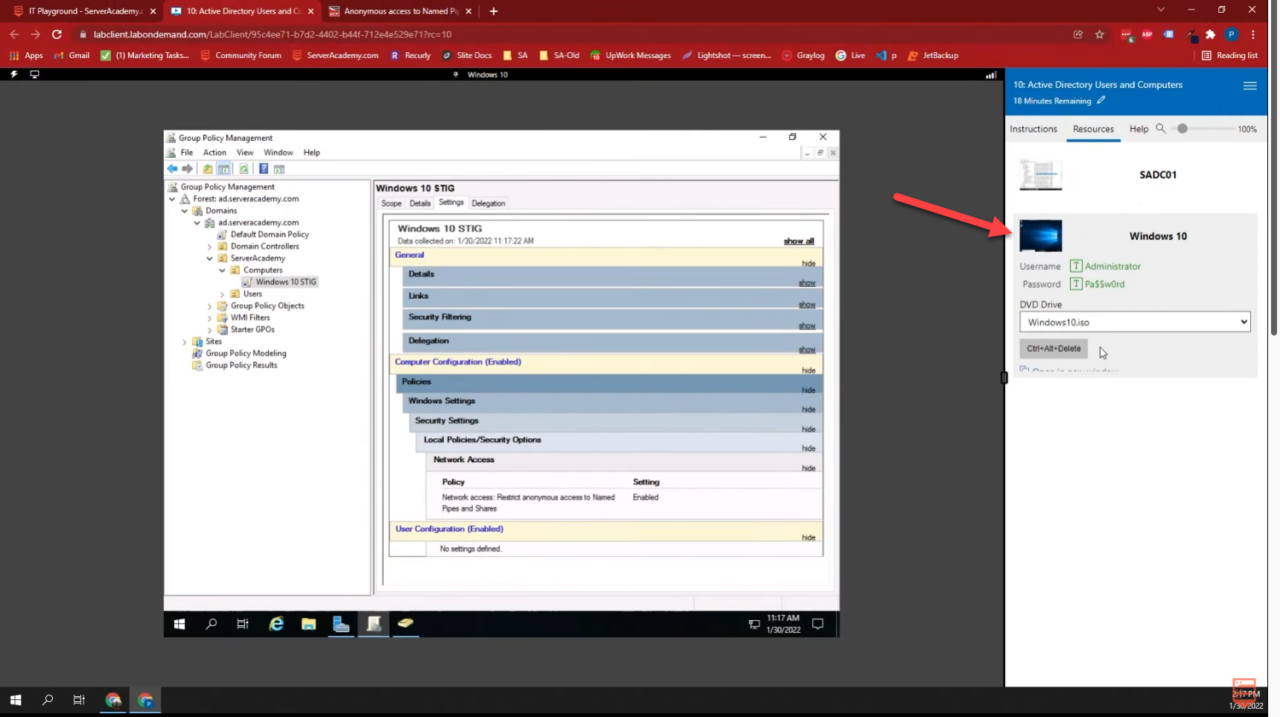
Now let’s switch over to your Windows 10 Computer. If you’re using the Server Academy IT labs, then just click the Windows 10 computer in the Resources tab:

Hit start, then search for and open CMD. Once it loads, run gpupdate /force. This will grab the newly configured Group Policy from our Domain Controller.

Next we can confirm that the setting was applied by opening RSOP.msc:

Now we can browse to the setting we configured in Group Policy and make sure that it is applied on our Windows 10 computer:

And that’s it! This finding is now resolved on our computer. If we were using vulnerability scanning software it would now report that this is no longer an open vulnerability.


